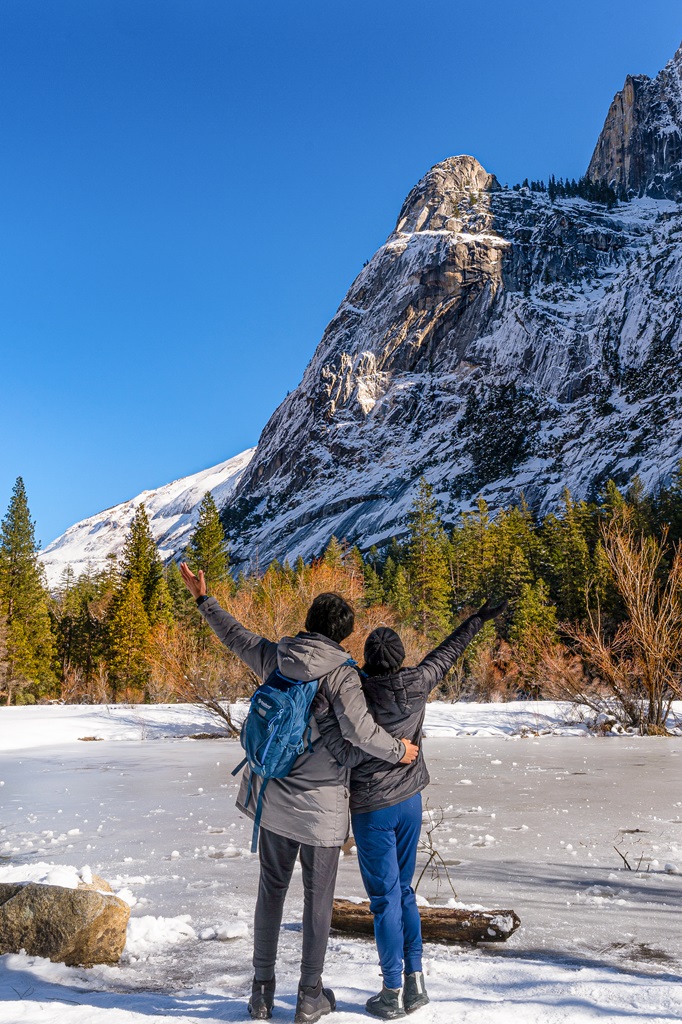
Wondering what to pack for Yosemite in winter? You’re not alone. Packing for a winter visit to Yosemite can feel overwhelming. 😥
You have to think about snowy roads, icy trails, freezing mornings, and changing mountain weather. This means you’ll need plenty of layers and more gear than any other season.
But with the right packing list, winter in Yosemite can be enjoyable rather than stressful. That’s why I put together this complete Yosemite winter packing list! 🙌
It covers everything from warm base layers and waterproof outerwear to cozy lounging clothes, winter hiking essentials, and an emergency winter car kit.
Whether you’re just sightseeing, hiking snow-covered trails, or relaxing at your lodge, this list will help you stay warm and prepared for the winter season.
Keep reading to see exactly what to pack for Yosemite in winter so you can spend less time worrying and more time enjoying one of the most beautiful seasons in the park. 💙
Affiliate Disclaimer: Some links on this page may be affiliate links, meaning I may earn a small commission at no extra cost to you. As an Amazon Associate, I earn from qualifying purchases. Thanks for supporting the blog! 🫶
Yosemite Entrance Fee, Park Pass, and Reservations
Entrance to Yosemite National Park costs $35 per vehicle for a 3-day pass. However, if you have the America the Beautiful Annual Pass, your entry is free!
For those who love exploring national parks, investing in the Annual Pass is a smart choice. At just $80, for U.S. residents, it grants you access to over 2,000 federal recreation sites across the country!
FEE UPDATES! Beginning January 1, 2026, non-U.S. residents (without an annual pass) will pay a $100 per person in addition to the standard entrance fee. The Annual Pass for non-US. residents will cost $250.
A reservation is not required to visit Yosemite in winter this year! In the past, reservations were required during the Firefall event which takes places in mid to late February. But this year, 2026, reservations are NOT required!
Yosemite Winter Clothing and Cozy Loungewear
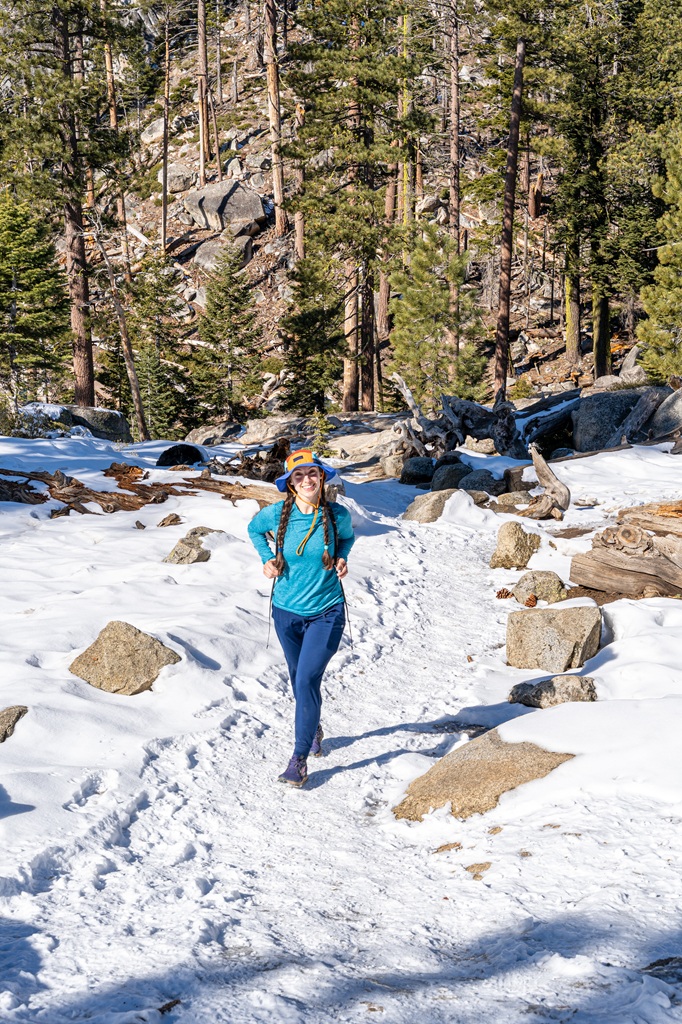
Packing the right layers for a winter trip to Yosemite really matters. It’s easy to think one bulky jacket, a long-sleeve shirt, and some fleece sweatpants will do the trick.
For a casual walk around Cook’s Meadow, that might be totally fine, but if you’re planning to hike something more demanding like the Upper Yosemite Fall Trail, that setup will not work.
You may not need every single item on this list but it’s better to be over-prepared than caught off guard if the temperatures are cooler than expected or a snowstorm blows in out of nowhere!
🧤🧣 Before you continue, it helps to understand how proper layering works. Knowing the basics will keep you warm and comfortable ➡️ How to Dress in Layers 101
Waterproof Winter Boots
Waterproof, insulated boots are a must for winter hiking in Yosemite, especially if you’re expecting snow. Cold, wet feet can turn an otherwise amazing hike into a miserable one fast.
I’m currently on the hunt for the perfect waterproof winter hiking boots, so I don’t have a personal recommendation just yet.
I did try the Altra Lone Peak waterproof boots, but unfortunately they didn’t hold up as well as I hoped in wet conditions.
I absolutely love Altra trail runners for dry conditions, so I had high hopes for their waterproof boots. Once I find a pair that keeps my feet warm and dry, I’ll let you know!
Base Layer Top (moisture-wicking)
The primary job for base layers is to wick moisture (aka sweat) from your body. This is essential for keeping your skin dry and your body temperature regulated.
This is so important, especially in winter! If you’re drenched in sweat in cold temperatures, it can increase the risk of hypothermia. That’ll ruin anyone’s day. 🥶
There are several different types of fabrics you can choose from, such as synthetics (polyester and nylon) and natural fibers (merino wool and silk). Either material works but there are small differences when it comes to drying time, odor control, and durability.
🤩 My favorite base layer top is the REI Co-op Midweight Long-Sleeve Base Layer
✅ Why I like it:
- It’s made from recycled polyester and spandex so it’s soft against the skin and stretchy.
- The midweight fabric (220 gsm) offers plenty of warmth in cold temperatures while being moisture-wicking.
- The material meets the bluesign® criteria and it’s made in a Fair Trade Certified™ factory.
- It’s more affordable as compared to base layers made from merino wool.
Fleece Mid-Layer Jacket (insulating)
Your mid-layer should be insulating which is what helps trap the heat your body naturally gives off. The better this layer holds onto that warmth, the more comfortable you’ll be, especially in cold winter conditions.
There are two main types of insulating mid-layer material: fleece and down. I’ll talk about fleece first then down material below.
Fleece stays warm even when it gets a little damp, dries quickly, and is breathable, so you’re less likely to overheat while hiking.
The downside is that they’re not ideal in windy conditions due to its breathability. That’s why it’s important to pair a fleece jacket with an outer shell layer if windy/rainy conditions are expected.
🤩 My favorite fleece jackets are the Cotopaxi Teca Fleece Full-Zip Jacket and RevolutionRace Evolution Stretch Fleece Hoodie. They’re both made from synthetic fibers.
✅ Why I like the Cotopaxi Teca Fleece:
- It’s made from 100% recycled fleece and deadstock polyester taffeta.
- Midweight fabric (255 gsm) offering plenty of warmth.
- Made in a Fair Trade Certified™ factory.
✅ Why I like the RevolutionRace Evolution Fleece:
- Quick-drying fabric that keeps you warm and dry.
- Stretchy material offering total mobility and comfort.
- Features a hoodie, three-zippered pockets, and thumb-hole grips.
Down Mid-Layer Jacket (insulating)
Down insulation is hard to beat when it comes to lightweight, packable warmth in cold, dry conditions. It offers an incredible warmth-to-weight ratio, which makes it perfect for winter trips when you want maximum warmth without a bulky jacket.
That said, down does have one major downside – once it gets wet, it loses most of its insulating power and takes a while to dry. Because of this, down works best for cold, dry conditions, hanging around camp, or winter trips where you’re not moving much.
For the most versatility, many hikers layer a fleece underneath a down jacket. This combo keeps you warm and comfortable when not moving around much or when hiking in very cold temperatures.
If you’re adventuring in windy or wet conditions, be sure to pair your down layer with a waterproof and windproof outer shell to keep you warm and dry.
🤩 My favorite insulated down jacket is the Cotopaxi Fuego Hooded Down Jacket.
✅ Why I like it:
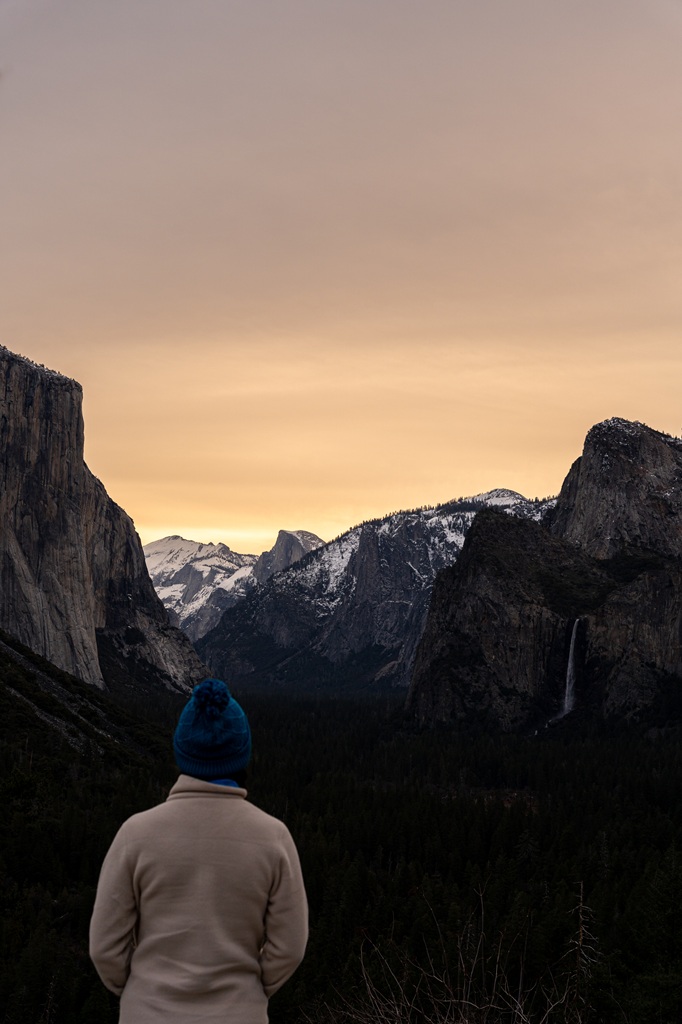
- Great for casual strolls in winter, rest breaks while hiking, or watching sunrise from Tunnel View in freezing temperatures.
- It has 800-fill-power responsibly sourced down.
- Shell material is 100% recycled nylon C0 durable water repellent (DWR) 80/10 finish with downproof coating (made without intentionally added PFAS chemicals).
- Comfortable, lightweight, and fits well.
- Made in a Fair Trade Certified™ factory.

Outer Shell Jacket
Your outer layer is what protects you from the elements, such wind, rain, and snow. It’s especially important if you’re adventuring in cold and wet conditions.
Most shell jackets are designed to block wind and moisture while still allowing some sweat to escape. Many are treated with a durable water repellent (DWR) finish, which helps water bead up and roll off the fabric instead of soaking in.
There are different types of outer shell jackets and which one you choose will depend on your plans when visiting Yosemite this winter. Are you just sightseeing? Planning to hike some trails? Thinking about cross country skiing or backpacking in the wilderness?
Types of outer shell jackets ⬇️
- Waterproof/Breathable Jackets – Most functional, and usually the most expensive, option. They’re best for heavy rain, snow, or stormy conditions. Higher-quality shells keep you drier and tend to be more durable over time.
- Water-Resistant/Breathable Jackets – Better suited for light rain, drizzle, and breezy weather, especially when you’re moving a lot. These jackets are typically more affordable and made from tightly woven fabrics that block light wind and moisture but aren’t fully waterproof.
- Soft Shell Jackets – Prioritize breathability and comfort. They often have stretchy fabric and sometimes light insulation, making them great for active adventures. Many combine light wind and rain protection with warmth, which can eliminate the need for a separate insulating layer in mild conditions.
- Waterproof/Non-Breathable Shells – These are more basic shells, usually made from coated nylon. They’re fully windproof and waterproof but don’t breathe well at all. They work best for low-activity situations in winter like sightseeing or easy strolls in Yosemite Valley.
🤩 My favorite outer shell jacket is the Patagonia Torrentshell 3L Jacket.
Base Layer Bottoms/Long Underwear
Base layer bottoms, also known as long underwear, work the same way as base layer tops. You want something that’s moisture-wicking, quick-drying, and comfortable.
Just like tops, they come in lightweight, midweight, and heavyweight options, so you can choose based on the weather and how active you’ll be.
I recently bought my first pair of base layer bottoms from Backcountry, but I haven’t had a chance to test them out yet. For past winter hikes, I’ve just worn my Gymshark workout leggings under fleece pants, and that setup has worked fine for me.
But I’m excited to test out my new base layer bottoms and see how they compare to normal active leggings!
Fleece Mid-Layer Pants
As mentioned above, fleece traps warmth but also breathable and dries quickly if it gets lightly damp. It’s a great mid-layer for when you’re constantly moving in cooler temperatures.
The downside is that fleece isn’t great in wind or rain. So, in those conditions, it’s best to pair it with an outer shell layer.
🤩 I love wearing the Baleaf fleece-lined jogger pants when hiking in cold weather. They also have fleece-lined leggings which are so comfortable and warm for sightseeing or sitting by the fire outside.
✅ Why I like it:
- They’re affordable (less than $50).
- Soft fleece lining with a water-resistant outer layer (not waterproof).
- Surprisingly good durability! Their fleece jogger pants have gotten me through many cold weather hikes, including hiking to the summit of Mount Whitney in one day.
- The fleece leggings are cute (come in many different colors), comfortable, and warm. They’ve become my favorite thing to wear on casual outings in winter.
Outer Shell Pants
As mentioned above, the outer layer protects you from wind, rain, and snow. There are two main types of outer shell pants people wear in the winter – softshell and hardshell.
Softshell pants are very breathable with good durability and some insulation. They’re great for active adventures in winter conditions.
On the other hand, hardshell pants are designed to block wind, snow, and water and has no built-in insulation. These are meant to be paired with a good layering system.
Wearing a full three-layer setup (base, mid, and outer shell) might be overkill for casual sightseeing and easy winter hiking in Yosemite Valley. But having all three layers on hand is a smart idea.
Temperatures can drop quickly in the winter when the sun goes down and weather in the mountains can change all of a sudden. You don’t want to be caught in cold, rainy (or snowy) weather without extra layers in your pack!
Warm Hat/Beanie
A good beanie keeps your head and ears warm in the winter. If you’re like me, your ears can start hurting when doing some sort of moderate-intensity activity outside in cold weather. So having something like a beanie that covers your head and ears is a life saver!
🤩 My favorite beanie is the Cotopaxi Tozo Beanie!
Neck Gaiter
Neck gaiters are stretchy, tube-shaped garments that sit around your neck but can easily be pulled up over your cheeks, nose, or even your head offering protection against harsh conditions.
I’ve bought a Buff neck gaiter and used it when hiking in the Grand Canyon. It was amazing as it kept me from swallowing copious amounts of dust that was being kicked up in front of me by a line of mules.
I don’t own a winter-specific neck gaiter, and honestly, I don’t know what I’ve been thinking. My face is ridiculously sensitive and gets wrecked in cold, dry, windy weather.
From what I’ve read, merino wool is the way to go for winter, so I’m planning to invest in one this season. I’ll report back on how it performs.
Gloves
I need a good pair of gloves. And if you’re visiting Yosemite in winter, so do you. I’ve used cheap gloves in the past, and while they worked well enough, I’ve never been truly happy with any of the pairs I’ve owned.
This winter, I want to invest in a good set of gloves. There are so many different types of gloves designed for different conditions and activities. I’m interested in testing out a pair of fleece or down mittens for relaxing at camp and a pair of functional gloves when hiking.
When you’re shopping, look for the following features:
- Waterproofing
- Insulation
- Dexterity and grip
- Durability
- Touchscreen compatibility
Once I finally find a pair I love, I’ll definitely share an update!
Quick-Drying Socks
The best socks for winter hiking are made from merino wool or a wool-synthetic blend, which offer a balance of warmth, moisture-wicking, and breathability.
These materials help keep your feet warm without overheating and manage sweat so your feet stay dry. Choose midweight or heavyweight socks depending on how cold it is and how active you’ll be.
🤩 My favorite pair of midweight hiking socks are Darn Tough Hiker Micro Crew Cushion Socks. I’m obsessed with them! Make sure to pack an extra pair of socks.
✅ Why I like them:
- Comfortable with good cushion on the heels.
- Moisture-wicking and quick-drying which is very important when hiking tough trails in cold weather.
- Their “Unconditionally Guaranteed for Life” policy – if the socks aren’t the longest lasting socks you’ve ever owned, then you can return them for another pair!
- Material is mostly merino wool with a blend of synthetic fibers (59% merino wool, 39% nylon, 2% lycra spandex).
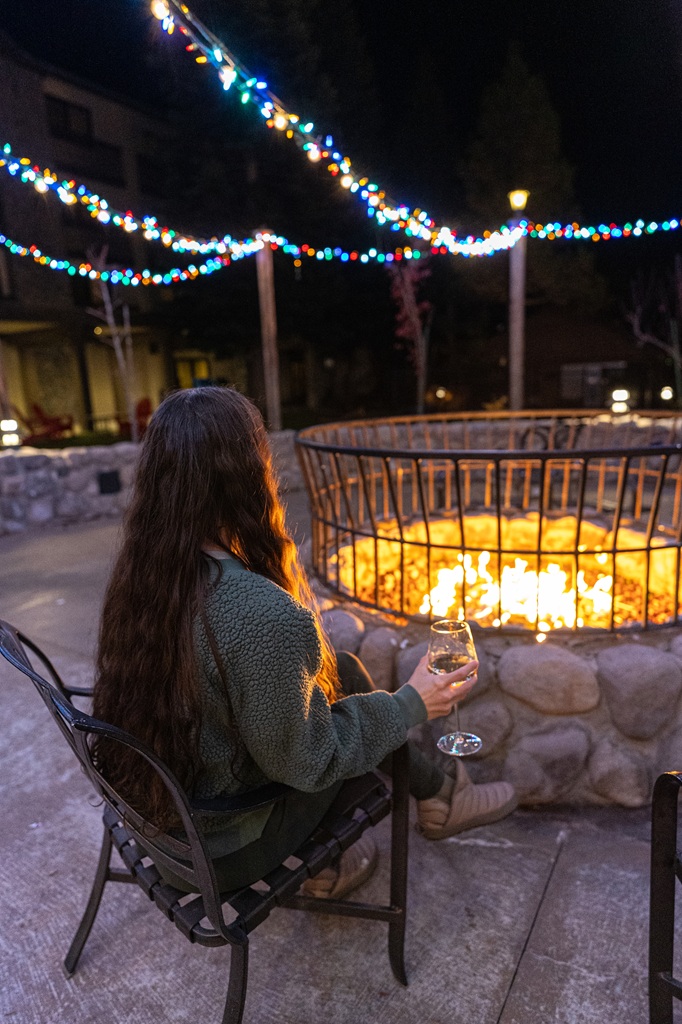
Cozy Loungewear
Time to head back to your lodge and relax after a long day of adventuring! Make sure you pack something cozy to wear. Even if you plan to head out to dinner, be comfortable!
I personally wouldn’t pack anything “fancy” unless you’re participating in the Bracebridge Dinner at The Ahwahnee Hotel.
If I’m heading to Yosemite this winter and planning to eat at a restaurant or sit by a firepit drinking a glass a wine, you’ll catch me wearing something warm, cute, and comfortable!
🤩 Here’s one of my favorite cozy winter fits:
- Top – REI Co-op Campwell Flannel Shirt
- Bottoms – Baleaf Fleece-lined Leggings
- Shoes – The North Face ThermoBall Traction Booties
Yosemite Winter Gear (+ 10 Essentials for Hiking)
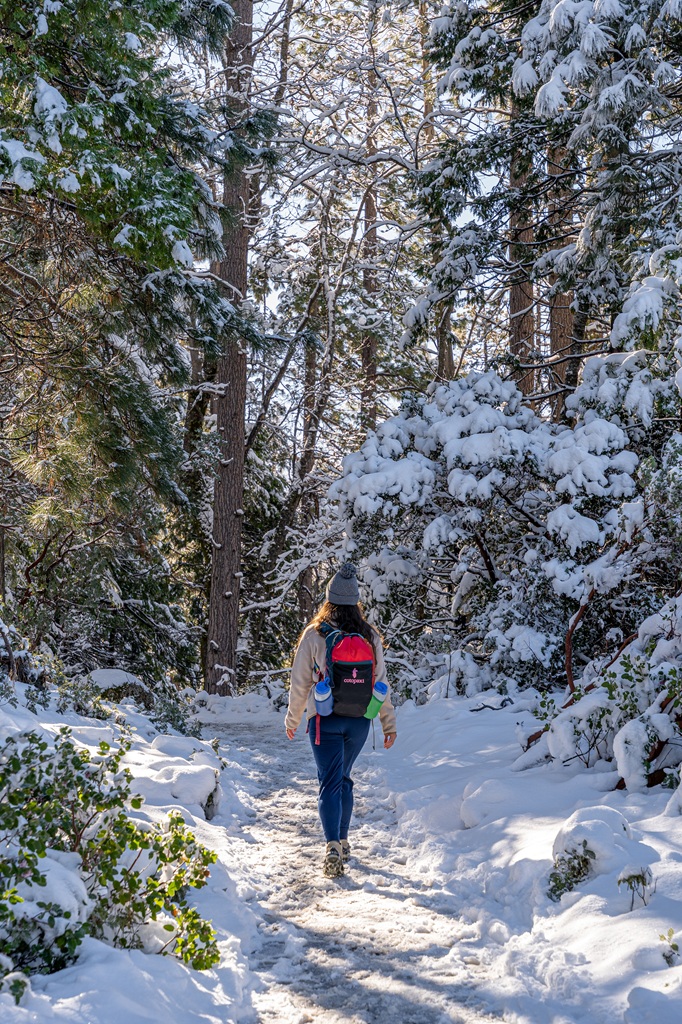
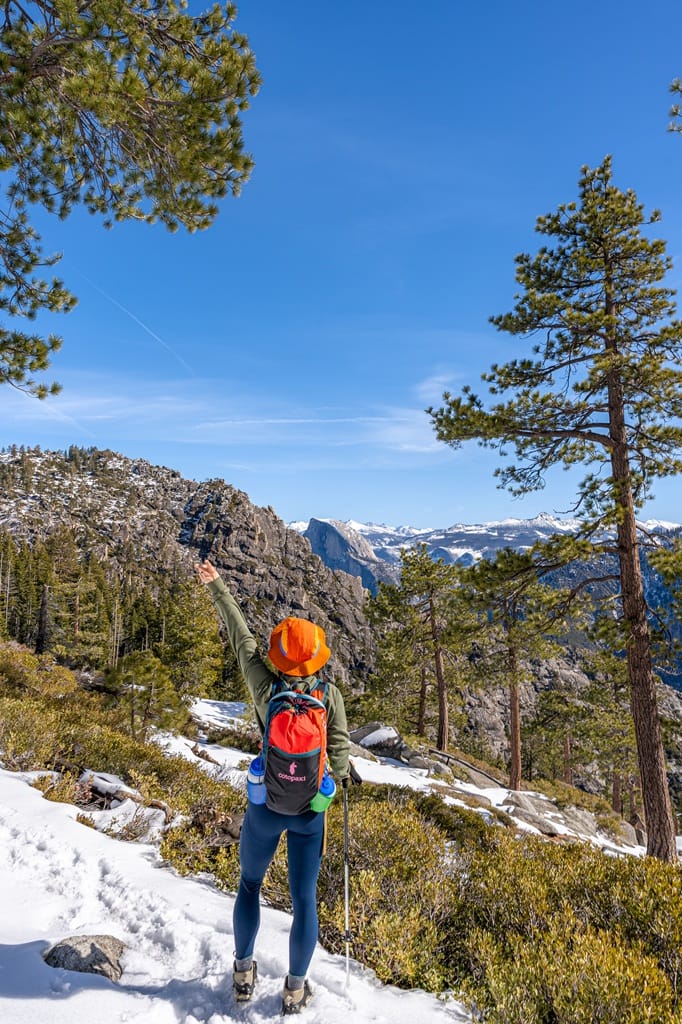
22-30L Backpack
For winter hiking, a 22-30L backpack is usually ideal. It’s large enough to carry extra layers, snacks, water, and essential gear without feeling too bulky.
In winter, you’ll likely be shedding and adding layers throughout the day, so having enough space to stash a jacket or fleece is key.
Look for a pack with comfortable padding, adjustable straps, and easy-access pockets so you can grab gloves, a hat, or snacks without digging around.
External attachment points are also helpful for things like trekking poles or traction devices.
🤩 I’ve been using the Cotopaxi Luzon Del Dia 24L Pack and my husband has been using the REI Co-op Trail 25L Pack.
The Cotopaxi Luzon Del Dia 24L Pack has been ideal for casual winter hikes. It holds all my layers, snacks, essential hiking gear, microspikes, and water bottles. The water bottle pockets on the sides are quite big so if I bend over to pick something up or ties my shoes the bottles will fall out.
I’d like to test out a different type of day pack for winter hikes just to compare. Also, it’d be nice to have more external attachment points as the Del Dia Pack doesn’t really have any.
The REI Co-op Trail 25L Pack is a lot better for holding everything you need, comfortable, durable, comes with a rain cover, and has ample pockets and external attachment points. It’s also affordable!

Microspikes
Microspikes and other similar traction devices slip right over your boots to provide extra grip on snow and ice. They’re incredibly important for hiking Yosemite trails in winter to prevent falling on ice-covered trails.
I recently bought a pair of Black Diamond Microspikes and so far, I love them! I’ve already been on a few icy hikes in them, and they provide great traction so I don’t slip and fall.
Another great option, based on lots of positive reviews, is the Kahtoola Microspikes Traction System.
Trekking Poles
Trekking poles are essential for added stability on snowy, icy, and slippery winter trails. They help improve balance, reduce the risk of slipping, and take pressure off your knees, especially when hiking downhill on slick terrain.
In winter conditions, poles also let you test snow depth and firmness before stepping. If you plan to be hiking or snowshoeing in soft snow, make sure your trekking poles have snow baskets. They prevent the tips from sinking too deep into the snow.
🤩 I use REI Co-op Trailmade Trekking Poles and highly recommend them!
✅ Why I like them:
- Lightweight and easy to adjust for my height.
- Comes with snow baskets.
- Has wrist straps for a better hold on the poles. The amount of times my poles have just *magically* fallen out of my hands is insane, so I like using the wrist straps to prevent this.
Gaiters
Gaiters help keep snow out of your boots when snowshoeing or hiking in deep snow. They also protect your socks and pant legs from getting wet, block cold wind, and keep debris like ice, slush, and mud from sneaking into your boots.
In winter conditions, staying dry is key to staying warm, and gaiters are helpful for this reason.
I currently don’t own a pair of gaiters, but I think it’ll be a good idea as I want to go on more snowy adventures this winter.
Snowshoeing?
Planning to go snowshoeing in Yosemite? Obviously, you’ll need a pair of snowshoes.
They’re used when hiking on deep, soft, or loose snow, usually anything over six inches, to prevent sinking, also known as postholing.
Don’t own any? You can rent snowshoes at the Badger Pass Ski Area!
Cross Country Skiing?
The same goes for cross country skiing. If you already have your own gear, you’re good to go!
But if not, you can easily rent cross country skiing equipment at Badger Pass, including skis, boots, and poles.
✨ READ THIS: 18 Best Yosemite Winter Activities You Can’t Miss!
Now let’s look at the 10 essentials for hiking. These are the core safety items every hiker should carry, no matter the season, but they’re especially important in winter when weather can change quickly and daylight is limited.
Rain Gear and Extra Layers
Nature is unpredictable, so it’s important to be prepared for sudden changes in weather. Always pack at least one extra layer that can handle the worst conditions you might encounter, not just what’s in the forecast.
Weather can quickly turn wet, windy, or much colder than expected. When deciding what to pack, think about what would keep you warm if you had to stay inactive for a long period of time.
Bring layers that will keep you warm and dry. I explained the three main layers above, but as a reminder, they include a base layer, mid-layer, and outer shell.
In winter, you should already have these three layers either on you or in your pack. If rain or snow isn’t in the forecast, make sure you still have a waterproof/windproof outer shell just in case the weather changes.
It might be a good idea to pack a pair of waterproof/windproof pants as well. And don’t forget gloves, extra socks, a warm hat, and neck gaiter.
Emergency Shelter
Pack an emergency shelter like a bivy sack or emergency blanket in case the weather suddenly turns or you get stranded. Shelter is one of the most important items in any survival situation, protecting you from wind, rain, and cold.
👉 For short to moderate-length day hikes in Yosemite, I carry an emergency blanket with me. If I plan to hike deep into the wilderness, whether it be a long day hike or backpacking trip, I carry a bivy sack.
Navigation
Even if you’re planning to hike well-marked trails, it’s always important to carry some type of navigation system. It’s easier than you think to make a wrong turn and be on a completely different trail going to who knows where!
Here are the main navigation tools to consider when adventuring outdoors ⬇️
- A topographic map is essential for any hike that goes beyond short, obvious trails or heavily trafficked paths, showing elevation, landmarks, and terrain features to help you plan and stay on course.
- A standard compass is lightweight, reliable, and doesn’t require batteries. Paired with map-reading skills, it’s a vital backup if you get disoriented.
- Digital offline maps are another great option in addition to a physical map and compass. I use my AllTrails+ membership to download offline trail maps in advance, which means I can navigate even without cell service.
- A Personal Locator Beacon (PLB) or satellite messenger can be a lifesaver in emergencies. These devices use GPS to pinpoint your location and send a distress signal via satellite, making them a smart backup for remote hikes where cell coverage is unreliable.
Carrying a combination of these tools, and knowing how to use them, gives you peace of mind and can make the difference in staying safe during winter adventures in Yosemite!
✨ Planning a winter trip to Yosemite? Follow this 3-day Yosemite winter itinerary for must-see views, top-rated hikes, and can’t-miss experiences.
Headlamp/Flashlight
Always carry a reliable light source with extra batteries in case your hike runs longer than expected or you need light for an emergency. Headlamps are the go-to for most people when hiking or camping because they’re hands-free.
👉 Right now, I use a simple Black Diamond 300 lumens headlamp. It’s affordable and does the job!
First-Aid Kit
Always carry a basic first-aid kit so you’re prepared for minor injuries or unexpected emergencies. A good starting point is a pre-made kit, which you can then customize based on your trip, how long you’ll be out, and any personal medical needs.
Your kit should cover the basics: blister care, adhesive bandages in multiple sizes, gauze pads, medical tape, antiseptic wipes or ointment, over-the-counter pain relievers, and any personal medications.
👉 When day hiking, I always carry the HART Outdoor First-Aid Kit. It’s lightweight and has all the essentials. I restoke items individually if I ever run out.
Water Bottles and Filters
Always carry enough water to stay hydrated, along with a filtration system or purification tablets if you plan to refill from natural sources.
You should drink water regularly even in the winter. It can be hard to drink water when it’s cold outside but it’s important that you stay hydrated!
Before heading out, think about how much water you’ll need and whether there are streams, rivers, or lakes along your route. It’s crucial to have a reliable way to purify water, whether that’s a filter, chemical treatment, or even a stove for melting snow in winter conditions.
As a general rule, most people need about half a liter of water per hour during moderate activity in mild temperatures, but you may need more depending on the weather, altitude, effort level, or if an emergency comes up.
👉 I like carrying the Nalgene 32 fl. oz. bottles along with the Lifestraw Peak Squeeze Water Filter System. In the winter, I also carry an insulated bottle with hot tea in it!
Food/Snacks
Always pack energy-rich snacks or meals to keep your energy levels up while hiking and plan for the unexpected. Trips can run longer than planned due to weather, trail conditions, or injury, so it’s smart to carry at least one extra day’s worth of food.
Focus on no-cook, long-lasting foods that are easy to digest and high in calories. Salty snacks and quick fuel work especially well for outdoor activities.
Think trail mix, nuts, energy bars, and dried fruit. These pack easily and help keep your energy steady throughout the day.
If you’re heading out on a long day hike in the winter, consider bringing more than a one-day backup supply. Having extra food is one of those simple precautions that can make a huge difference if plans change.
Sun Protection
Sun protection is important year-round, even in winter and when it’s cloudy. Snow and ice reflect sunlight, which can increase UV exposure, so items like sunscreen, sunglasses, SPF lip balm, and sun-protective clothing are must-haves.
Sunscreen helps protect your skin from sunburn, premature aging, and skin cancer. Choose a broad-spectrum formula that blocks both UVA and UVB rays, with at least SPF 50 or higher for extended outdoor activity.
Apply generously to all exposed skin and reapply every couple of hours. And don’t forget an SPF lip balm!
👉 I love using the Blue Lizard Sensitive Mineral SPF 50 Sunscreen.
Sunglasses are essential for protecting your eyes from damaging UV radiation. This is especially important when the ground is covered in snow or ice as it reflects the sun and can potentially cause snow blindness.
The best sunglasses for hiking in snow should have polarized lenses that can block 100% of UVA and UVB rays and provide full-coverage frames.
👉 I love wearing the Tifosi Swank Polarized Sunglasses. They’re versatile, fit my face well, and have gotten me through many snowy hikes in Yosemite.
👉 I recently bought a pair of Tifosi Vogel XC Sunglasses and already love them! They’re better for non-snowy adventures, great for trail running, and cover my face more which helps block the wind.
Sun-protective clothing is a great way to limit UV exposure without constantly reapplying sunscreen. Look for long-sleeve shirts, pants, and wide-brim hats, especially those with a UPF rating.
In the winter, it’s usually easy to achieve this since you’ll likely already be wearing a long-sleeve shirt and pants. Sometimes I’ll wear a sunhat if it’s not too cold outside but otherwise I’ll wear a beanie to keep my head and ears warm and apply sunscreen on all areas of my face and neck.
👉 My favorite sunhat is the Cotopaxi Tech Bucket Hat. And if temperatures are mild, I love wearing the REI Co-op Sahara Shade Hoodie.
Fire
Always carry a lighter, matches, or a fire starter so you’re able to build a fire in an emergency. Fire can be a critical heat source for staying warm, melting snow for water, and signaling for help if needed.
In most cases, a simple disposable butane lighter works great, but waterproof matches (or matches stored in a waterproof container) are also a good option.
For winter outings where firewood isn’t available, like above treeline or in deep snow, carrying a stove is a smart backup. It can serve as an emergency heat source and a reliable way to melt snow for drinking water.
⚠️ Before heading out, make sure you’re familiar with fire restrictions in Yosemite.
Most people visiting Yosemite in winter typically won’t have to worry about making an emergency fire but for those planning to head out into the backcountry, this is a crucial piece of gear that can be lifesaving!
👉 I always carry a UCO Titan Stormproof Match Kit and an Outdoor Element Firebiner. Thankfully, I’ve never had to use either, but it gives me peace of mind having a few devices that could start a fire in an emergency situation.
Repair Kit and Tools
Always carry a versatile tool or knife to handle everyday tasks and unexpected situations, such as food prep, quick gear fixes, first aid, making kindling, cutting cord, and opening packaging.
You can keep it simple with a basic folding knife, or go with a multi-tool, which combines several tools into one compact option. Many multi-tools include items like a knife, scissors, screwdrivers, and a can opener.
It’s also smart to carry a small repair kit, especially on longer or more remote trips. Basic items like duct tape, cordage, fabric repair tape, zip ties, and safety pins can get you out of a bind.
Depending on your activity, you might also want repair parts for things like water filters, tent poles, stoves, sleeping pads, microspikes, snowshoes, or skis.
❄️ Yosemite Winter Guides
- Ultimate Guide to Visiting Yosemite in Winter
- The Only Yosemite Winter Itinerary You Need!
- Where to Stay in Yosemite in Winter: 15+ Best Lodges, Hotels, and Cozy Cabins
- The Ultimate Yosemite Winter Packing List
- 20 Best Yosemite Hikes in Winter (Guide to Snowy Adventures)
- 18 Best Yosemite Winter Activities You Can’t Miss!
- Yosemite Firefall: A Complete First-Timer’s Guide
- Beginner’s Guide to Visiting Mariposa Grove in Winter
Yosemite Winter Car Kit + Tire Chains
Tire Chains
Tire chains are often required when visiting Yosemite in winter, and if chain control is in effect, you MUST carry them and know how to use them, even if you’re in a 4WD/AWD vehicle or have snow tires.
⛓️ Levels of chain control:
- R1 – You’ll need to put chains on your car unless you’re in a car, pickup, or SUV under 6,000 pounds AND you have snow tires with at least 6/32 inches of tread or deeper.
- R2 – You’ll need to put chains on your car unless you’re in a car, pickup truck, or SUV under 6,500 pounds AND you have snow tires with at least 6/32 inches of tread or deeper AND your car has 4WD or AWD engaged.
- R3 – Chains are required on ALL vehicles, no exceptions.
You can buy chains or cables at most auto parts stores and gas stations near Yosemite. Make sure you buy the correct size for your tires. It’s rare to find a place that will rent chains so you may have to purchase them even if you won’t need to install them.
Thankfully, my husband and I live close by, so we always keep tire chains in our vehicle year-round when visiting Yosemite.
👉 We have used Auto-Trac Tire Traction Chains several times and they’ve been great. Make sure you purchase ones that fit your vehicle!
⚠️ Always check road conditions before heading out or call 209-372-0200 (press 1 then 1 again).
Having an emergency winter car kit is incredibly important in case you get stranded or caught in an unexpected winter storm.
Pack your car with the following items to make a stressful situation much more manageable!
Blankets or Sleeping Bags
Staying warm is the top priority if you have to spend an unexpected night in your car in Yosemite during the winter.
Keep extra blankets or sleeping bags in your car so you can retain body heat while waiting for help. Even a short delay can become dangerous in freezing temperatures, especially at night.
👉 My husband and I always keep our Mountain Hardwear Bishop Pass 15 Sleeping Bags in our vehicle just in case! We’ve used these sleeping bags for camping, and they’ve kept us warm and comfortable on cold nights.
Extra Warm Layers
Pack additional winter layers like insulated jackets, hats, gloves, and thick socks.
If you need to step outside to put on chains or dig out your car, having dry, warm clothing can make a huge difference in comfort and safety.
Ice Scraper and Snow Brush
An ice scraper and snow brush are essential for clearing your windshield, mirrors, headlights, and roof after snowfall.
Good visibility is critical for driving safely, and removing snow from your car helps prevent it from blowing onto other vehicles.
Small Shovel
A compact shovel is incredibly helpful for digging your car out of snow, clearing around your tires, or creating space to install tire chains.
It can be a real lifesaver after heavy snowfall or overnight accumulation.
Extra Water and Snacks
Bring extra water and high-energy snacks in case you’re delayed or stuck for several hours.
Choose items that won’t freeze easily and snacks with a good mix of carbs, protein, and salt to keep your energy up and body warm.
A small stove is also helpful for melting snow for water.
Light Source (+ extra batteries)
Winter days are short, and emergencies often happen after dark. A light source, such as a headlamp or flashlight, makes it much easier to put on chains, check your vehicle, or signal for help.
Always pack extra batteries so you’re not left in the dark. If it’s a rechargeable light source, make sure it’s fully charged or have a way to charge it if needed.
Portable Power Bank with Chargers
A portable power bank ensures your phone stays charged if you need to call for help, check road conditions, or use maps.
Cold temperatures drain batteries faster, so this is especially important in winter.
Signaling Devices
Pack items like a whistle, reflective triangles, or emergency flares to help others spot you if you’re stranded.
These are useful during snowstorms, low visibility, or at night when help may take longer to arrive.
Yosemite Winter Packing Tips
1. Pack layers, not one bulky jacket – Focus on base layers, insulating mid-layers, and a waterproof outer layer so you can adjust as temperatures and conditions change throughout the day.
2. Choose moisture-wicking fabrics – Skip cotton and opt for wool or synthetic materials to stay dry and warm.
3. Always bring traction devices – Microspikes or other traction devices are essential for icy trails, viewpoints, and even paved paths in Yosemite Valley.
4. Don’t forget sun protection – Snow reflects UV rays, making sunburn and eye strain more likely, even on cloudy days. Sunglasses, sunscreen, SPF lip balm, and sun-protective clothing are must-haves.
5. Pack extra warmth than you think you’ll need – Temperatures are much cooler in early mornings and later in the evenings. Extra socks, gloves, and an insulated jacket can make a big difference.
6. Always carry tire chains and know how to use them – You are required to carry tire chains in your vehicle at all times during chain control which is basically all winter long, even for 4WD/AWD and rental vehicles. Practice installing them before your trip.
7. Bring a winter car kit – Include blankets/sleeping bags, extra layers, snacks, water, a light source, ice scraper/snow brush, shovel, and power bank in case of delays or sudden weather changes.
8. Pack the 10 essentials – Yosemite’s winter conditions can change fast, and a quick walk or short hike can turn into a much longer day. Carrying the 10 essentials (explained above) helps ensure you’re prepared for unexpected weather or emergencies.
9. Check conditions right before you go – Always check the weather forecast, road conditions, trail conditions, and chain requirements.
10. Pack the day before – To make things easier and less stressful the morning of your trip, pack everything the day before. It helps to have a checklist so you don’t forget anything!
Places to Stay in Yosemite in Winter (my top picks)
Yosemite Valley Lodge
Yosemite Valley Lodge is a popular 3-star choice for families and couples thanks to its central location in Yosemite Valley, reasonable prices, and easy access to Yosemite’s iconic sights.
Trails like Lower Yosemite Fall, Cook’s Meadow Loop, and Valley Loop Trail are just a short walk away.
The lodge has 245 rooms, including traditional, family, bunk, and ADA-accessible options. A few rooms have Yosemite Falls views, but the waterfall is just steps from your door.
Amenities include several on-site dining options (Mountain Room Restaurant, Base Camp Eatery, and Starbucks), easy trail access, and close proximity to the Merced River and Half Dome viewpoints.
🤩 Book your stay at Yosemite Valley Lodge
The Ahwahnee
The Ahwahnee is Yosemite’s most famous historic lodge. It’s located within Yosemite Valley and offers nonstop views of Half Dome, Yosemite Falls, Glacier Point, and the Royal Arches.
As a National Historic Landmark, it’s hosted presidents, royalty, and luxury travelers for decades. Inside, you’ll find soaring ceilings, massive stone fireplaces, and historic artwork.
In winter, the dining room turns into Bracebridge Hall, a festive experience with food, music, and entertainment inspired by Washington Irving’s classic story.
Lodging options include standard rooms with modern comforts, premium suites with fireplaces or balconies and epic views, and cozy cottages for more privacy.
Amenities include a dining room and bar, heated outdoor pool, shuttle access, gift shop, valet parking, concierge, laundry, EV charging, and ADA accessibility.
🤩 Book your stay at The Ahwahnee
Curry Village
Curry Village is a historic and popular spot in Yosemite Valley, offering a mix of canvas tent cabins (heated and unheated), wood cabins, and standard hotel rooms. It’s perfect for families, couples, or anyone who wants a blend of comfort and a touch of adventure.
If you book an unheated tent in winter, make sure you bring extra blankets or sleeping bags!
Make sure to place all food, toiletries, trash, and any other scented items in the bear-proof lockers which are provided at every tent cabin.
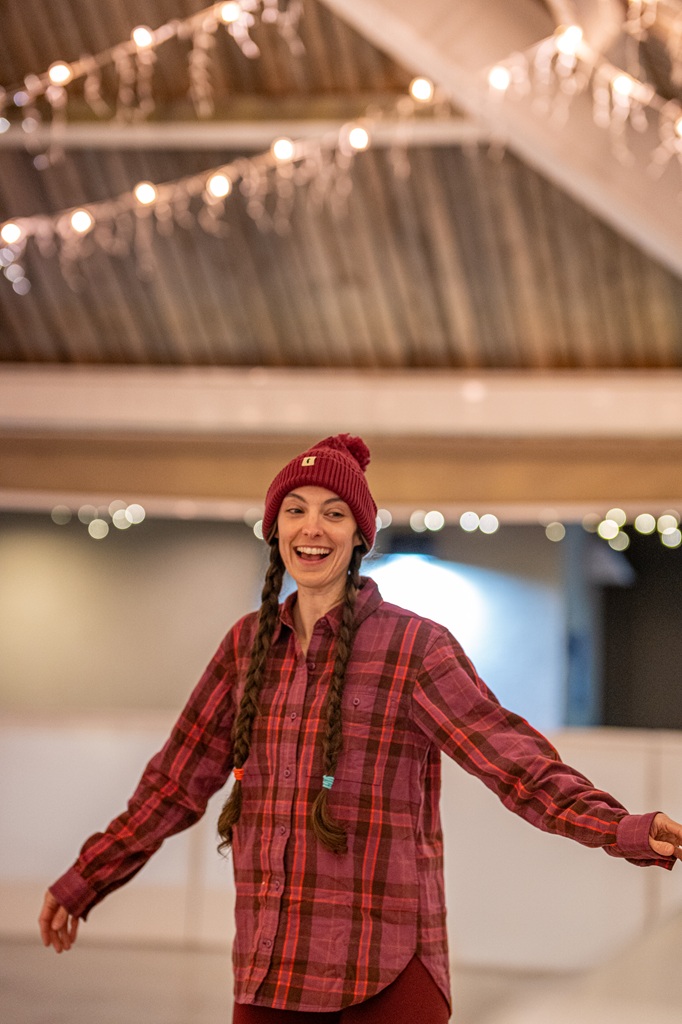
Curry Village offers multiple on-site dining options (Pizza Deck, Seven Tents Pavilion, Bar 1899, Coffee Corner, Taqueria @ The Meadow Grill – some options may not be open in winter), easy access to nearby trails, and in winter, a family-friendly outdoor ice skating rink.
🤩 Book your stay at Curry Village
Tenaya Lodge
Tenaya Lodge at Yosemite is a 4-star luxury resort in Fish Camp, just 5 minutes from Yosemite’s South Entrance. Sitting at 5,288 feet, it combines cabin-in-the-woods vibes with upscale comfort. It’s perfect for couples, families, or anyone wanting a cozy mountain getaway.
My husband and I recently stayed at Tenaya Lodge in December 2025 and loved every minute of our stay. Read my honest, in-depth Tenaya Lodge review!
The resort offers several lodging styles, including two-bedroom Explorer Cabins with fireplaces and plenty of space, cottages with patios and forest views, and spacious main lodge rooms and suites close to the restaurants, spa, and indoor pool.
Tenaya Lodge also has a ton of activities included with your stay, even in winter, such as ice skating, snowshoeing, sledding, guided hikes, and more. Luxury amenities like the Ascent Spa, heated indoor pool, hot tubs, and multiple on-site restaurants make it tempting to spend your whole trip at the resort.
🤩 Book your stay at Tenaya Lodge


Yosemite View Lodge
Yosemite View Lodge is a riverside hotel just minutes from the Arch Rock Entrance, making it a perfect base for winter trips.
The lodge sits along the Merced River, so you can wake up to peaceful river views and crisp winter mornings. Read my complete Yosemite View Lodge guide and review before you book!
Rooms are spacious and include kitchenettes, with some offering fireplaces and spa tubs. Suites with full kitchens are great for families or larger groups.
On-site dining options include The River Restaurant & Lounge for a sit-down meal and Parkside Pizza for something quick and casual.
If you want convenient, comfortable lodging close to the park, Yosemite View Lodge is a solid choice.
🤩 Book your stay at Yosemite View Lodge
Rush Creek Lodge
Rush Creek Lodge is a 4-star mountain resort just 5 minutes from the Big Oak Flat Entrance. The lodge offers spacious rooms, suites, and villas. Amenities include a heated outdoor pool, hot tubs, a spa, playground, fire pits, and plenty of on-site activities like bike rentals, giant checkers, shuffleboard, and ping pong.
Guests can enjoy meals at the on-site restaurant, grab snacks from the general store, or relax with a drink in the lounge. Groveland is also nearby for extra dining and shopping options.
Rush Creek Lodge is a certified B Corp with eco-friendly initiatives and a youth employment program, so your stay supports sustainability and the local community.
During the holidays, the lodge gets festive with guided Yosemite outings, snowshoe trips, sightseeing tours, and fun activities like gingerbread house building and stocking decorating.
🤩 Book your stay at Rush Creek Lodge
Evergreen Lodge
Evergreen Lodge is a modern, woodsy retreat set on 20 acres, just 5 minutes from the Hetch Hetchy Entrance and 20 minutes from Big Oak Flat Entrance.
The lodge offers cozy cabins with private decks, Alexa devices, and gourmet coffee makers, plus larger vacation rentals and glamping options. On-site amenities include a heated pool, hot tub, game room, playground, restaurant, general store, and plenty of activities like ping pong and billiards.
As a founding B Corp, Evergreen Lodge focuses on social and environmental initiatives. After a day exploring Yosemite, you can unwind with a massage in a private cabana or at the spa at Rush Creek Lodge.
During the holidays, Evergreen Lodge offers festive fun activities, such as guided hikes, snowshoeing through giant sequoias, Yosemite Valley sightseeing, and family activities like stocking decorating and gingerbread house building.
🤩 Book your stay at Evergreen Lodge
Conclusion
Figuring out what to pack for a winter trip to Yosemite can feel overwhelming, but hopefully this Yosemite winter packing list has made it a lot easier!
My goal is to make trip planning simple, stress-free, and even a little fun! If you used this list, let me know how it helped you plan your Yosemite winter adventure.
Stay warm, stay safe, and enjoy every snowy, magical moment in Yosemite! ☃️
🤩 Yosemite Trip Planning Resources
- 1-Day Yosemite Itinerary for First-Time Visitors
- Where to Stay Outside of Yosemite (best places in 2026)
- 13 Best Hikes in Yosemite Valley You Can’t Miss!
- Best Spots to Find Giant Sequoia Trees in Yosemite
- 10 Must-Do Easy Hikes in Yosemite for All Skill Levels
- Hetch Hetchy Hikes: Explore This Hidden Gem
- Best Yosemite Waterfall Hikes: Complete Guide
- Ultimate Guide to Visiting Yosemite in May
- Is Tioga Pass Open? Plan an Epic Trip with This Guide
- 12 Best Tioga Pass Hikes for Adventure Lovers
Enjoyed this post? Pin for later!