Planning a trip to Sedona, Arizona, but not sure which hikes to prioritize? I’ve got you covered!
After hiking many trails in Sedona, I’ve created a list of the 10 best Sedona hiking trails that are absolutely worth your time. 🙌
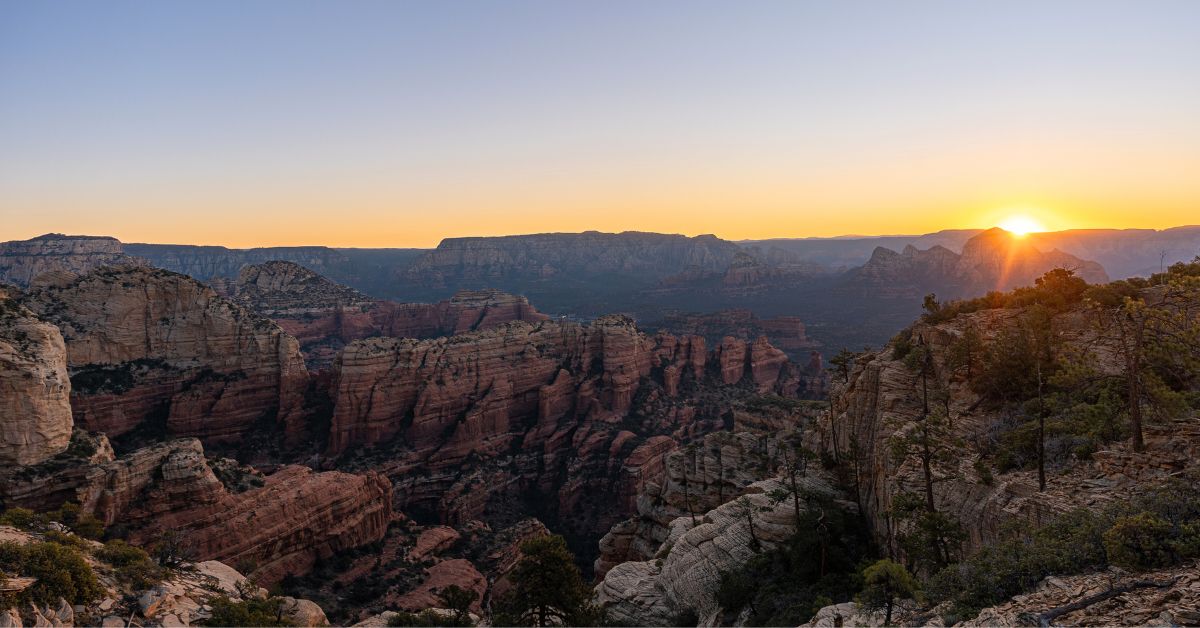
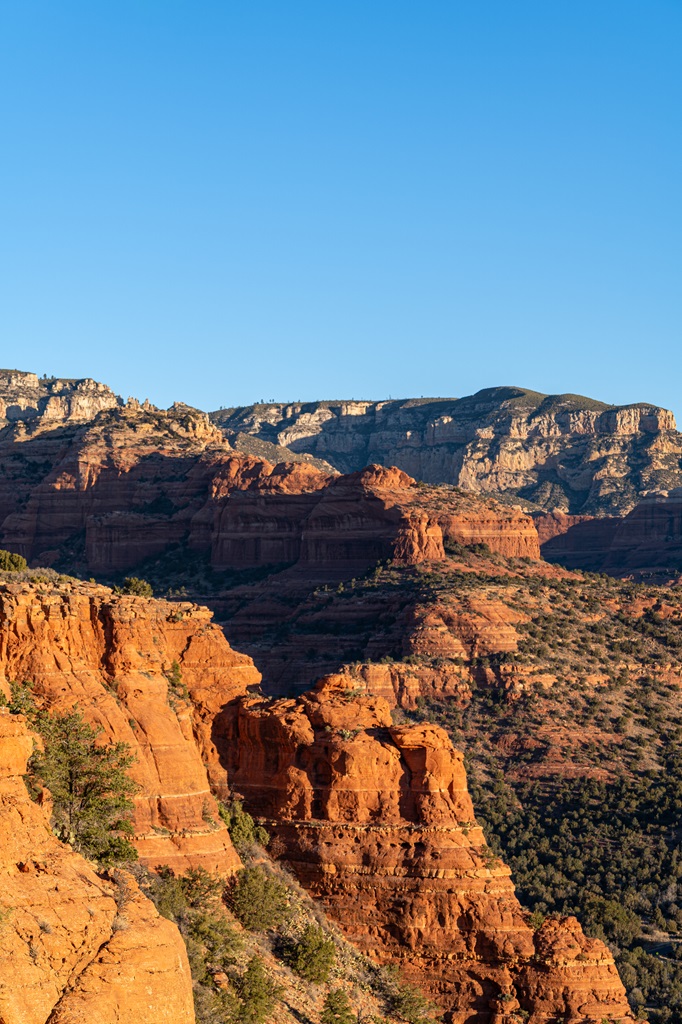
These trails showcase the area’s stunning red rock landscapes, unique geological formations, and unforgettable views.
Sedona has its share of hidden gems, and while I’d love to add those to the list, some places are best kept quiet to help preserve their beauty. Unfortunately, once a secluded spot goes viral, it often leads to overcrowding and damage.
If everyone followed Leave No Trace principles, this wouldn’t be an issue, but as we all know, a few careless visitors can ruin a place for everyone.
That said, the hikes on this list are already well-known and quite popular! They offer some of the most breathtaking scenery in Sedona.
Since popularity means crowds, I’ll also share insider tips on the best times to go and how to make the most of your Sedona hiking experience.
Let’s dive into the 10 best hikes in Sedona, Arizona! 😍
Affiliate Disclaimer: Some links on this page may be affiliate links, meaning I may earn a small commission at no extra cost to you. As an Amazon Associate, I earn from qualifying purchases. Thanks for supporting the blog! 🫶
Best Hikes in Sedona, Arizona
1. Devil’s Bridge
Starting Point: Dry Creek Vista Trailhead or Mescal Trailhead
Length: 4 to 6 miles roundtrip
Elevation Gain: 530 to 730 feet
Difficulty: Moderate to hard
Hiking Time: 2 to 4 hours
Route Type: Out-and-back
Pet-friendly? Yes, must be on leash
Hike Features: Devil’s Bridge, ability to walk across the bridge, and stunning views
✨ READ THIS: Devil’s Bridge Hiking Guide
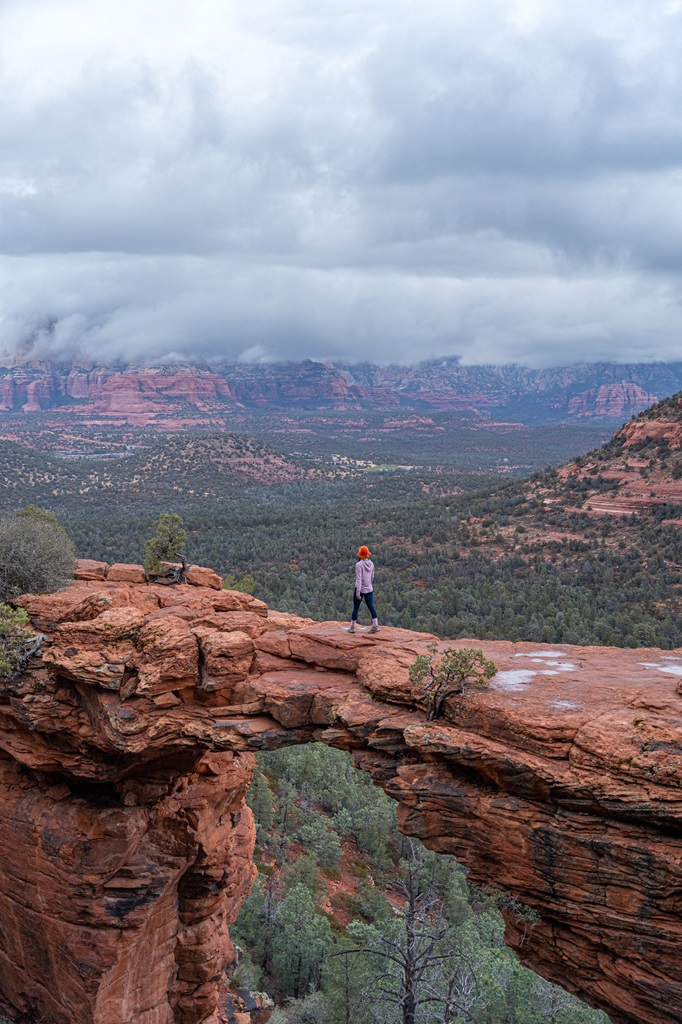
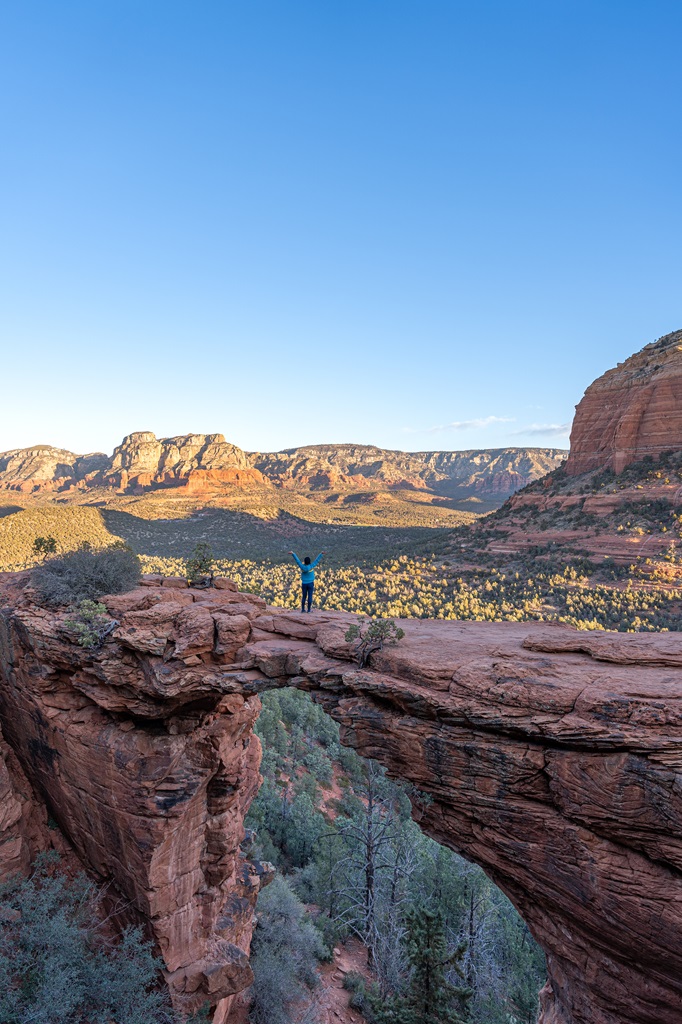
Devil’s Bridge is the largest natural sandstone arch in Sedona, Arizona! It stands at an impressive height of 54 feet and offers panoramic views of the surrounding red rock landscape.
The official Devil’s Bridge Trailhead starts along the unpaved portion of Dry Creek Road (FR 152) and requires a high clearance, 4×4 vehicle to access.
If you begin this hike from the Devil’s Bridge Trailhead, then it’s only a 2-mile trek roundtrip.
If you don’t have a high-clearance vehicle, you can park at either the Dry Creek Vista Trailhead or the Mescal Trailhead.Or you can take the free Sedona Shuttle to either of those last two trailheads.
From the Dry Creek Vista Trailhead, you can take either the Chuckwagon Trail (6 miles roundtrip) or Dry Creek Road (4 miles roundtrip).
From the Mescal Trailhead, you can take the Mescal Trail (4 miles roundtrip).
🎟️ A Red Rock Pass is NOT required to park at either trailhead!
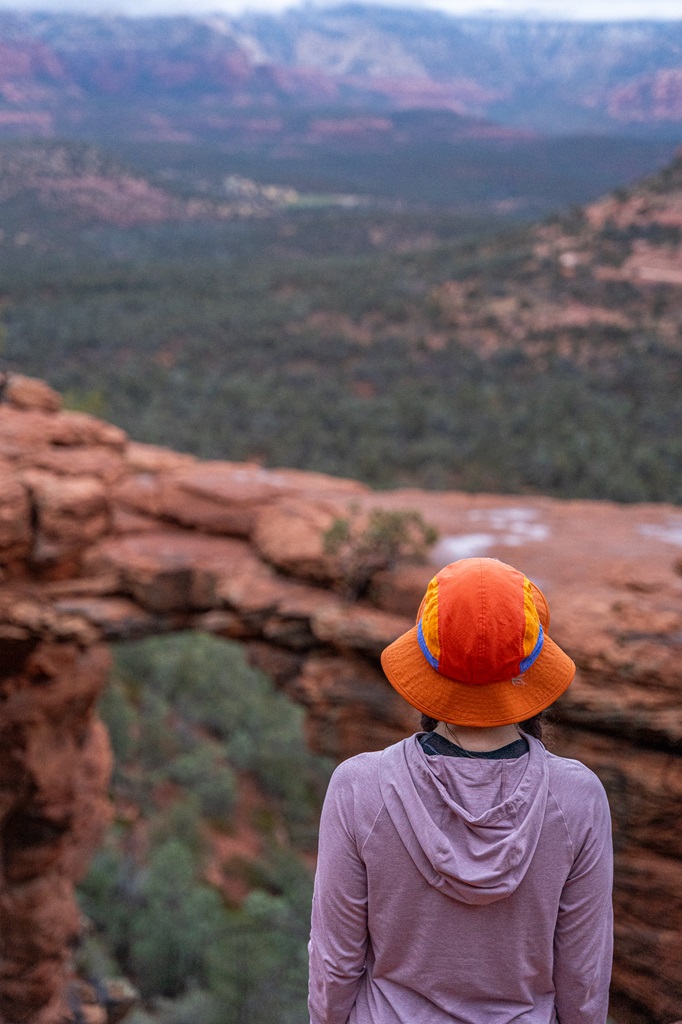
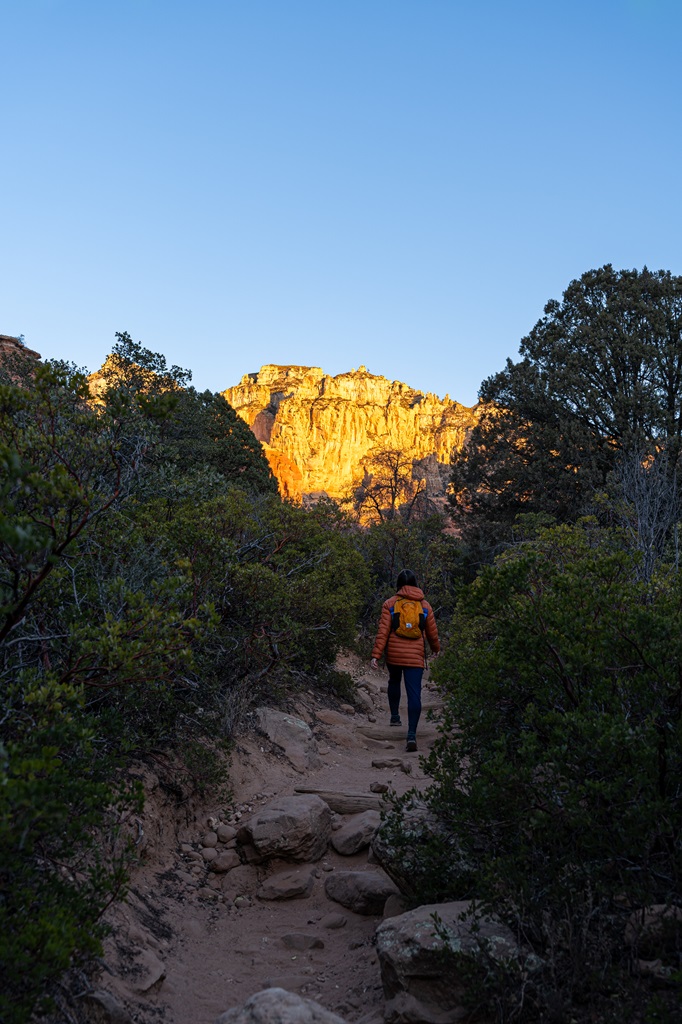
Start this hike early in the morning, particularly before sunrise, to avoid the crowds and beat the heat! Hiking to Devil’s Bridge can be tough for beginners but doable and it’s great for families with older kids.
Don’t forget to walk across the bridge and get a picture! If you’re afraid of heights, it might be scary, but it’s not as narrow as it looks in photos. Always be careful and do what feels comfortable for you.
Devil’s Bridge is an amazing geological landmark and a must-see when visiting Sedona!
2. Cathedral Rock Trail
Starting Point: Cathedral Rock Trailhead
Length: 1.5 miles roundtrip
Elevation Gain: 780 feet
Hiking Time: 1 to 2 hours
Route Type: Out-and-back
Difficulty: Moderate to hard
Pet-friendly? Yes, must be on leash
Hike Features: Fun scramble, amazing views, perfect for sunset or sunrise, vortex site
✨ READ THIS: Cathedral Rock Hiking Guide
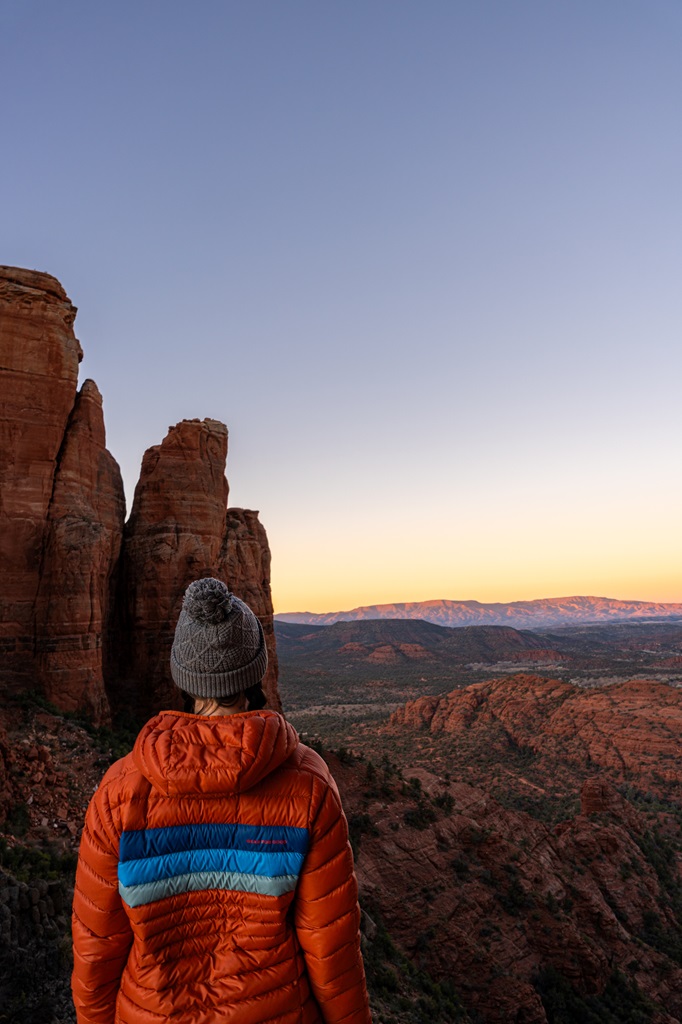
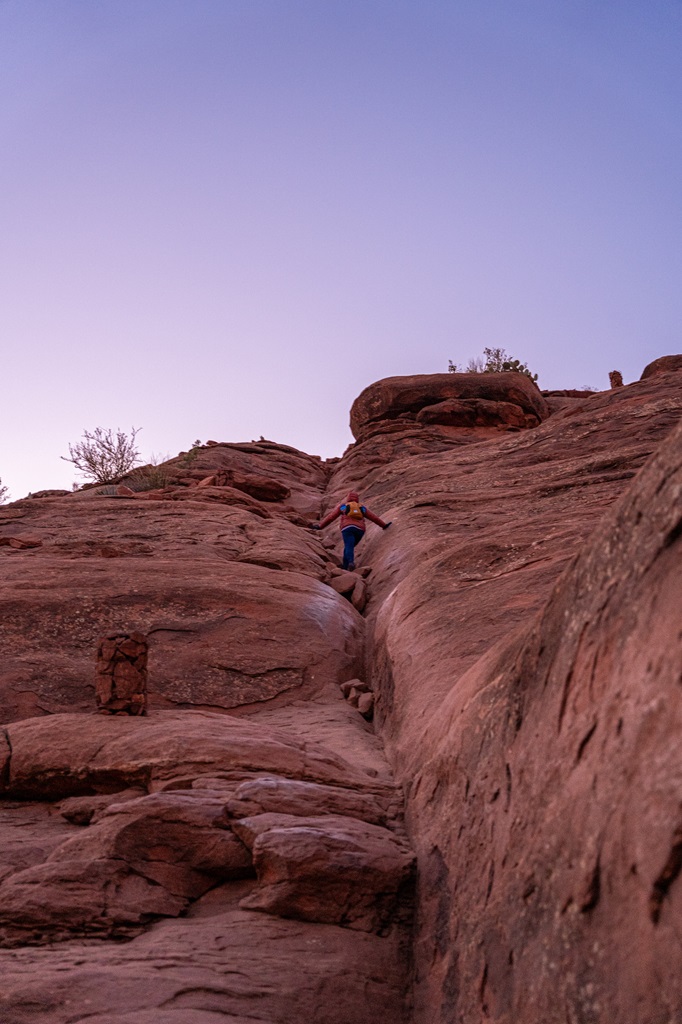
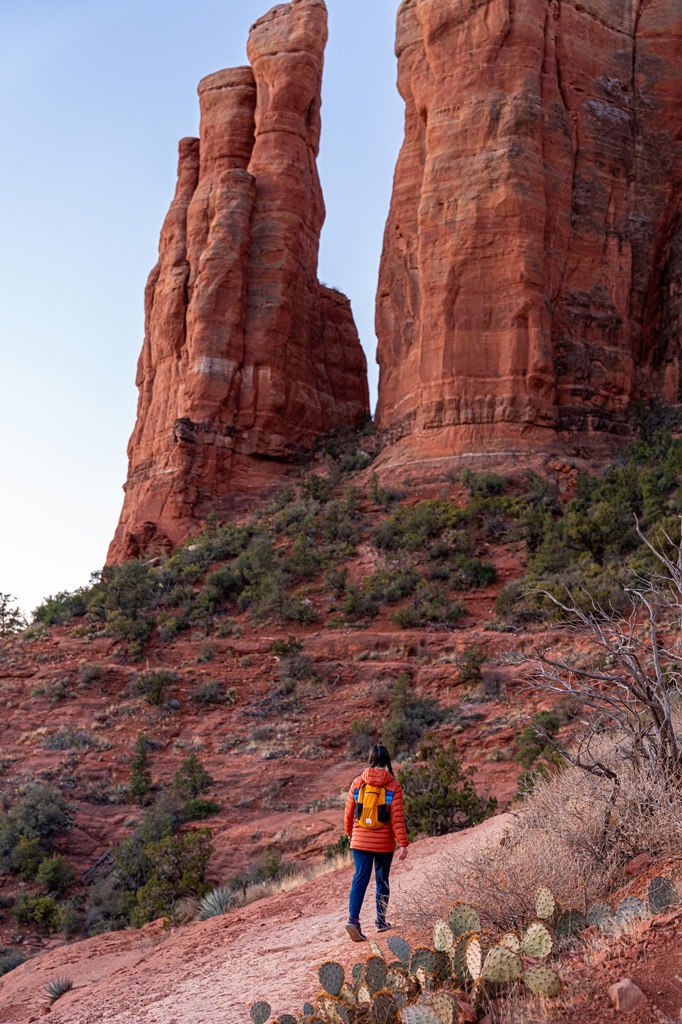
If you’re planning a trip to Sedona, Arizona, Cathedral Rock is an absolute must-do hike!
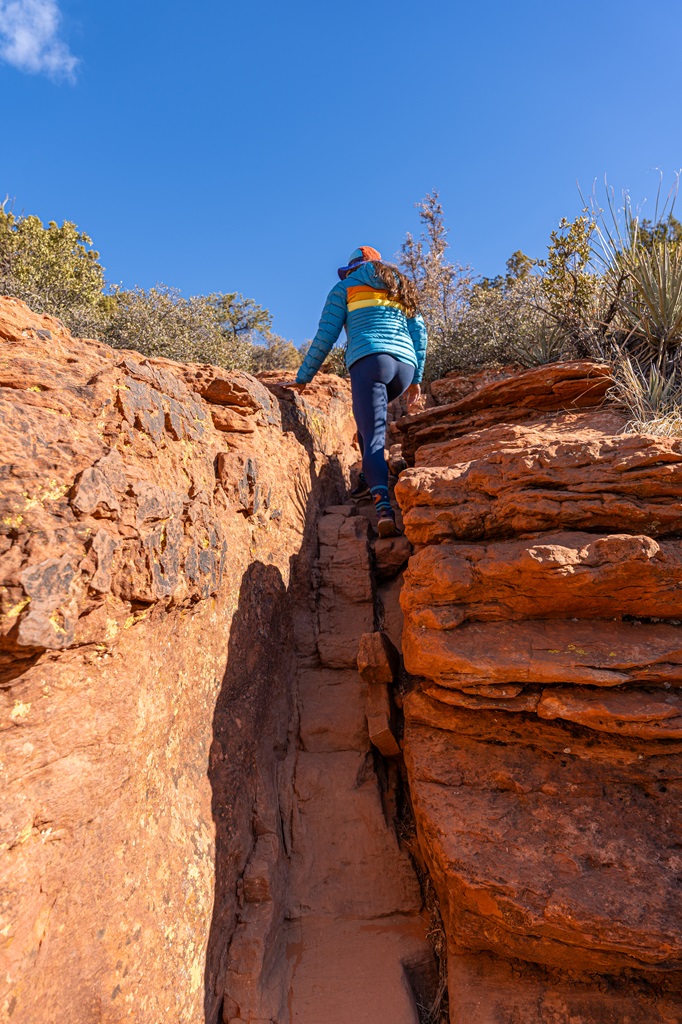
The Cathedral Rock hike features an exciting yet beginner-friendly rock scramble leading to one of the most breathtaking viewpoints in the area. This is one of my favorite Sedona hiking trails!
Cathedral Rock is also a famous vortex site, believed to be a center of energy that promotes healing and spiritual connection.
The main parking area for the Cathedral Rock hike is located at the Cathedral Rock Trailhead, located off Back O’ Beyond Road.
There are two parking lots side by side which can hold about 45 vehicles, and restrooms are located at the trailhead.
This trailhead parking area is open Mondays through Wednesdays and closed Thursdays through Sundays from 7 AM to 5:30 PM. When the parking area is closed, the only way to access the trailhead is via the free Sedona Shuttle.
🎟️ A Red Rock Pass is required to park at the Cathedral Rock Trailhead!
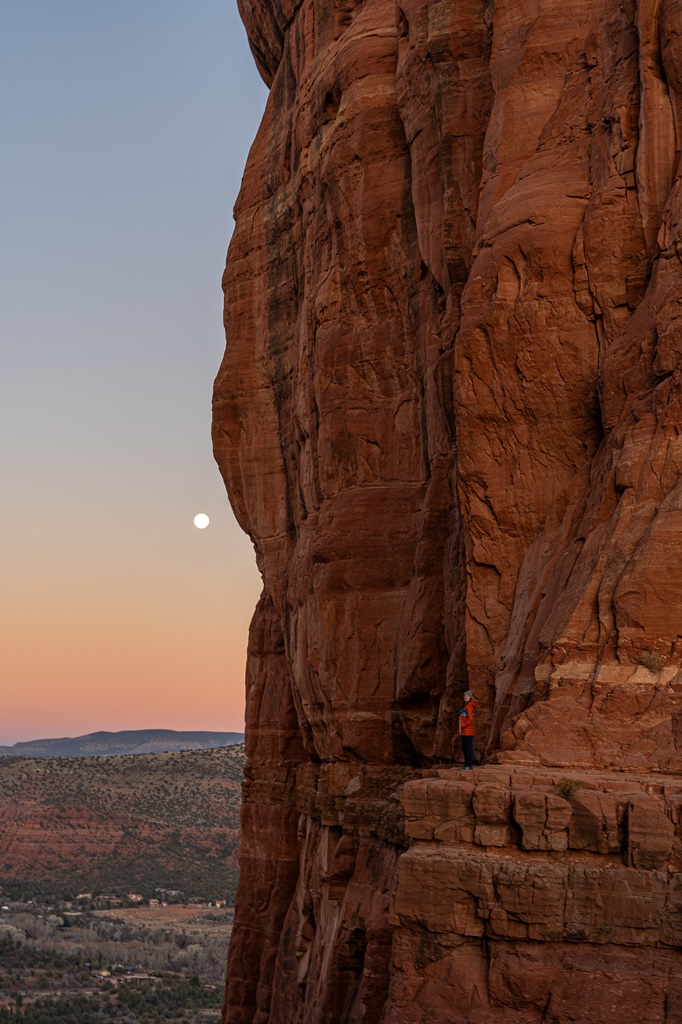
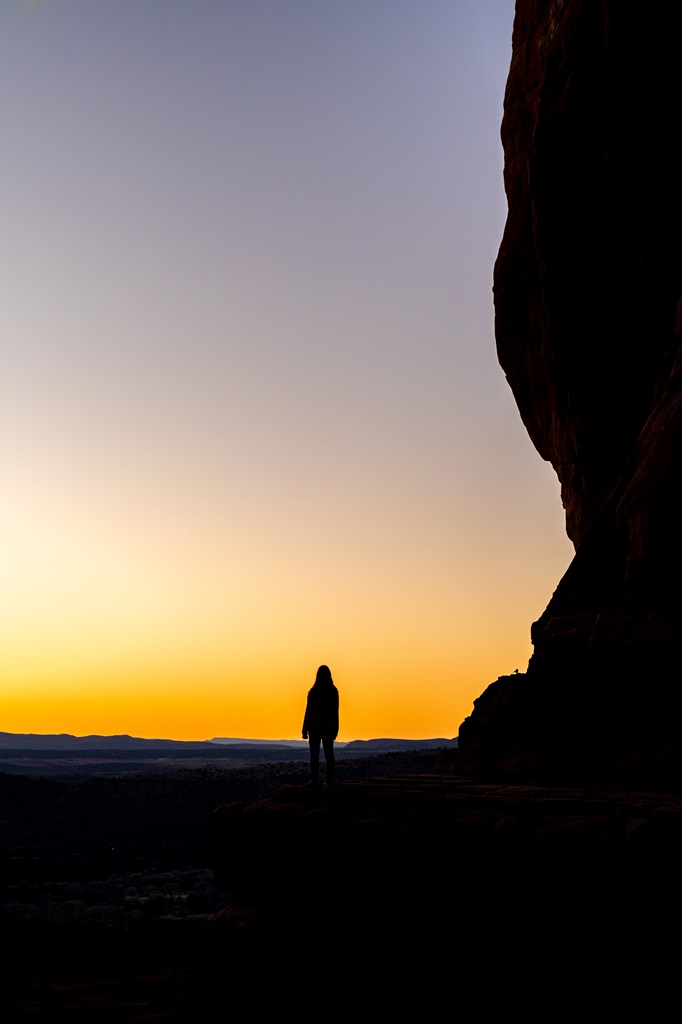
Sunset is a popular and incredible time to visit Cathedral Rock. If conditions are right, the sky explodes with stunning red and orange colors. Expect crowds because Cathedral Rock is one of the best spots to watch sunset in Sedona.
Sunrise is also a great time to hike this trail, especially if you want to avoid the crowds.
🔦 Tip: Bring a headlamp and pack extra layers if you’re visiting at sunrise or sunset!
3. Subway Cave via Boynton Canyon Trail
Starting Point: Boynton Canyon Trailhead
Length: 5 miles roundtrip
Elevation Gain: 550 feet
Difficulty: Moderately challenging
Hiking Time: 2.5 to 3 hours
Route Type: Out-and-back
Pet-friendly? Boynton Canyon Trail is pet-friendly (must be on leash), but it’s not recommended to bring them to the cave or near the ruins
Hike Features: Subway Cave, ancient Sinagua ruins, petroglyphs
✨ READ THIS: Subway Cave Hiking Guide
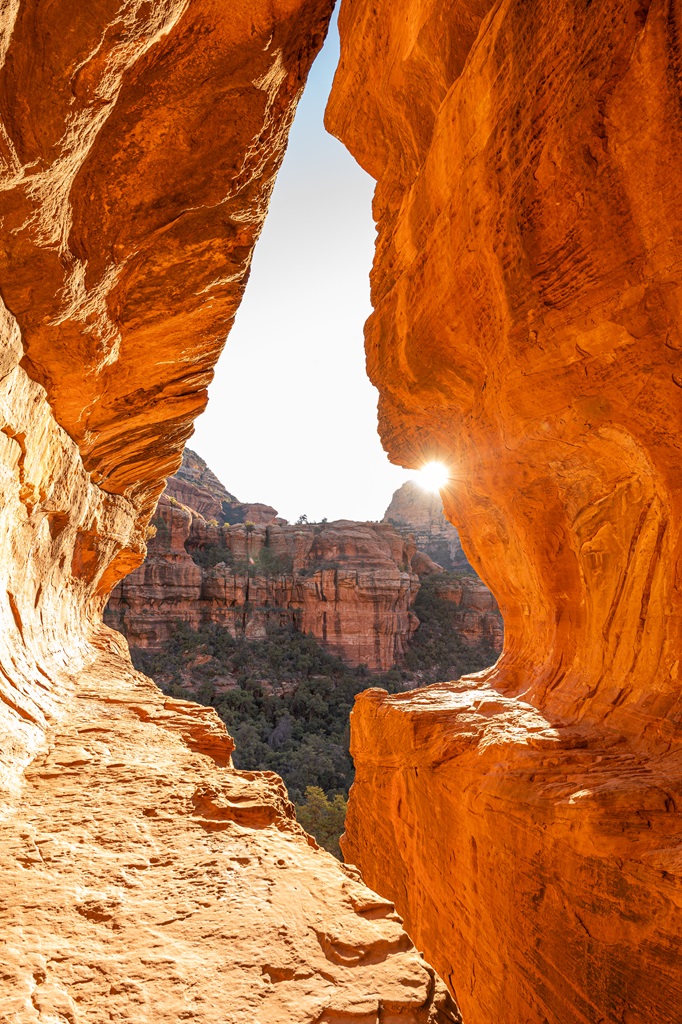
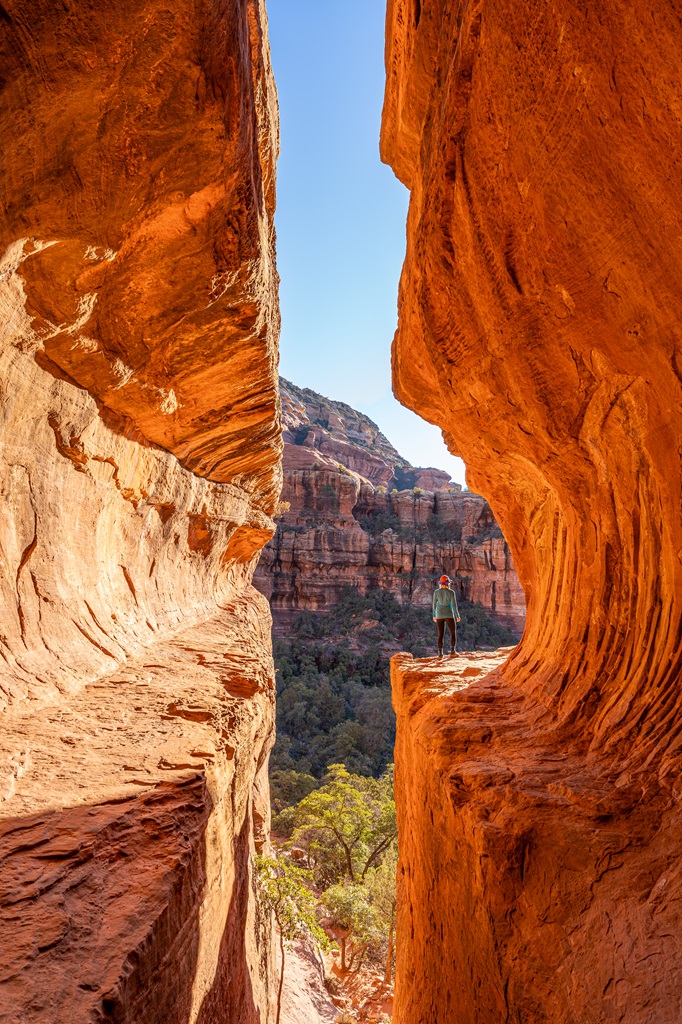
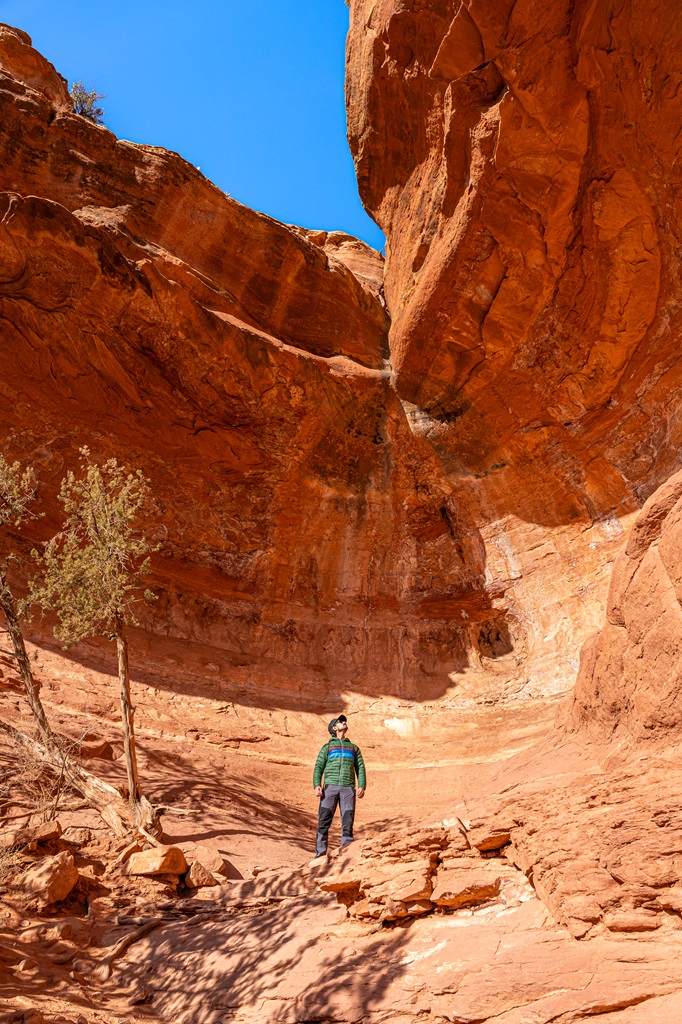
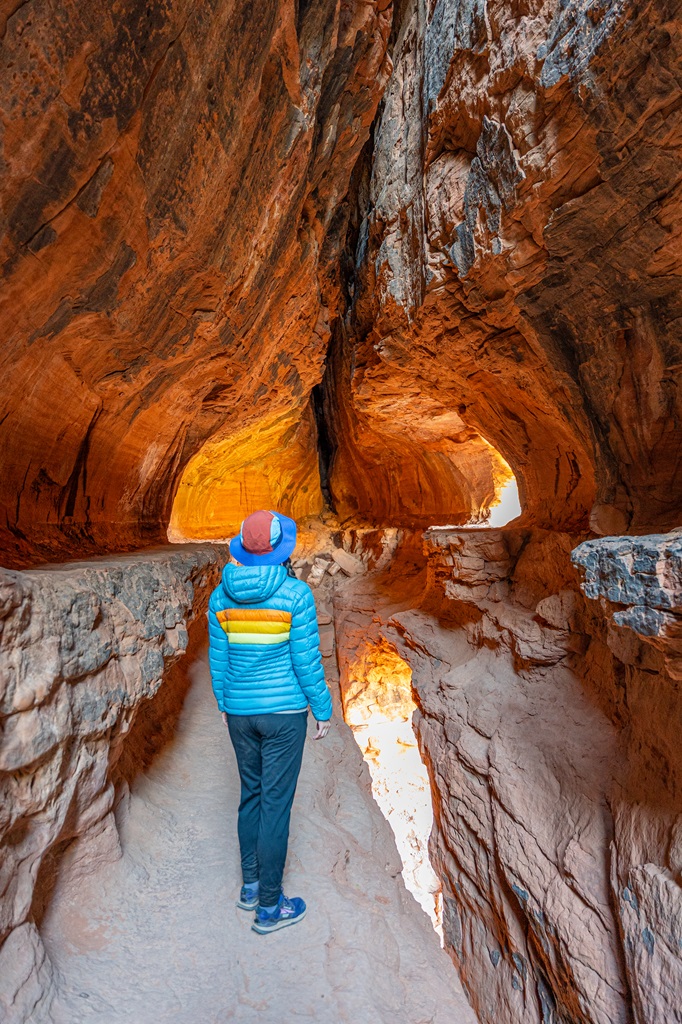
The Subway Cave is one of the most popular hikes in Sedona, Arizona. It used to be a true hidden gem among locals but unfortunately (yes, I say unfortunately), someone shared the location of this spot on social media.
Since then, thousands and thousands of people have visited the Subway Cave. It’s an incredibly beautiful and historical spot. It’s one of my favorite spots in Sedona!
Sadly, not everyone knows how to respect sensitive sites like this. The ruins have literally been ruined and put back together. I’m only sharing this spot because it’s very well-known, and I want to help educate people that the Subway Cave and historical sites near it need to be respected!
If you’re planning to visit this incredible cave, please respect the site and follow Leave No Trace principles so it stays protected for generations to come.
Because of its popularity, the parking area fills up quickly, and you should expect to share the cave with other visitors. If the parking lot is full when you get there, consider hitting up another nearby trail.
The trail stats above are if you plan to only hike to the Subway Cave and back to the trailhead.
If you plan to hike the entire Boynton Canyon Trail including the Subway Cave then the hike will be about 7.1 miles roundtrip.
If you also include the short detour to the Boynton Canyon Vortex the total mileage will be about 7.5 miles roundtrip.
The Boynton Canyon Trailhead, the main parking area for Subway Cave, is located off Boynton Canyon Road, near its intersection with Boynton Pass Road.
This parking lot isn’t very big – there are about 25 parking spots and a restroom. With the trail’s popularity, it fills up fast! To secure a spot, aim to arrive before 7 AM, especially during peak season.
🎟️ A Red Rock Pass is required to park at the Boynton Canyon Trailhead!
If the main lot is full, additional parking is available along Boynton Pass Road, just west of the Boynton Pass Road/Boynton Canyon Road junction.
The hike begins along the Boynton Canyon Trail then veers off onto a social trail which is fairly easy to follow but download offline maps from AllTrails to help with navigation.
If you’re hoping to capture the perfect shot, you will have to be at the cave at the right time and wait for the sun to illuminate the cave.
The best lighting occurs right after sunrise when the cave glows a stunning bright orange – this effect lasts for a few hours. Since the cave faces east, it gets darker as the day goes on.
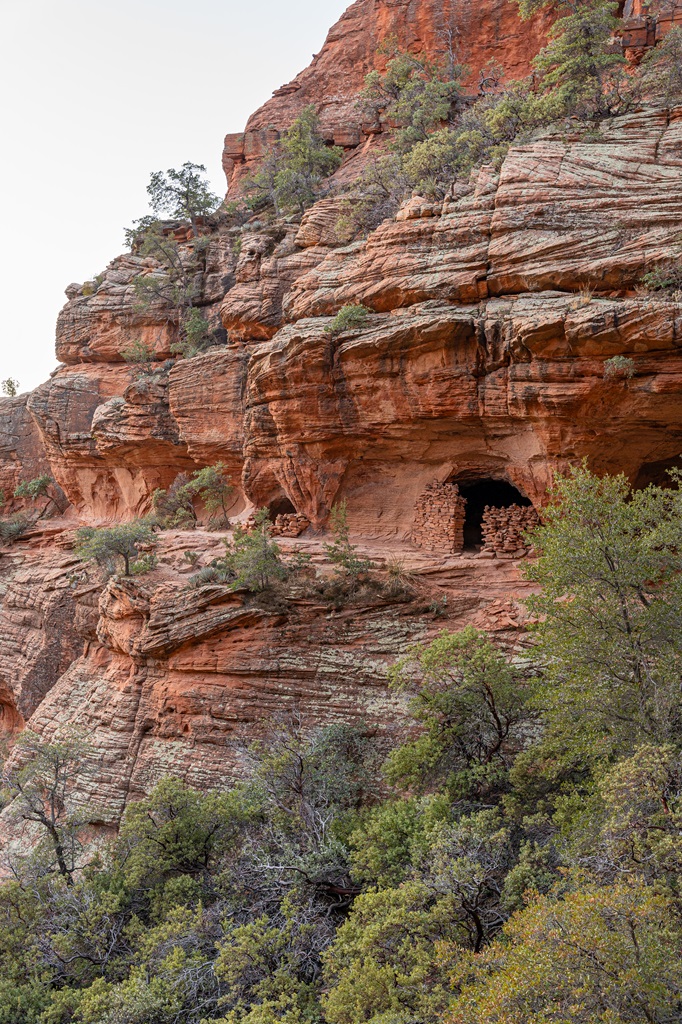
Near the cave you will find ancient Native American ruins and petroglyphs.
Please do your part to protect these sites:
✔ Do not touch, climb on, or disturb the ruins or petroglyphs
✔ Never remove artifacts – leave everything as you found it
✔ Follow Leave No Trace principles to keep this sacred place pristine
Let’s ensure they remain preserved for future generations.
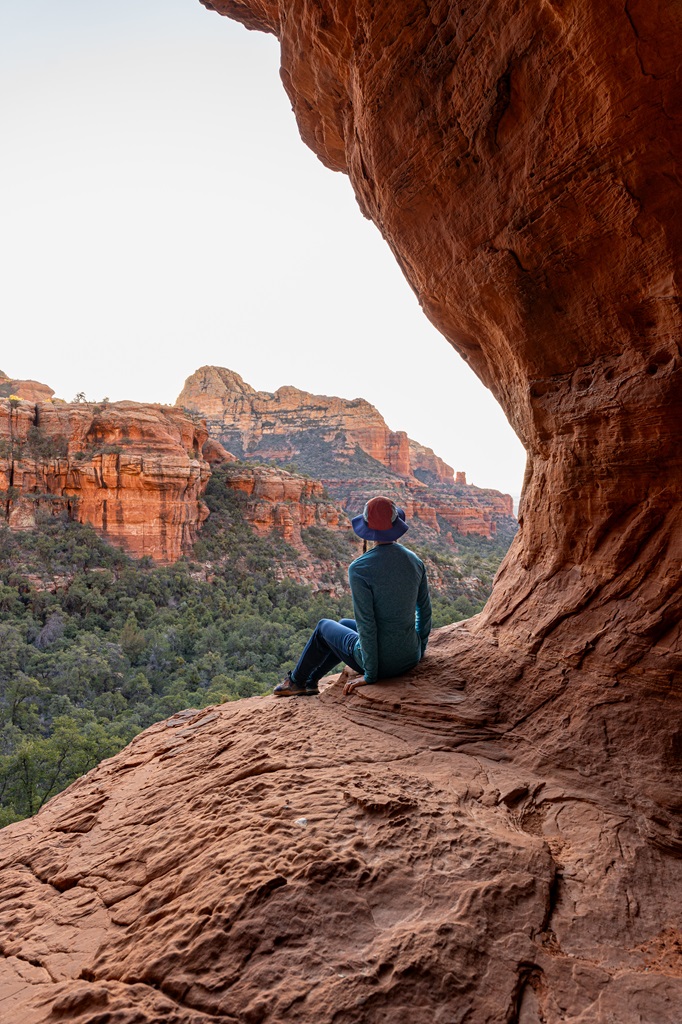
Hiking to Subway Cave in Sedona is an adventure that combines stunning red rock scenery, a bit of scrambling, and a touch of history with the ancient Sinagua ruins.
I highly recommend hiking the rest of the Boynton Canyon Trail and checking out the Boynton Canyon Vortex for even more incredible views and energy.
There’s so much to explore on this trail – don’t just stop at the cave!
4. Birthing Cave
Starting Point: Long Canyon Trailhead or Mescal Trailhead
Length: 2 miles (+1 mile if starting from Mescal Trailhead)
Elevation Gain: 250 feet
Difficulty: Moderately challenging
Hiking Time: 1 to 2 hours
Route Type: Out-and-back
Pet-friendly? Yes, must be on leash
Hike Features: Birthing Cave, scenic views from the cave
✨ READ THIS: Birthing Cave Hiking Guide
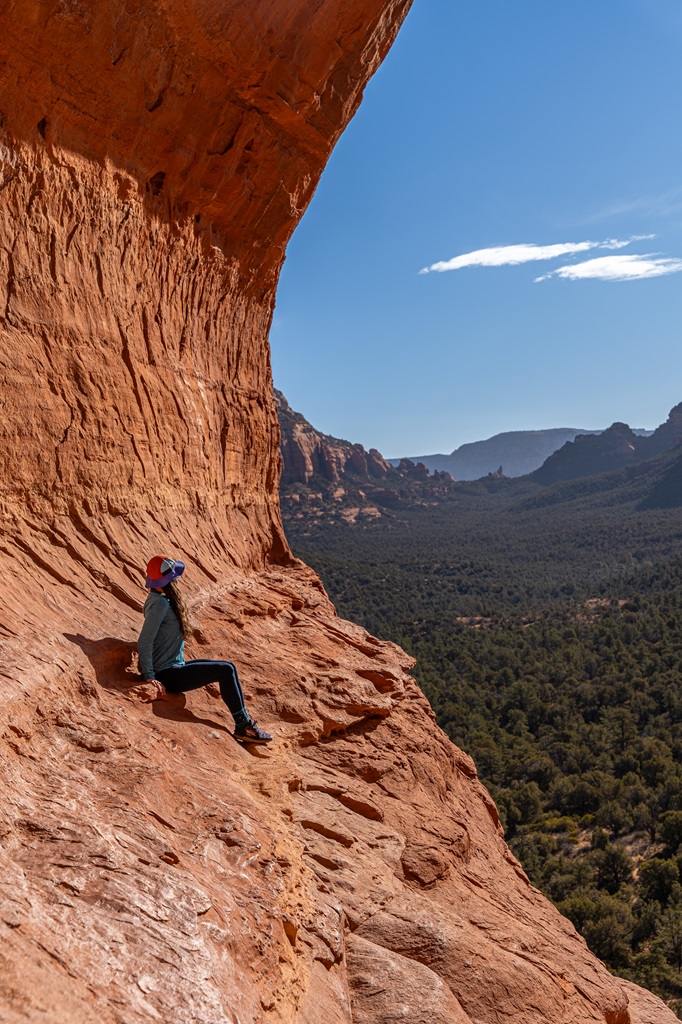
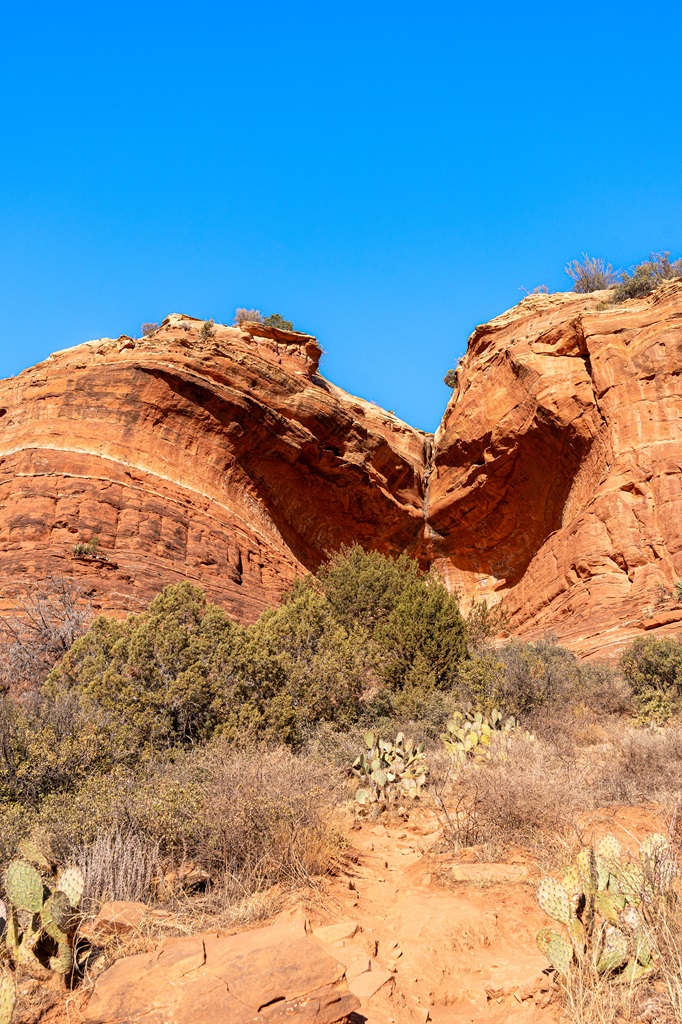
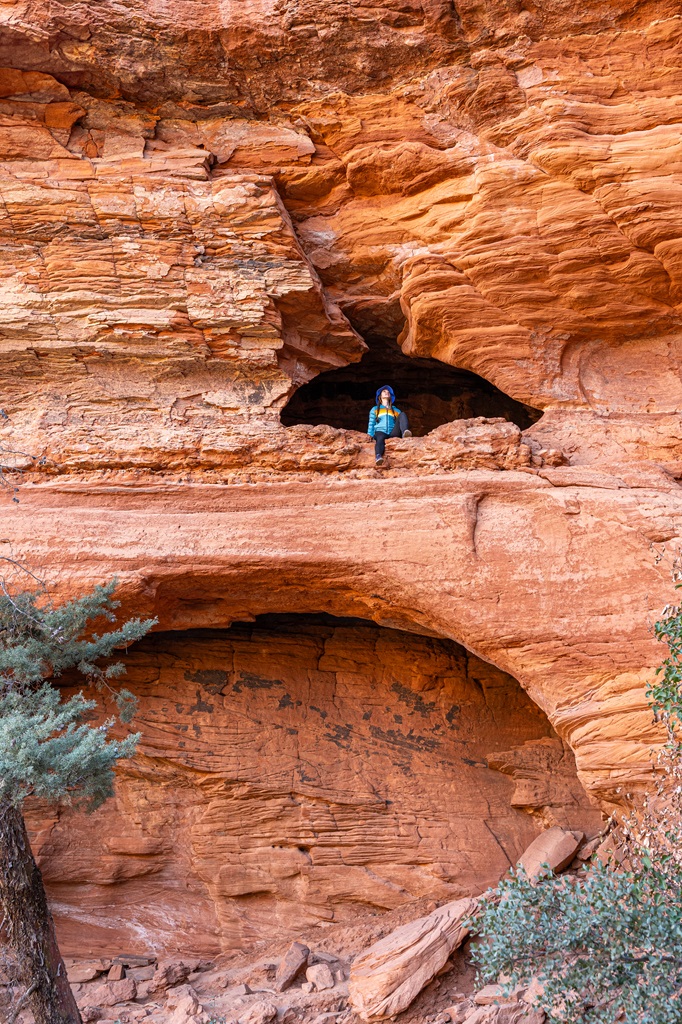
Nestled among the breathtaking red rock formations of Sedona, Arizona, the Birthing Cave is a remarkable blend of natural beauty and profound cultural significance.
It’s one of those “off-the-beaten-path” adventures that will leave you breathless once you reach the cave.
This is a sacred spot so please be respectful when you visit and follow Leave No Trace principles!
The most popular area to start this hike is from the Long Canyon Trailhead located off Long Canyon Road. The parking area is a small open dirt area that does not hold too many vehicles.
If the Long Canyon Trailhead parking area is full, you can also park at the Mescal Trailhead which is only a half mile drive down the road. There is a trail at the Mescal Trailhead that connects to the Long Canyon Trail.
🎟️ A Red Rock Pass is NOT required to park at either the Long Canyon Trailhead or Mescal Trailhead!
This hike begins by following the Long Canyon Trail then veers off onto a social trail. Just like the Subway Cave side trail, this trail is fairly easy to follow.
However, having offline maps downloaded on your phone can help you stay on the right path!
The Birthing Cave’s opening (seen from inside) is quite unique.
📸 To get the best picture of the opening you must climb higher up on the wall into a small hole in the back of the cave and use a wide lens. The cave walls are slippery so please be careful!
This spot holds deep cultural significance and was once used by Native Americans, so visit with respect and leave no trace.
It’s one of those “hidden gems” that lives up to the hype, making it a must-do on your Sedona itinerary!
5. Seven Sacred Pools and Soldier Pass Cave via Soldier Pass Trail
Starting Point: Soldier Pass Trailhead
Length: 4.5 miles (entire trail roundtrip) or 3 miles (cave and back)
Elevation Gain: 860 feet
Difficulty: Moderately challenging
Hiking Time: 2.5 to 3.5 hours
Route Type: Out-and-back
Pet-friendly? Yes, must be on leash
Hike Features: Devils Kitchen Sinkhole, Seven Sacred Pools, Soldier Pass Cave
✨ READ THIS: Soldier Pass Trail Hiking Guide
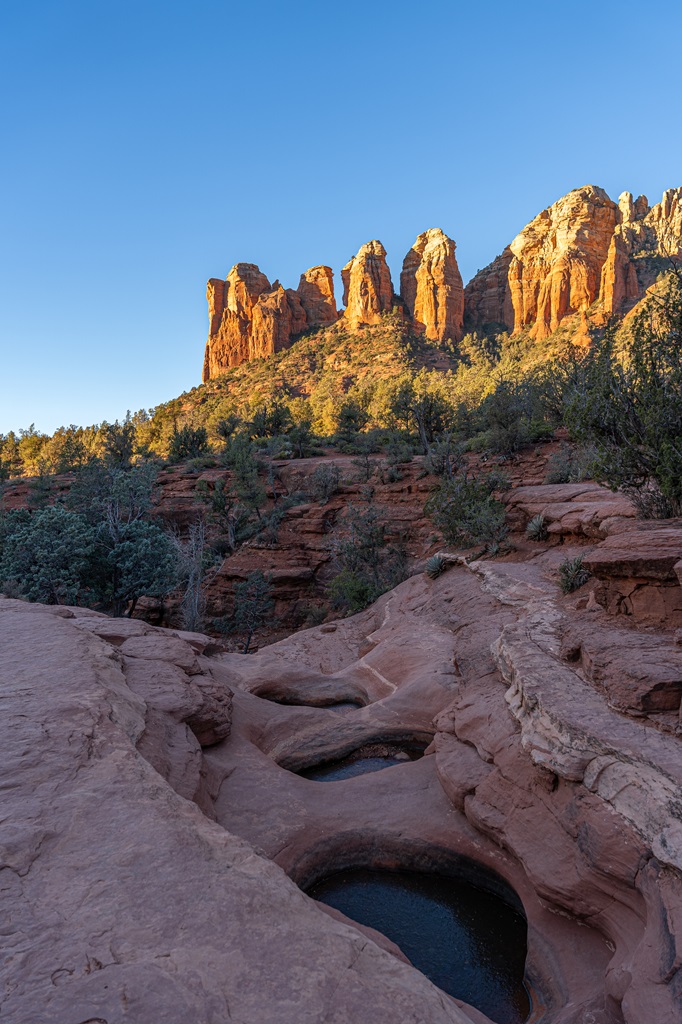
The Soldier Pass Trail in Sedona, Arizona, is an excellent hike for beginners and families, featuring remarkable landmarks like the Devils Kitchen Sinkhole and the Seven Sacred Pools.
🥾 The hike to the Seven Sacred Pools is 1.1 miles roundtrip with 95 feet of elevation gain. This is a great option for families with young children or those wanting a shorter hike.
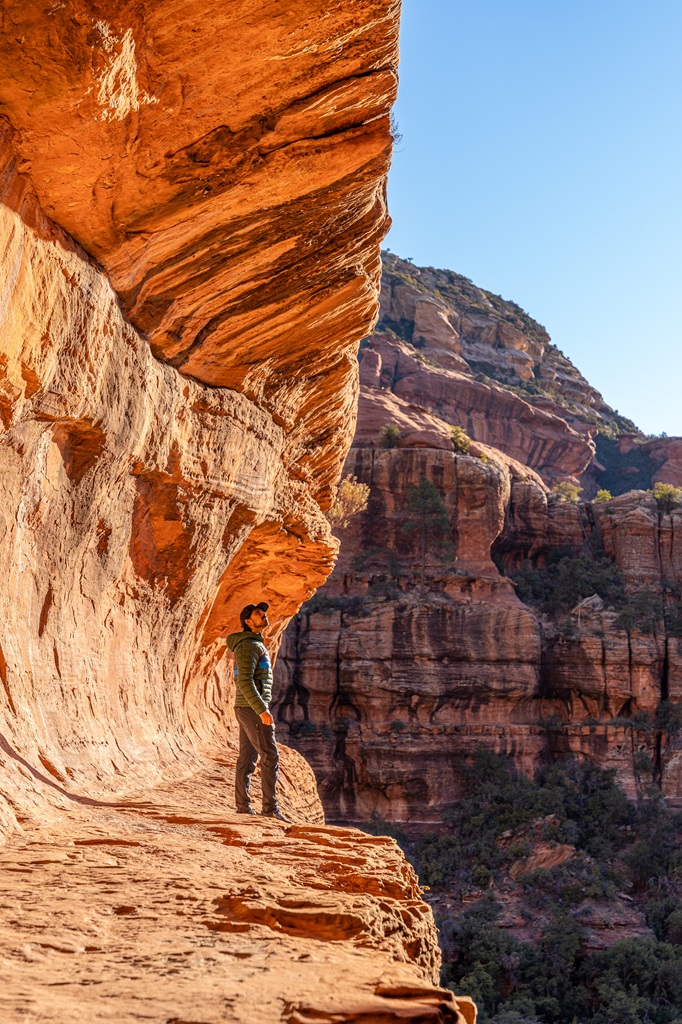
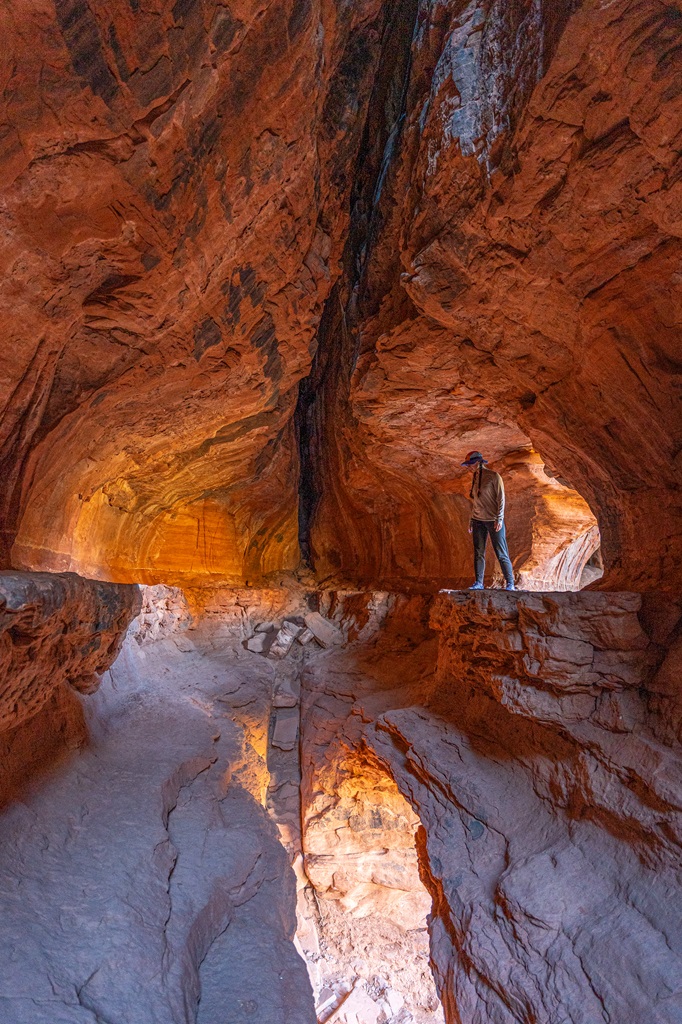
For those seeking a bit more adventure, a short detour leads to the Soldier Pass Cave – arguably the most breathtaking highlight of the trail.
The Soldier Pass Trailhead is located at the end of Forest Service 9904 Road near a residential area. The trailhead parking area only has 14 parking spots, there are no trash or restroom facilities and it’s not open 24 hours a day.
Soldier Pass Trailhead Open and Close Times:
- OPEN from 8 AM to 6 PM on Mondays through Wednesdays
- CLOSED Thursdays through Sundays
On the days the trailhead parking area is closed, people must take the free Sedona Shuttle to reach the trailhead.
Another popular spot to start this hike is from the Jim Thompson Trailhead. This parking area holds 50 vehicles and has restroom facilities.
🎟️ A Red Rock Pass is NOT required to park at the Soldier Pass Trailhead, but it is required at the Jim Thompson Trailhead!
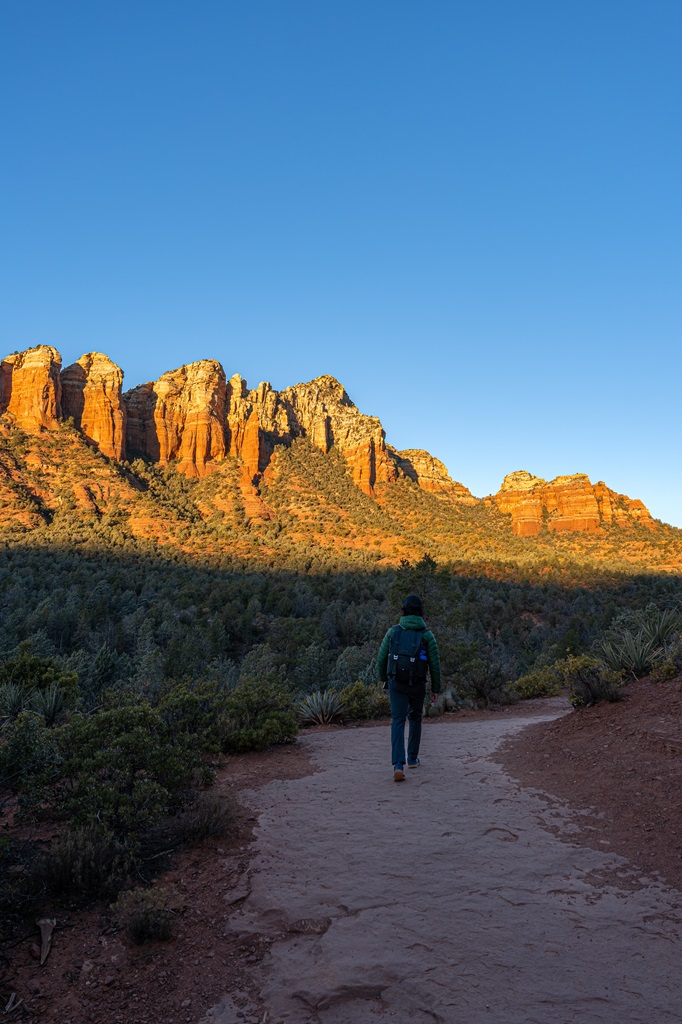
Start your hike to the Seven Sacred Pools and Soldier Pass Cave at sunrise. You will avoid crowds, beat the heat, and the lighting will be perfect for photos. 🤌
If you are planning to visit the cave, be aware that the side trail is not marked and there are no signs pointing you towards the right direction.
With that being said, it’s honestly so easy to find the cave. There will be a fork in the trail at the 1.3-mile mark – the right trail leads to the Soldier Pass Cave.
Download offline maps to help you navigate this unmarked social trail – it’s a well-worn trail so it’s easy to follow.
Getting inside the cave is the real challenge, but not overly challenging. It does require a bit of rock scrambling but nothing too technical.
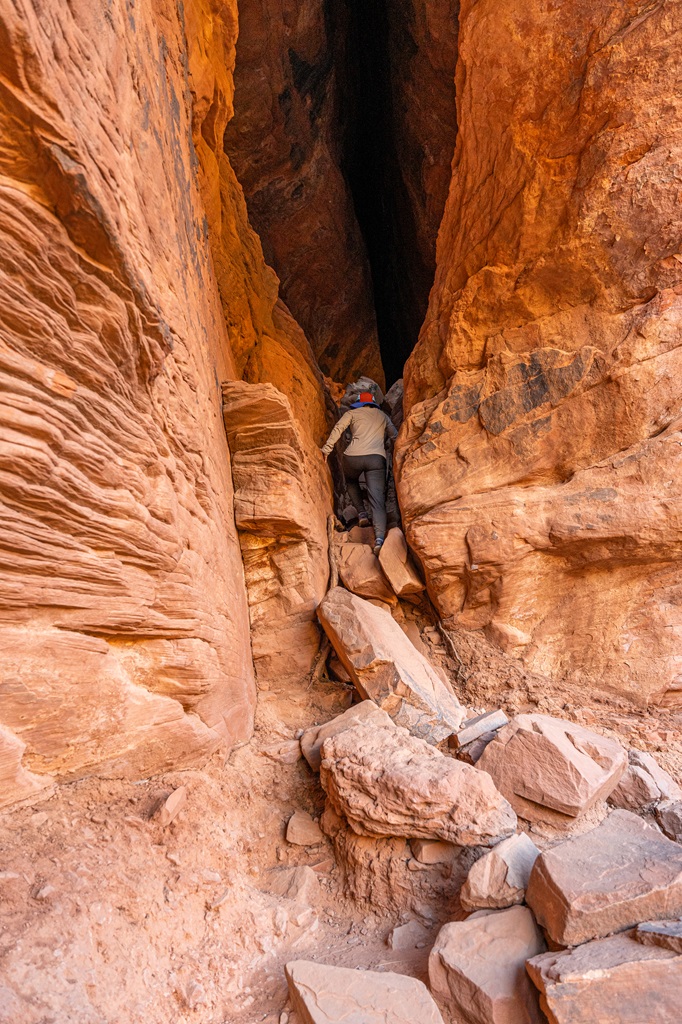

The inside of the Soldier Pass Cave is so beautiful, especially when the sunlight shines inside and the cave explodes into a bright orange color.
Most people will visit the cave then turn around and return to the trailhead. I encourage you to continue hiking along the Soldier Pass Trail for more stunning views of Sedona’s red rock landscape.
Another popular route is the Soldier Pass to Brins Mesa Loop which is 6 miles roundtrip and 1,100 feet of elevation gain. I have yet to do this route but seems like a great option if you want a longer hike.
Whatever you choose to do, the Soldier Pass Trail is a must-do for those seeking adventure and stunning red rock landscapes!
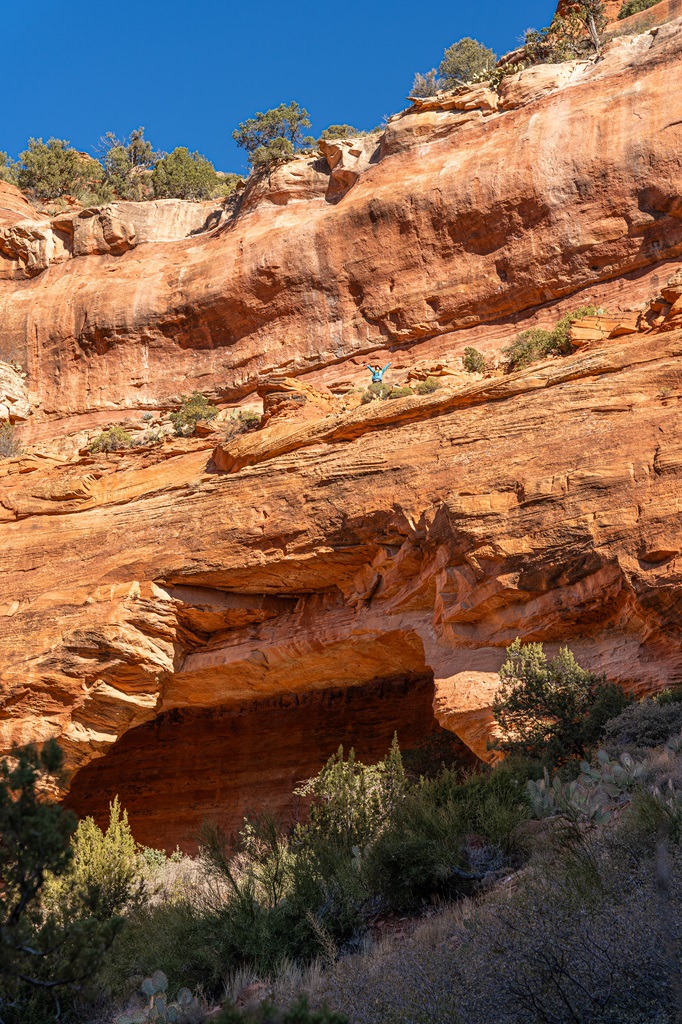
6. Fay Canyon Arch via Fay Canyon Trail
Starting Point: Fay Canyon Trailhead
Length: 1.5 miles (arch and back) and 2.4 miles (entire trail + arch)
Elevation Gain: 250 to 330 feet
Difficulty: Fay Canyon Trail is easy, and Fay Canyon Arch Trail is moderately challenging
Hiking Time: 1 to 1.5 hours
Route Type: Out-and-back
Pet-friendly? Yes, must be on leash
Hike Features: Fay Canyon Arch, red sandstone walls, and a secret overlook 🤫
✨ READ THIS: Fay Canyon Arch Hiking Guide
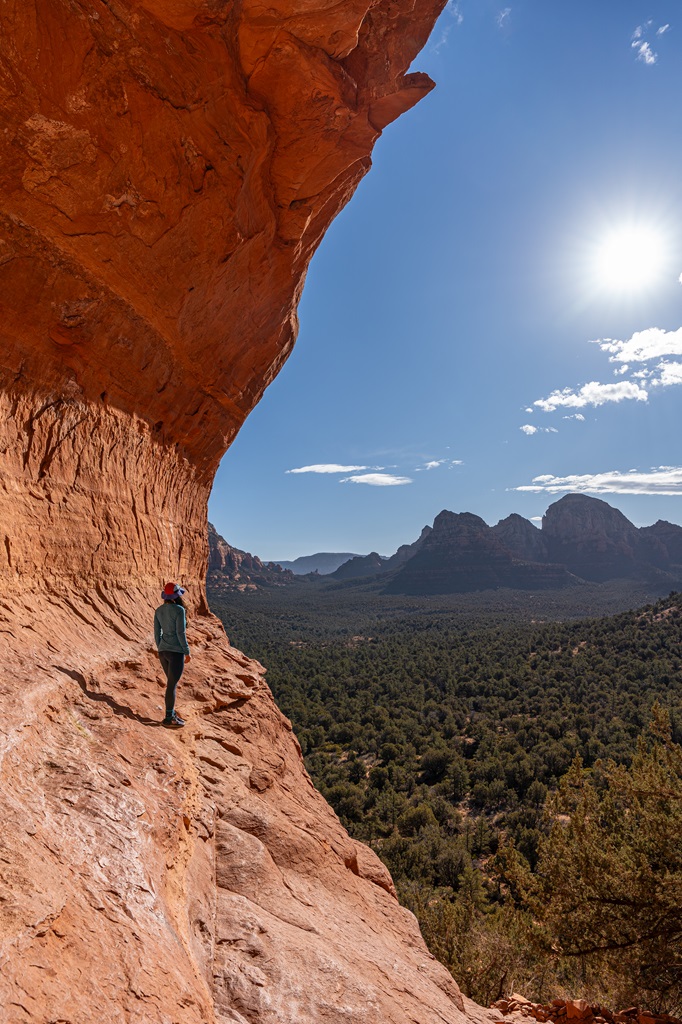
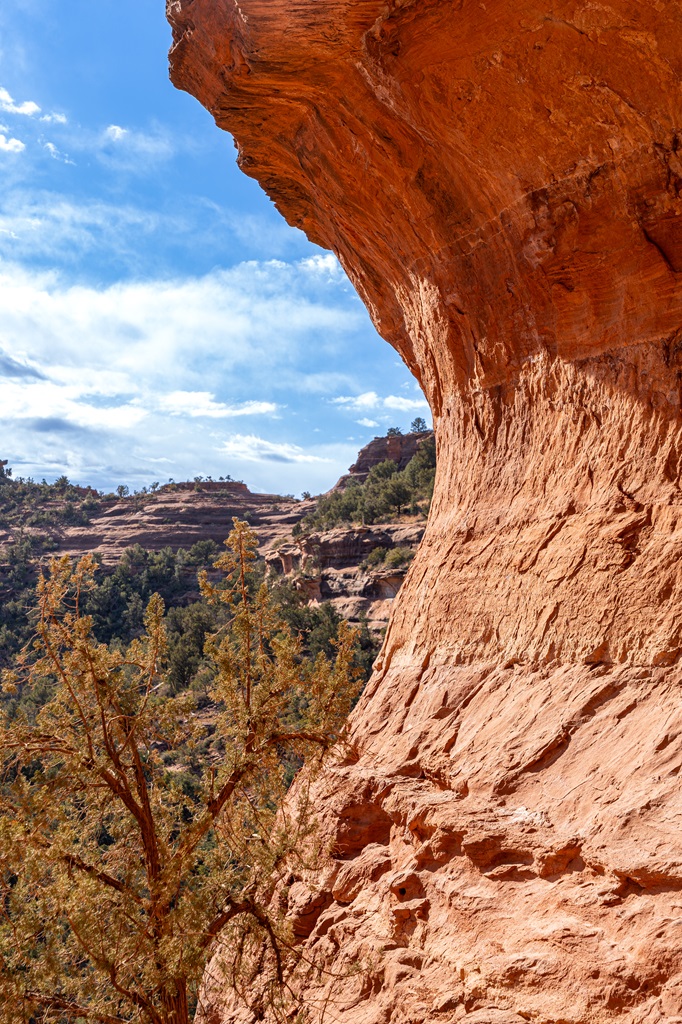
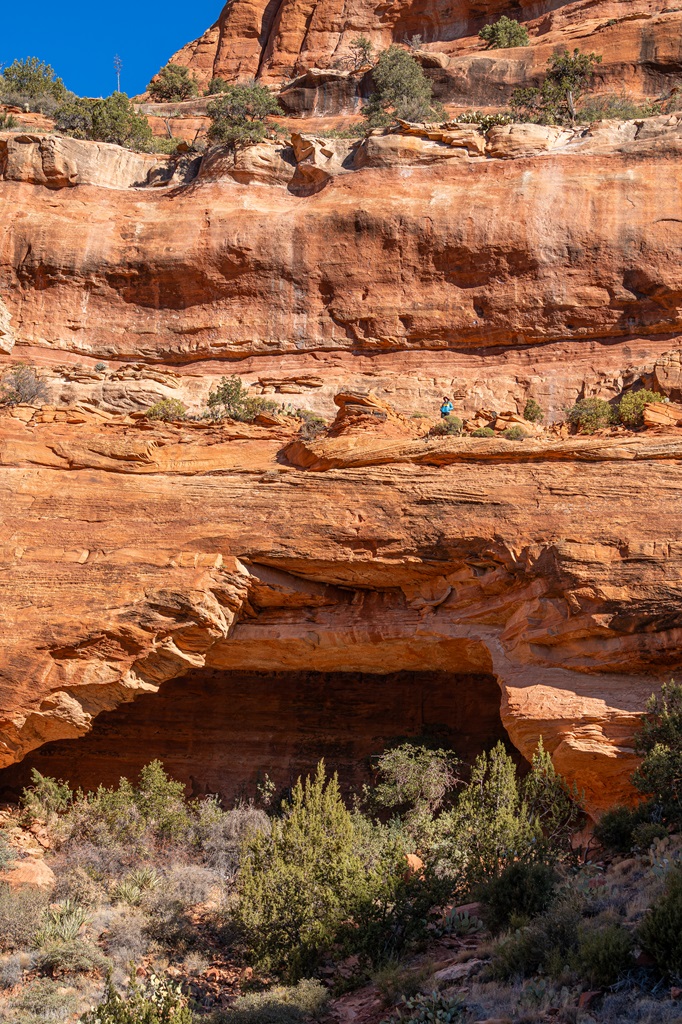
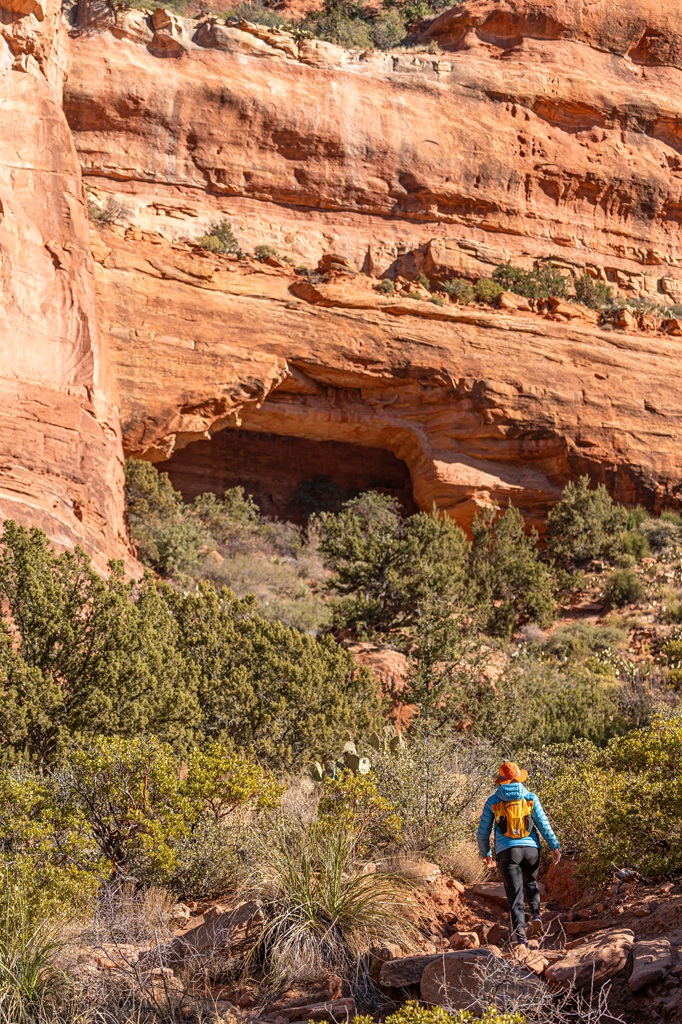
The Fay Canyon Trail is a true gem in Sedona, perfect for those seeking a short, scenic hike.
This easy, mostly flat trail is great for casual hikers and families and pairs well with other nearby hikes, such as Doe Mountain and Subway Cave.
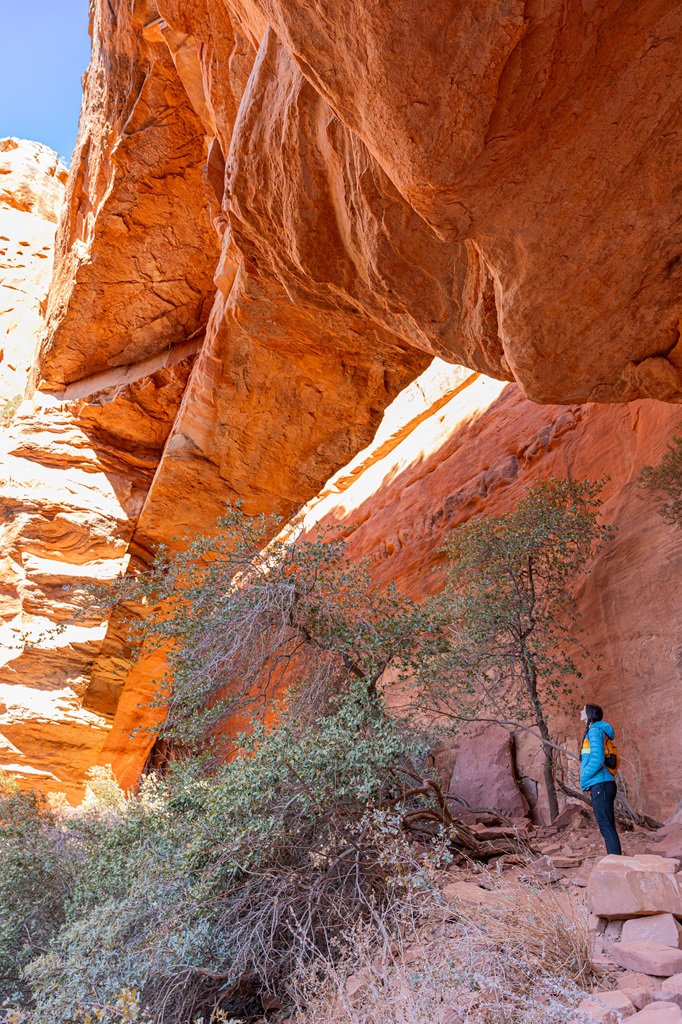
The true highlight is the Fay Canyon Arch, a natural arch-shaped rock formation hidden along a side trail. Reaching the arch requires a short but steep scramble over rocky terrain, but the effort is well worth it.
The Fay Canyon Trailhead is located about 20 minutes from Sedona off Boynton Pass Road. The trailhead has a spacious parking lot, but keep in mind that this is a popular and heavily trafficked hike – spots fill up quickly, especially during peak hours.
🎟️ A Red Rock Pass is NOT required to park at the Fay Canyon Trailhead!
To reach the Fay Canyon Arch, begin hiking along the Fay Canyon Trail. In about 0.6 miles, there will be an unmarked side trail to the right.
I recommend downloading the AllTrails offline maps, so you don’t miss the turn. Unlike the main trail, this path is narrower, rougher, and less defined, but it’s still fairly easy to follow.
Although the Fay Canyon Trail is great for hikers of all skill levels, the Fay Canyon Arch Trail is not for everyone – know your limits!
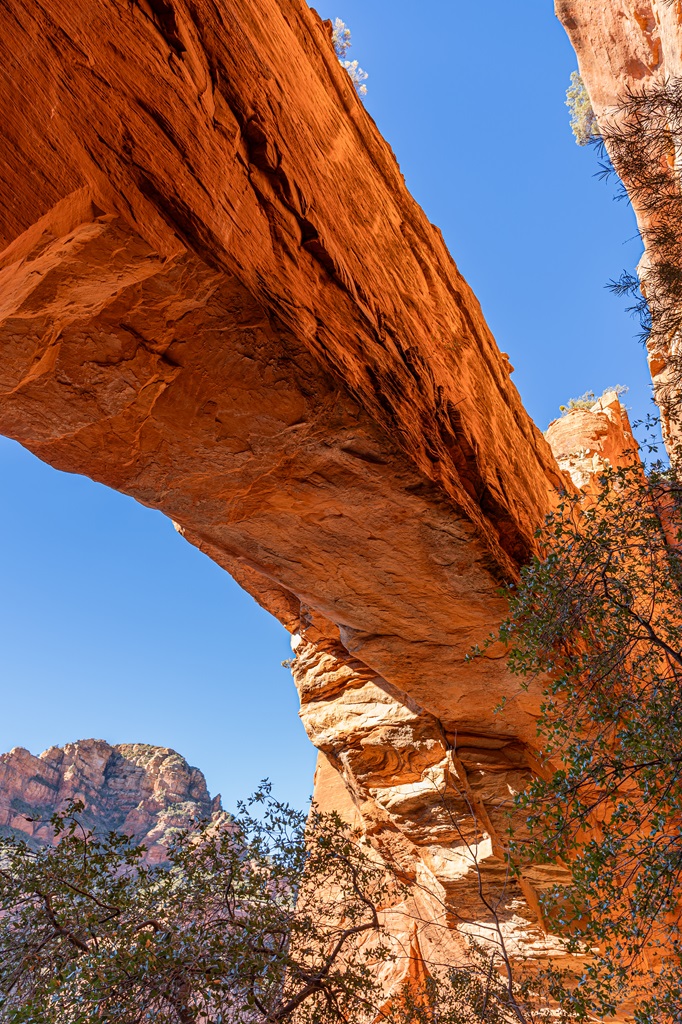
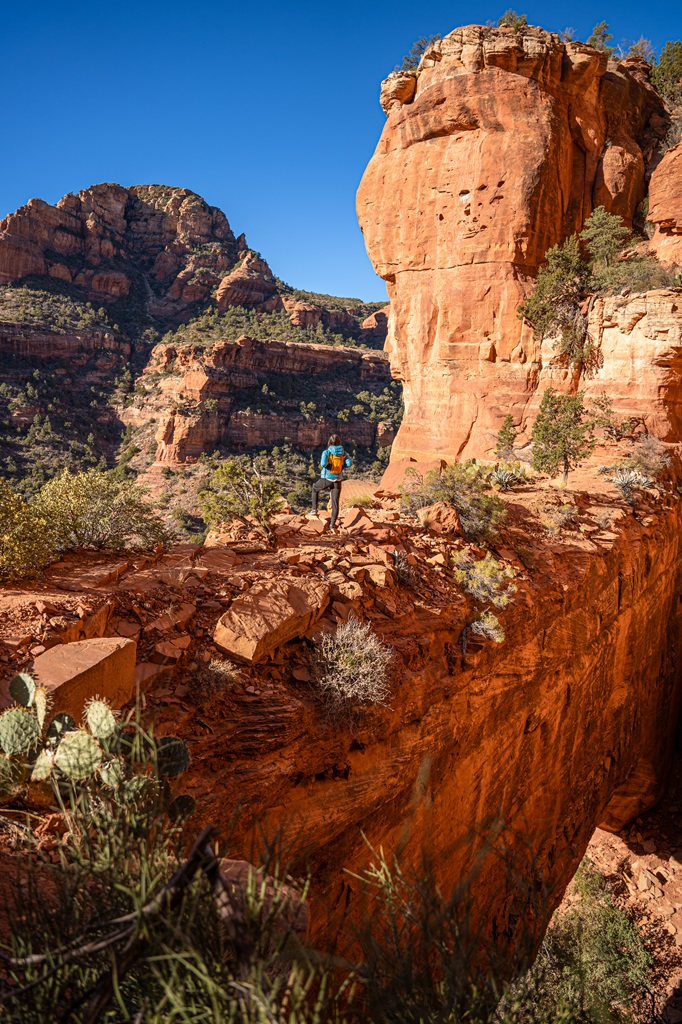
The up-close view of the arch is absolutely breathtaking, and the distant red rock scenery makes it even more spectacular. If you have time, I recommend completing the rest of the Fay Canyon Trail.
With its towering red cliffs, shaded path, and lush desert landscape, the Fay Canyon Trail is a great hike for anyone looking to explore Sedona’s beauty without too much effort.
For those looking to add a challenge, the climb to Fay Canyon Arch provides a thrilling detour with incredible views!
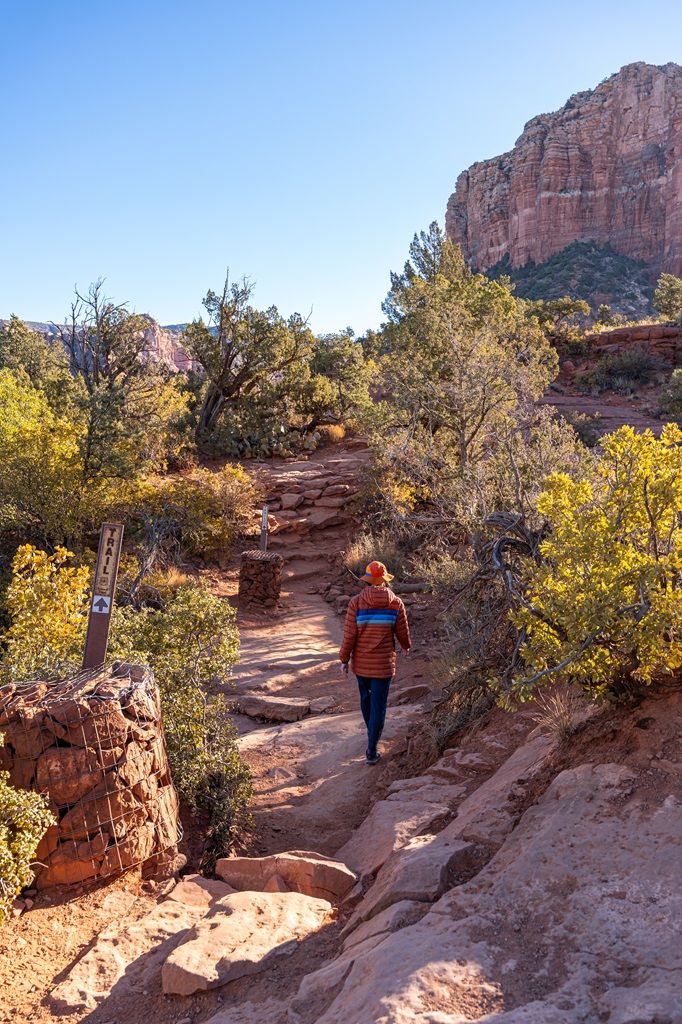
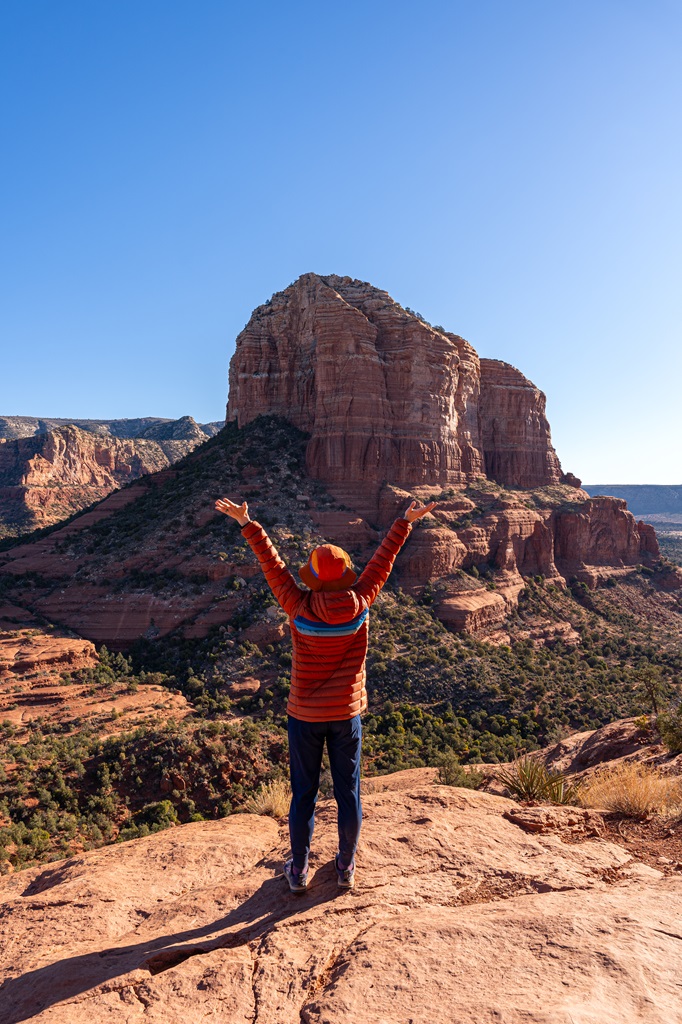
7. Bell Rock Climb
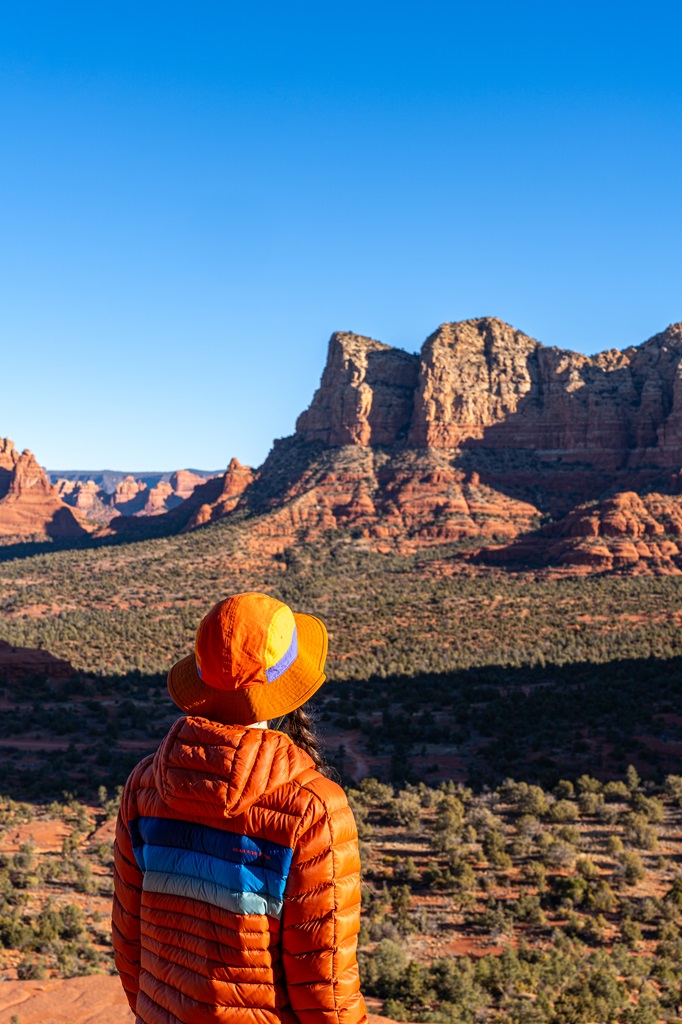
Starting Point: Courthouse Vista
Length: 1 mile
Elevation Gain: 400 feet
Difficulty: Moderately challenging
Hiking Time: 45 minutes to 1 hour
Route Type: Out-and-back
Pet-friendly? Yes, must be on leash
Hike Features: Fun scramble, amazing views of Sedona’s red rock landscape
The Bell Rock Trailhead is located at Courthouse Vista where there is a fairly big parking area with pit toilets.
🎟️ A Red Rock Pass is required to park at Courthouse Vista and Yavapai Point Trailhead!
If the main parking lot is full, there’s overflow parking at Yavapai Point Trailhead, about 0.5 miles from Courthouse Vista.
The hike starts along the Bell Rock Trail and quickly merges onto the Bell Rock Climb section which is well-marked with signs and cairns.
✅ Tip: Download the AllTrails map if you need help navigating this trail!
The official trail ends on a rocky platform. From there, you can climb as high as you feel comfortable – just be mindful of your limits.
My husband and I climbed up a little bit past the end of the official trail but not too far. It gets real dicey real quick!
We debated on climbing higher, but we didn’t have proper shoes for any class III+ routes (which is what it looked like from below).
Upon further research, I found out that you can climb all the way to the top, but it requires tackling class III to IV routes. Only do this if you have efficient climbing skills and proper gear!!
The easy scrambles near the bottom of Bell Rock are doable for most people and super fun. I highly recommend adding the Bell Rock Climb to your adventurous Sedona itinerary!
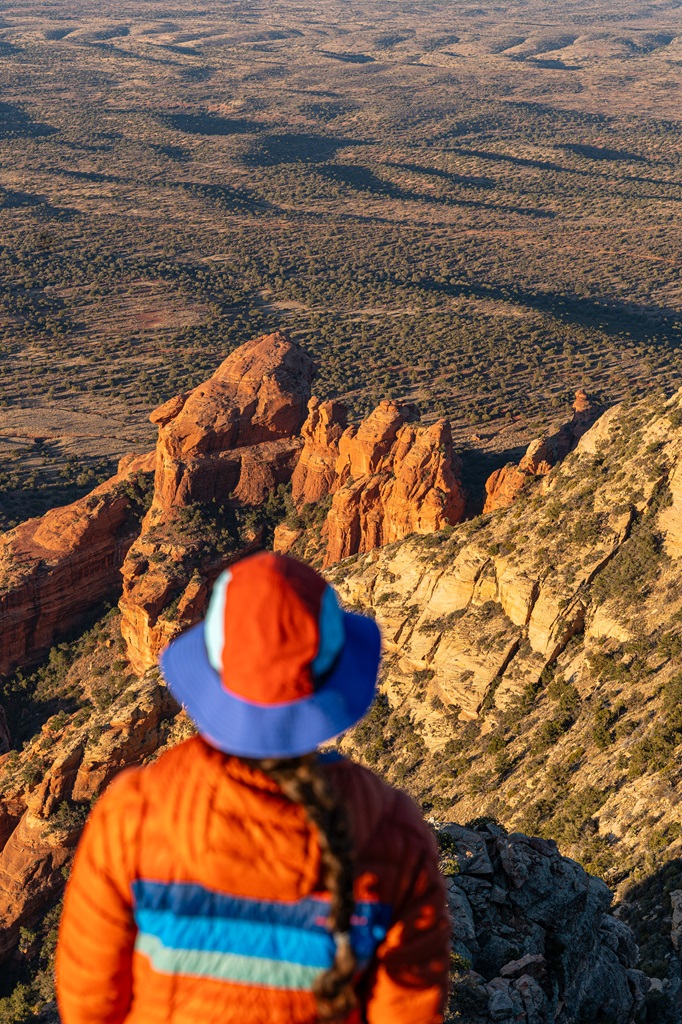
8. Bear Mountain Trail
Starting Point: Bear Mountain Trailhead
Length: 4.6 miles roundtrip
Elevation Gain: 2,000 feet
Difficulty: Challenging
Hiking Time: 3 to 4.5 hours
Route Type: Out-and-back
Pet-friendly? Yes, must be on leash
Hike Features: Easy rock scrambling, amazing views, a few false summits, Bear Mountain summit
✨ READ THIS: Bear Mountain Hiking Guide
Rising to 6,463 feet as Sedona’s second-highest peak, Bear Mountain is a challenging yet rewarding hike. It is named the toughest hike in Sedona. 😧
The strenuous 2.3-mile ascent climbs about 2,000 feet, with steep, rocky terrain and little shade.
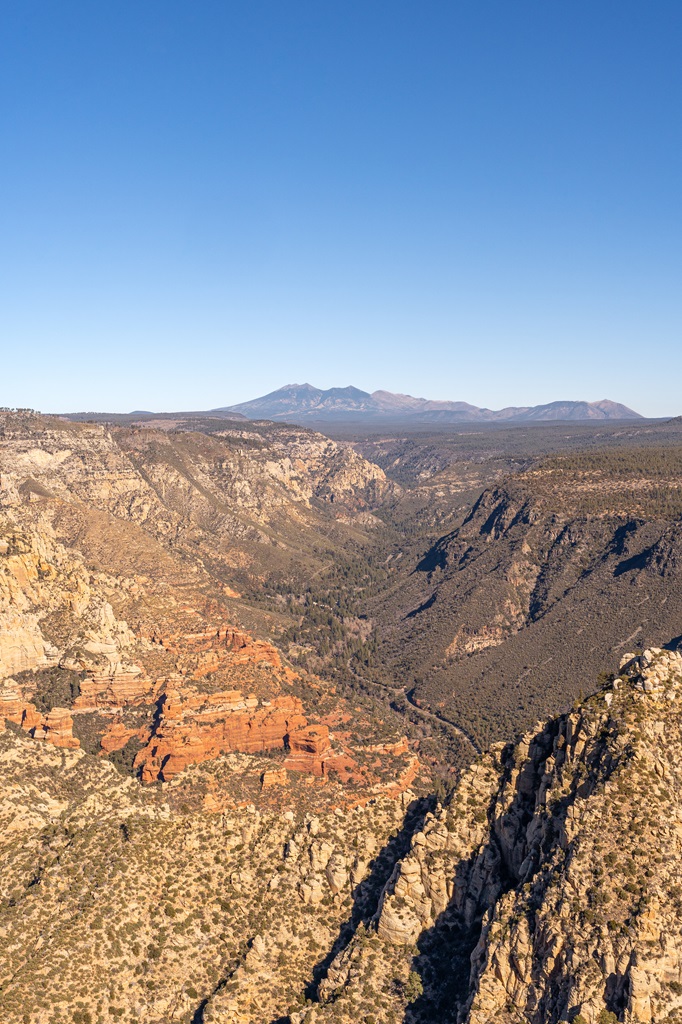
The trail offers breathtaking views throughout, showcasing Sedona’s iconic red rock formations and the distant San Francisco Peaks.
The Bear Mountain Trailhead offers a fairly spacious parking area, but it fills up quickly due to its popularity.
Since it serves as the starting point for both Bear Mountain and Doe Mountain, arriving early is essential to secure a spot. Vault toilets are available at the trailhead.
🎟️ A Red Rock Pass is required to park at the Bear Mountain Trailhead!
The Bear Mountain Trail begins across the street from the parking lot. The other trail that starts by the kiosk in the parking lot is the Doe Mountain Trail.
The Bear Mountain Trail consists of four steep sections consisting of switchbacks, lots of steps, and rock scrambling with a few breaks of flat or gentle incline in between each hard section.
🌄 This is another hike that is great to start before sunrise for multiple reasons:
- Avoid huge crowds
- Beat the heat
- Watch the sunrise
- Have plenty of time to complete this challenging hike
There are a few false summits, so don’t be fooled! There will be a “Trail End” sign on the Bear Mountain summit.
From the summit, you’ll be rewarded with panoramic views stretching across Sedona’s red rock landscape.
Hiking Bear Mountain in Sedona is a demanding yet incredibly rewarding adventure. Prepare properly, pace yourself, and enjoy the journey!
9. Doe Mountain Trail
Starting Point: Doe Mountain Trailhead
Length: 1.5 miles roundtrip
Elevation Gain: 515 feet
Difficulty: Moderately challenging
Hiking Time: 2 hours
Route Type: Out-and-back
Pet-friendly? Yes, must be on leash
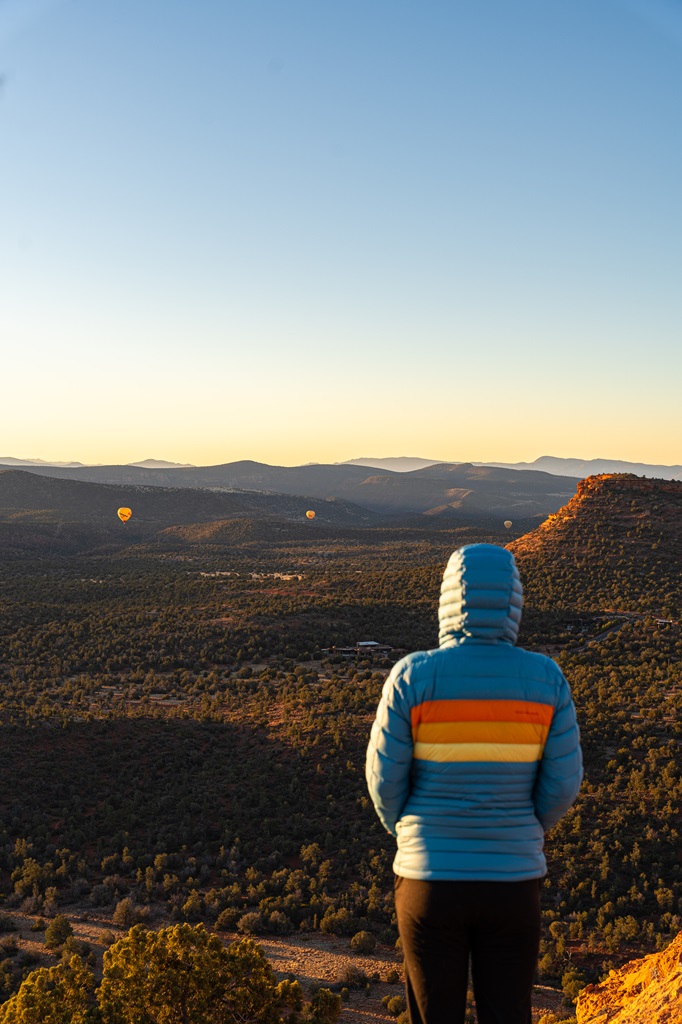
Hike Features: A few easy rock scrambling sections, panoramic views of Sedona’s red rock landscape, and a chance to see hot air balloons at sunrise
✨ READ THIS: Doe Mountain Hiking Guide
Well-marked, short, and easy to follow, the Doe Mountain Trail is a favorite of ours, especially at sunrise! As the sun comes up, it lights up the red rocks with a warm, golden glow that’s absolutely stunning.
And if you’re lucky, you might witness hot air balloons in the distance during golden hour making for a magical experience.
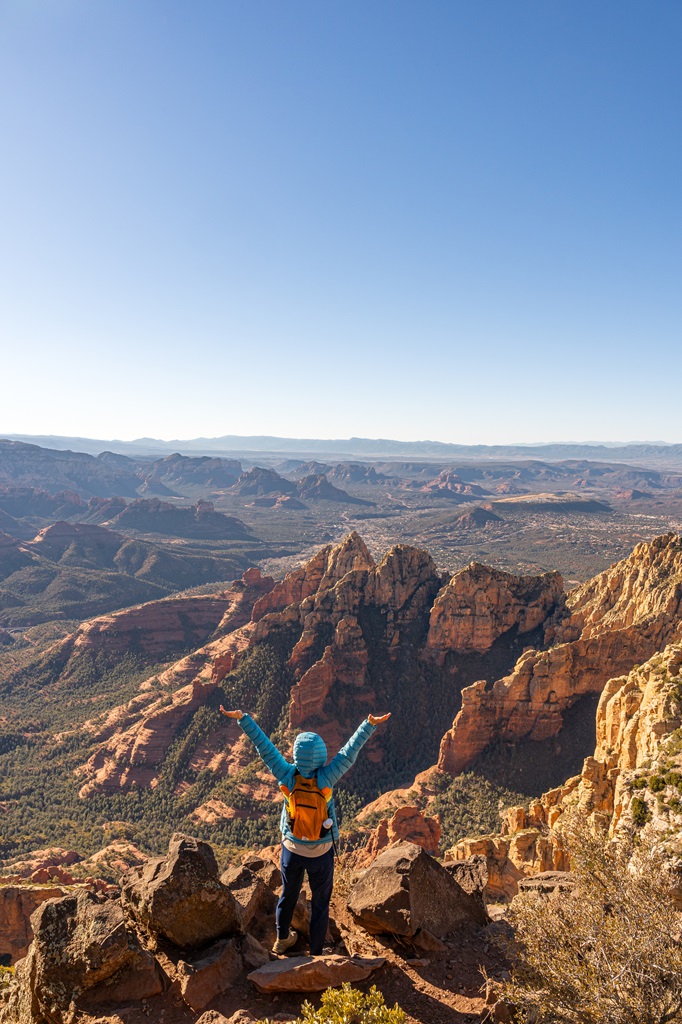
This moderately challenging hike rewards you with a flat-topped summit (aka mesa) offering sweeping panoramic views of Sedona’s stunning red rock formations.
The Doe Mountain Trailhead offers a fairly spacious parking area, but it fills up quickly due to its popularity.
Since it serves as the starting point for both Bear Mountain and Doe Mountain, arriving early is essential to secure a spot.Vault toilets are available at the trailhead.
🎟️ A Red Rock Pass is required to park at the Doe Mountain Trailhead!
The Doe Mountain Trail begins right next to the kiosk in the parking lot – just be sure not to accidentally take the Bear Mountain Trail, which starts across the street!
Starting from the parking area, the path makes a gradual climb up the mesa, weaving through a couple of switchbacks before reaching the top.
While mostly manageable, some sections get a bit rocky, requiring light scrambling – but nothing too difficult. The trail seems to end at an overlook offering breathtaking views.

This hike can be extended to a loop that follows the rim of Doe Mountain which offers more amazing views! If you choose to explore the full loop, the hike totals 2.4 miles with 620 feet of elevation gain.
If you’re able, download the AllTrails map for the Doe Mountain Loop to help you stay on the most-used path around the rim of the mesa.
I highly recommend hiking to the top for sunrise to experience the magical golden-hour glow, and you might even catch hot air balloons floating through the sky.
With its manageable distance, moderate challenge, and incredible scenery, it’s a must-add to your Sedona itinerary!
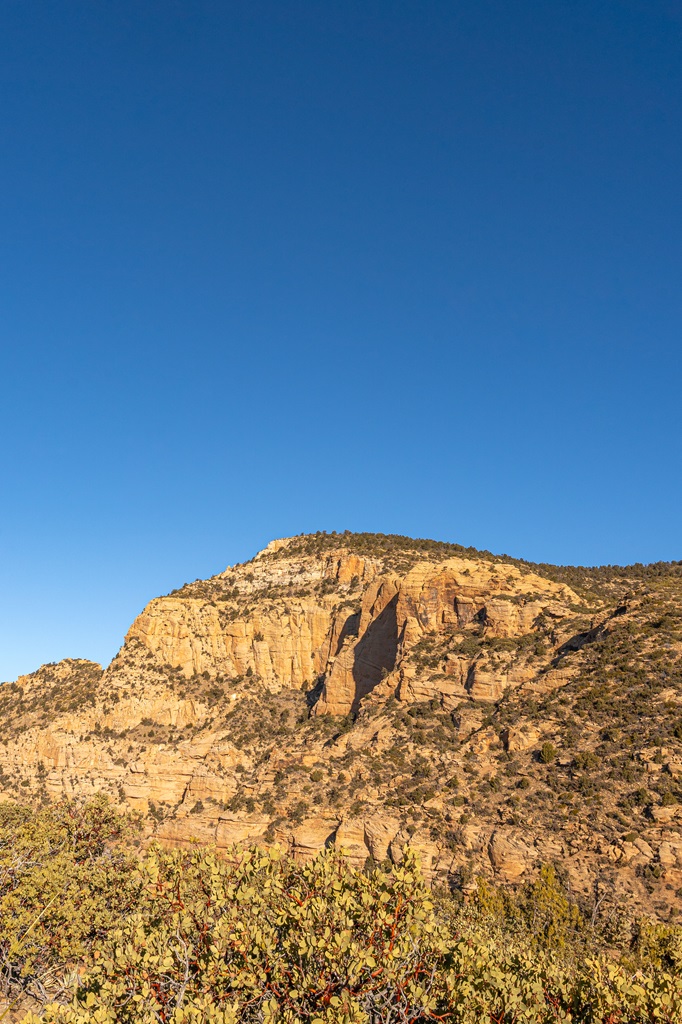
10. Wilson Mountain Trail
Starting Point: Midgley Bridge
Length: 12 miles roundtrip
Elevation Gain: 2,800 feet
Difficulty: Challenging
Hiking Time: 6 to 7.5 hours
Route Type: Out-and-back
Pet-friendly? Yes, must be on leash
Hike Features: Amazing views the entire way, Sedona Overlook, and North Canyon Overlook
✨ READ THIS: Wilson Mountain Hiking Guide
Wilson Mountain, the highest peak in Sedona at 7,122 feet, is a hike you need to add to your Sedona itinerary!
The trail leads to two different overlooks offering some of the most breathtaking panoramic views of Sedona and beyond.
If you’re up for a challenging climb with unmatched scenery and fewer crowds, this hike is perfect for you!

The Wilson Mountain Trailhead is located just north of Midgley Bridge, where you’ll find a small parking lot.
This area also serves as a trailhead for other hikes and features a scenic vista point overlooking the bridge, along with a picnic area.
While there are vault toilets available, there are no water sources, so be sure to bring plenty of water.
🎟️ A Red Rock Pass is required to park at Midgley Bridge!
The trail begins behind the bathrooms to the right – be sure not to walk past them, or you might end up on the wrong trail, like we did!
We accidentally started hiking on the Wilson Canyon Trail, but luckily, we caught our mistake quickly and didn’t have to backtrack too far.
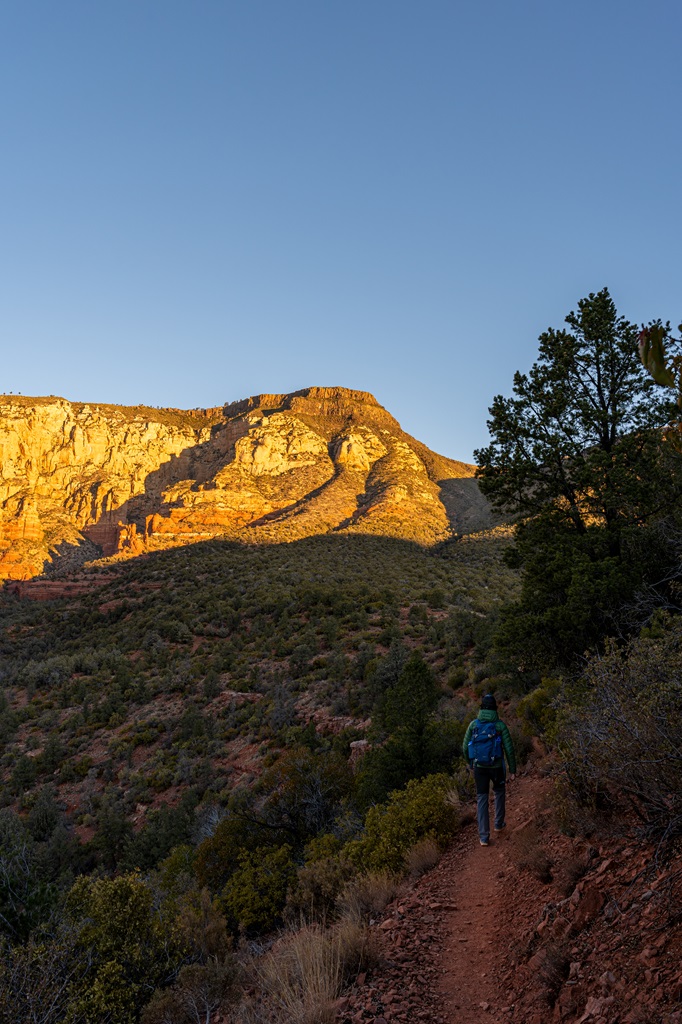
Since this hike is long and strenuous and the trail is exposed, it is a good idea to start this hike as early as possible to beat the heat and have plenty of time to complete this hike.
An alternate trail that provides a bit more shade and is just slightly shorter is the North Wilson Trail which starts from the Encinoso Picnic Area.
The first overlook you will reach once at the top of Wilson Mountain is the Sedona Overlook and further down the trail will be the North Canyon Overlook.
The Sedona Overlook offers a panoramic bird’s-eye view of Sedona and its surrounding landscapes, including Oak Creek Canyon, Coffee Pot Rock, and Capitol Butte.
The North Canyon Overlook offers views of Sterling Canyon, Oak Creek Canyon, and the San Francisco Peaks.
But be careful on the way down, as the rocky trail can make it difficult to find solid footing. Hiking poles are definitely recommended to help with stability.
If you’re looking for a challenging adventure away from Sedona’s more crowded hikes, Wilson Mountain is an unforgettable trek!
Best Hikes in Sedona Arizona Map
Sedona Hiking Trails: Best Time to Go
The best times to hike the trails in Sedona are typically in the spring (March to May) and fall (September to November). During these months, the weather is usually perfect for hiking and other outdoor activities.
This is also peak season for Sedona so expect many of the trails to be busy. Hiking early or later in the day can help avoid crowds!
✨ READ THIS: Best Sunrise Hikes in Sedona with Epic Views
Seasonal Considerations
🍂 Fall (September – November): This is a popular time to visit Sedona due to ideal weather conditions making it perfect for outdoor adventures.
❄️ Winter (December – February): This season is probably my favorite time to explore Sedona because the crowd-level is at its lowest.
My husband and I spent two weeks hiking in Sedona in January 2025, and we had the best time! We started each day before sunrise and had almost every single trail to ourselves.
Every hike was peaceful and incredible despite the temperatures being below freezing every morning. Unfortunately, we have yet to see Sedona covered in a dusting of snow, but hopefully one day!
⚠️ If there’s snow or ice on any of the trails, exercise caution and use good judgment – slippery conditions can make this hike dangerous!
🌷 Spring (March – May): This season offers pleasant temperatures and beautiful desert blooms, but trails will be busy as it’s a popular time to visit Sedona.
☀️ Summer (June – August): Visiting Sedona in the summer is not recommended due to extreme heat. Some trails in Sedona are exposed and challenging – this combination can increase the risk of dehydration and heat-related illness.
Follow these tips to stay safe in the summer:
- Start early in the morning or later in the day to avoid peak heat
- Bring plenty of water – more than you think you’ll need
- Wear sun-protective clothing like a hat, sunglasses, and lightweight clothing and apply sunscreen
Sedona Hiking Tips
1. Start Early: An early start not only helps to avoid crowds but also avoid peak heat and ensures you have enough time to complete any of Sedona’s hiking trails.
2. Red Rock Pass Required: This pass is required for parking at several of the trailheads, or you can use an America the Beautiful Pass.
You can purchase one online or at the trailhead kiosk:
- $5 for a day
- $15 for a week
- $20 for an annual pass
Learn more about the Red Rock Pass Program HERE.
3. Download Offline Maps: Most of the trails, besides the ones following a social trail, are well-marked and easy to follow but having offline maps on your phone can give you peace of mind.
4. Check the Weather: Avoid hiking in extreme heat, and be cautious if snow or ice is present, as the trail becomes dangerously slippery.
5. Stick to the Most-used Social Trail: Some hikes require follow a social trail – try your best to follow the most-used path to minimize damage and avoid unnecessary erosion.
6. Respect the Ruins: Look, but don’t touch any ancient ruins and petroglyphs that you may come across. These are sacred and protected sites!
7. Wear Sturdy Hiking Boots: Some of the trails involve steep, rocky terrain, so wear solid footwear with good traction and ankle support.
8. Bring Hiking Poles: They’ll help with balance on the loose, uneven terrain, especially on the descent.
9. Summer Safety Tips:
- Take frequent breaks in shaded areas.
- Be sure to bring plenty of water to stay hydrated.
- Eat high-carb and salty snacks to help keep your energy levels up and replenish electrolytes.
- Wear lightweight, breathable clothing, a wide-brimmed hat, and sunscreen to protect yourself from the sun.
- Try to hike during the cooler parts of the day, such as early morning or late afternoon.
10. Keep Sedona Pristine for Future Generations: Take the Sedona Cares Pledge and follow Leave No Trace principles.

Hiking in Sedona Packing List
👚 Layers of Clothing (top) – Pack a moisture-wicking base layer, a fleece mid-layer, an insulated jacket, and an outer shell to protect you from the elements, such as rain and wind. You may not need all these layers, especially in the summer months, but it’s always best to be over-prepared!
Check out my favorite tops 👇
- Base layer: REI Co-op Sahara Shade Hoodie (warm/mild conditions) and REI Co-op Midweight Long-Sleeve Base Layer (cooler conditions)
- Fleece mid layer: Cotopaxi Teca Fleece Full-Zip Jacket
- Down mid layer: Cotopaxi Fuego Hooded Down Jacket
- Outer shell: In the summer I always pack a light windbreaker, such as the Cotopaxi Teca Crop Windbreaker or the RevolutionRace Unit Light Windbreaker. If cold, windy, and rainy conditions are in the forecast (or there’s a slight possibility), I make sure to pack my Patagonia Torrentshell 3L Jacket.
🩳 Hiking Shorts or Pants – Pack a comfortable, durable, and stretchy pair of hiking shorts or pants. Also think about what conditions you might run into, such as warm or cold temperatures, wind and/or rain, bugs, and overgrown trails.
Check out my favorite hiking bottoms 👇
- Cotopaxi Losdos Zip-Off Pants
- RevolutionRace Breezy Ankle Outdoor Pants
- Baleaf Fleece-Lined Jogger Pants
- RevolutionRace Summit Pocket Tights
- Revolution Race Hike & Dive Shorts
🥾 Hiking Footwear – Bring a good pair of hiking boots or shoes with good traction. If I’m not expecting to hike in too much mud or snow, my go-to hiking shoes are the Altra Lone Peak trail runners. They have a wide-toe box, 0 mm heel-to-toe drop, and MaxTrac rubber outsole. Plus, they’re lightweight and so comfy!
🧦 Socks – Moisture-wicking, quick-drying socks are the way to go. My favorite pair of hiking socks are Darn Tough Hiker Micro Crew Cushion Socks. Always pack an extra pair!
🎒 Day Pack – What you plan to do (sightseeing, hiking, etc.), determines what size pack you’ll need. Here is what I typically bring based on what I’m doing that day 👇
- Short walks and sightseeing: Cotopaxi Kapai 1.5L Del Dia Hip Pack
- Short, easy to moderate day hikes: REI Co-op Flash 22L Pack
- Long, moderate to challenging day hikes: REI Co-op Trail 25L Pack or Cotopaxi Luzon Del Dia 24L Pack
🥢 Trekking Poles – Essential for stability, balance, and support when hiking trails, especially on tough, rocky, and uneven terrain. I use REI Co-op Trailmade Trekking Poles and love them!
❄️ Microspikes – Bring a pair of microspikes if you’re visiting in the winter and you’re planning to hike along icy trails. They will give you good traction to avoid slipping! I use Black Diamond Access Spike Traction Device.
🦟 Mosquito/Bug Repellants – In the warmer months, be prepared for annoying gnats, mosquitoes, and flies. Wear long-sleeve clothing, a head net, and use bug spray.
🧤 Extra Warm Layers – If you expect cooler conditions or hiking to higher elevations, make sure to pack extra layers for added warmth, such as gloves, beanie, neck gaiter, and a light jacket.
🗺️ Navigation – Carry a physical topographic map, compass, a satellite messenger (or personal locator beacon), and download offline maps to help you stay on course, find your way in unfamiliar terrain, and call for help if needed.
🔦 Headlamp/Flashlight – A reliable light source with extra batteries, in case you end up hiking in the dark or need it for emergency situations.
💧 Water – Water bottles to carry sufficient water to stay hydrated, along with a filtration system or purification tablets if you plan to refill from natural sources.
🍕 Food – Energy-rich snacks or meals to keep your energy levels up during the hike.
😎 Sun Protection – Sunscreen, sunglasses, and a sunhat to protect yourself from harmful UV rays, even when it’s cloudy. Also, polarized sunglasses are important when it’s bright outside and to reduce glare from reflective surfaces like water, snow, and roads.
🩹 First-Aid Kit – A basic first-aid kit with items like bandages, antiseptic, pain relievers, and any personal medications you may need.
🥶 Emergency Shelter – Pack an emergency bivy sack or space blanket for shelter in case of sudden weather changes.
🔥 Fire – A lighter, matches, or fire starter to help you build a fire for warmth or signaling in case of emergency. Along with matches, I also carry a multi-tool carabiner that has a fire starter, utility blade, screwdriver, and bottle opener.
🗡️ Multi-Tool and Repair Kit – A versatile tool/knife and repair kit to handle any task, from preparing food to making repairs.
💩 Waste Disposal Supplies – WAG bags, trowel, toilet paper, pee cloth, wipes, Ziploc bags – be sure to pack out everything!
More Things to Do in Sedona, Arizona
I promise there’s more exciting things to do in Sedona besides hiking. But hiking is the BEST thing to do – in my personal opinion. 😉
Here’s a list of some more fun things to do when visiting Sedona, Arizona!
1. Visit the Chapel of the Holy Cross
2. Book an exciting Jeep Tour
3. See the stars with a Sedona stargazing tour
4. Enjoy a hot air balloon ride at sunrise
5. Browse the art galleries in Tlaquepaque Arts and Shopping Village
6. Take a pottery or painting class
7. Have a picnic at Crescent Moon Ranch
8. Go swimming at Slide Rock State Park
9. Watch sunrise at the Sedona Airport Overlook
10. Visit the Sedona Heritage Museum
Conclusion
If you have an adventurous soul and you’re planning at trip to Sedona, you must add a few (if not all) of these hikes to your itinerary!
Most people tend to be short on time when going on vacations and only have time for a few hikes.
If that’s the case, I highly recommend these 5 hikes:
- Cathedral Rock (at sunset)
- Devil’s Bridge (at sunrise)
- Subway Cave (at sunrise)
- Soldier Pass Trail (at sunrise)
- Doe Mountain (at sunrise)
There is so much to explore in Sedona, you would have to book a very long vacation to do and see it all!
Always remember to follow Leave No Trace principles, respect Native American sites, and have patience and kindness towards others. 💛
If this guide inspires you to tackle the best hikes in Sedona, Arizona, I’d love to hear about your adventure. Leave a comment and share your experience!
Enjoyed this post? Pin for later!