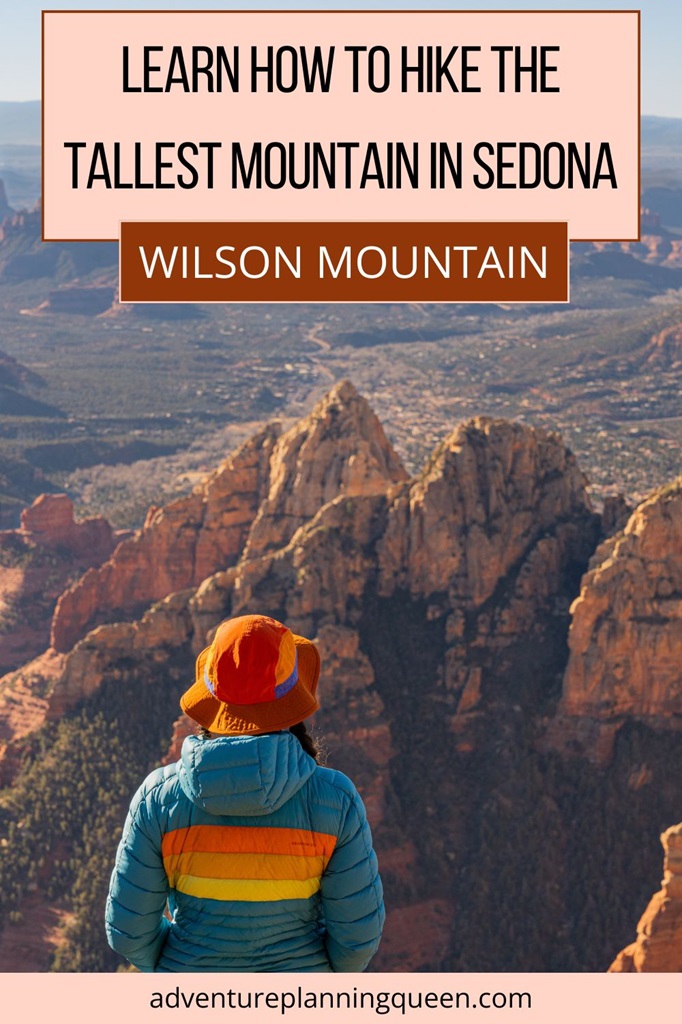
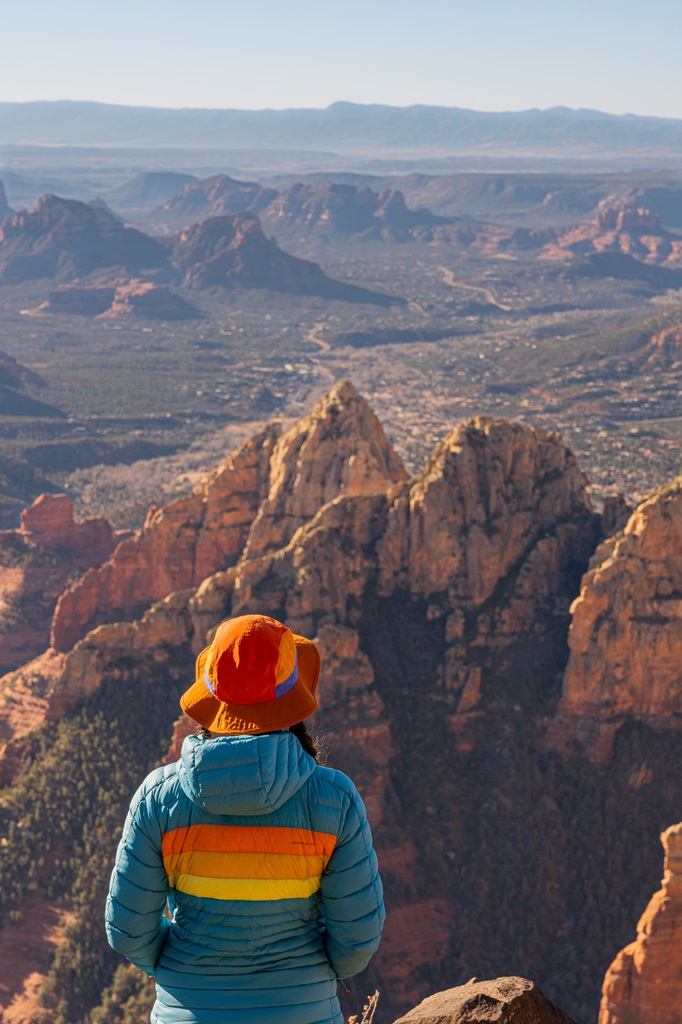
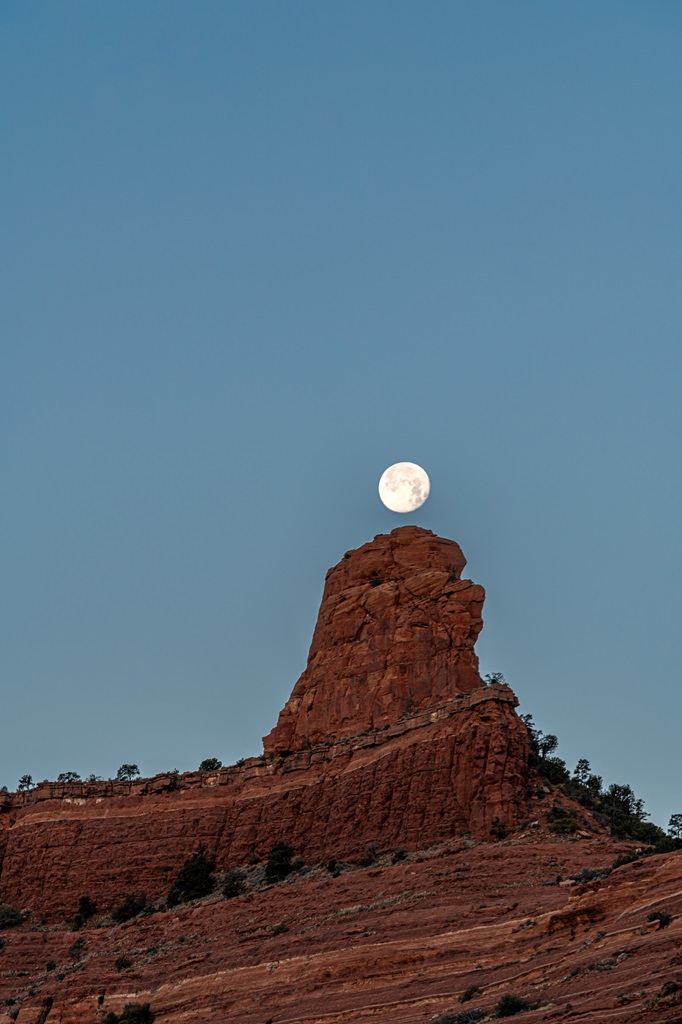
Wilson Mountain, the highest peak in Sedona at 7,122 feet, is a hike you need to add to your Sedona itinerary! 😍
The trail leads to two different overlooks offering some of the most breathtaking panoramic views of Sedona and beyond. Just be prepared for a tough climb!
Unlike Sedona’s more crowded trails, such as Cathedral Rock and Devil’s Bridge, Wilson Mountain offers more solitude.
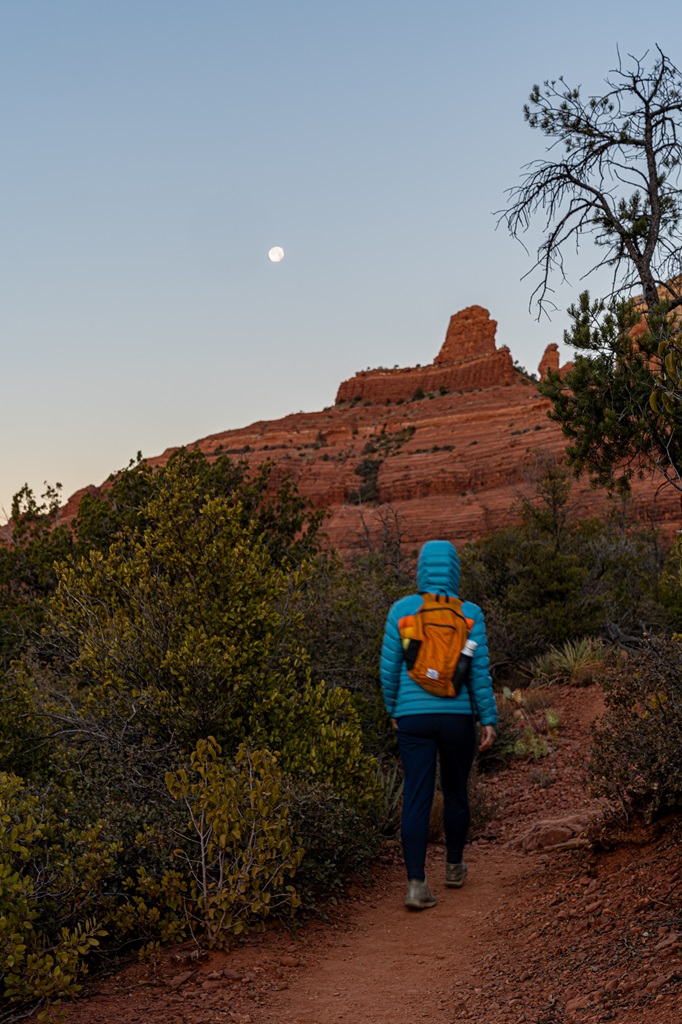
When my husband and I hiked to the top of Wilson Mountain for the first time in January 2025, we had each overlook to ourselves.
While we encountered a few hikers on our descent, the small parking lot was full due to other trails and vista points in the area.
If you’re up for a challenging climb with unmatched scenery and fewer crowds, this hike is perfect for you! Read through my ultimate guide to hiking Wilson Mountain for everything you need to know before hitting the trail. 🙌
Affiliate Disclaimer: Some links on this page may be affiliate links, meaning I may earn a small commission at no extra cost to you. As an Amazon Associate, I earn from qualifying purchases. Thanks for supporting the blog! 🫶
- Wilson Mountain in Sedona: Trail Stats and Maps
- Wilson Mountain Parking and Trailheads
- Best Time to Hike Wilson Mountain in Sedona
- Hike the Wilson Mountain Trail: Step-by-Step Directions
- Wilson Mountain Hiking Tips
- Hiking in Sedona Packing List
- Wilson Mountain Trail vs North Wilson Trail: Which One is Right for You
- Conclusion
Wilson Mountain in Sedona: Trail Stats and Maps
Named after Richard Wilson, a bear hunter killed by a grizzly in 1885, Wilson Mountain is the tallest peak in Sedona at 7,122 feet.
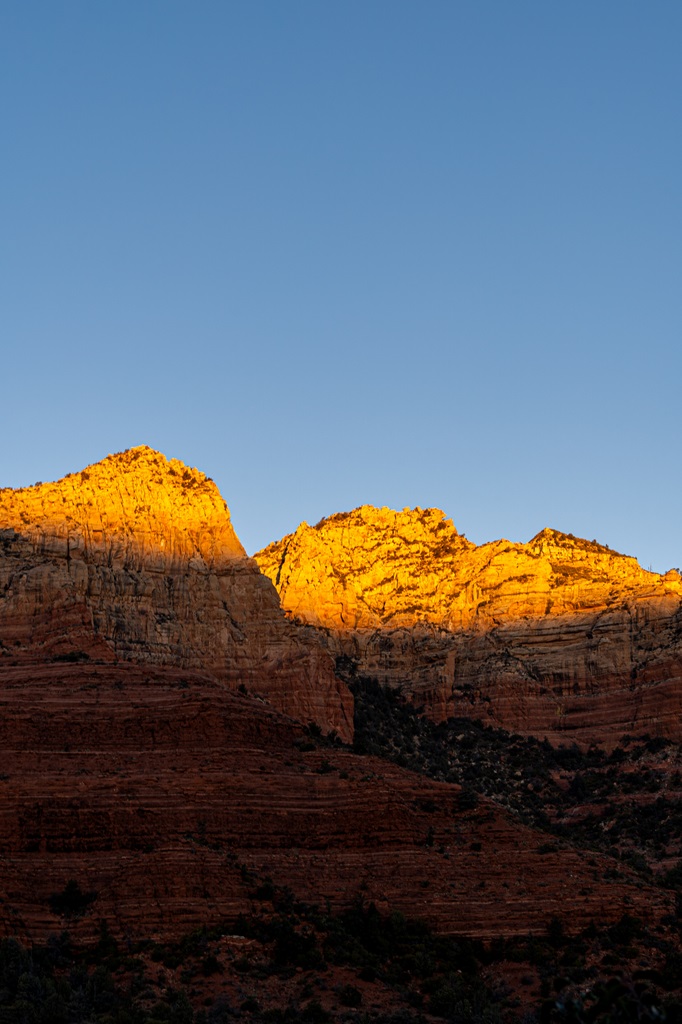
This towering mesa offers breathtaking views of Oak Creek Canyon, Sedona’s iconic red rock formations, and distant landmarks like the San Francisco Peaks and Verde Valley.
Reaching the summit is a strenuous adventure, with two main trails leading to the top:
- Wilson Mountain Trail from Midgley Bridge
- North Wilson Trail from Encinoso Picnic Area
The Wilson Mountain Trail (south side) is the more exposed and scenic route, while the North Wilson Trail (north side) provides a cooler, more wooded ascent.
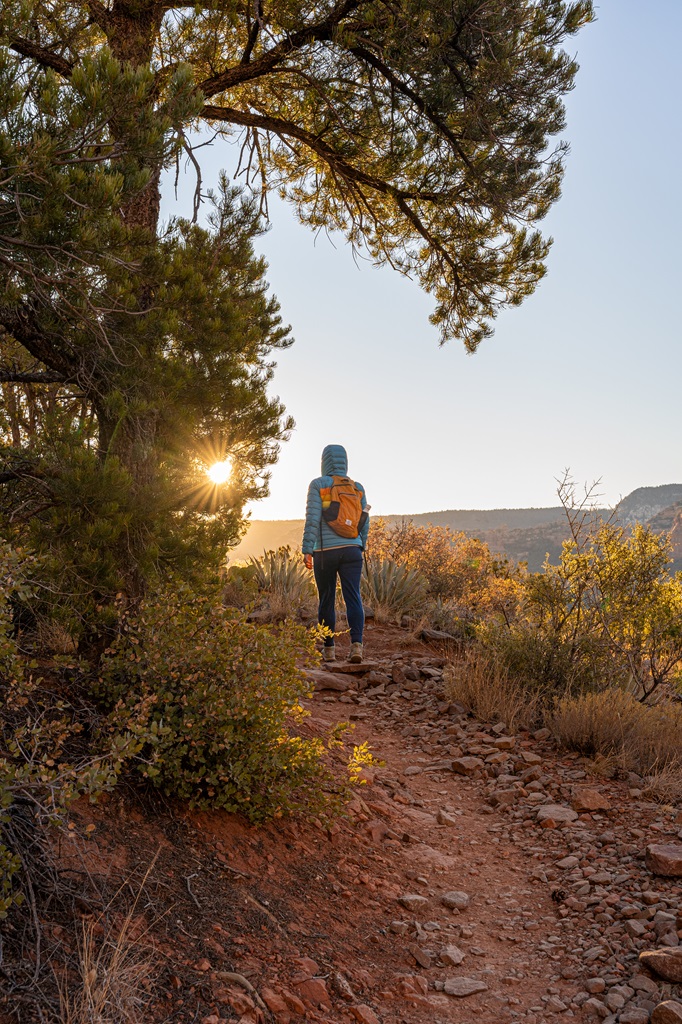
My husband and I took the Wilson Mountain Trail and, while we loved the incredible views, the steep climb and loose rocks made for a challenging trek. If you’re up for a tough but rewarding hike, I highly recommend it!
Since we hiked the Wilson Mountain Trail, I’ll break down this route in detail with step-by-step directions and pictures.
Don’t worry, I’ve got the North Wilson Trail covered too! I’ll give you an overview of this route so you can compare both options and choose the best one for your adventure.
Wilson Mountain Trail Stats and Map
Starting Point: Midgley Bridge Picnic Area
Length: 12 miles roundtrip
Elevation Gain: 2,800 feet
Difficulty: Challenging
Hiking Time: 6 to 7.5 hours
Route Type: Out-and-back
Pet-friendly? Yes, must be on leash
Hike Features: Amazing views the entire way, Sedona Overlook, and North Canyon Overlook
North Wilson Trail Stats and Map
Starting Point: Encinoso Picnic Area
Length: 10 miles roundtrip
Elevation Gain: 2,700 feet
Difficulty: Challenging
Hiking Time: 5.5 to 6.5 hours
Route Type: Out-and-back
Pet-friendly? Yes, must be on leash
Hike Features: Sedona Overlook and North Canyon Overlook
Is a Red Rock Pass required?
A Red Rock Pass is required to park at both the Wilson Mountain Trailhead and North Wilson Trailhead, or you can use an America the Beautiful Pass if you have one.
You can purchase a Red Rock Pass online in advance or at the self-pay kiosk at either trailhead.
🎟️ The Red Rock Pass costs:
- $5 for a day
- $15 for a week
- $20 for an annual pass
Learn more about the Red Rock Pass Program HERE.
Wilson Mountain Parking and Trailheads
Wilson Mountain Trailhead at Midgley Bridge Picnic Area:
The Wilson Mountain Trailhead is located just north of Midgley Bridge, where you’ll find a small parking lot.
This area also serves as a trailhead for other hikes and features a scenic vista point overlooking the bridge, along with a picnic area.
While there are vault toilets available, there are no water sources, so be sure to bring plenty of water.
Given the limited parking, it’s best to arrive early. If the parking lot is full, you can drive 3.5 miles to the North Wilson Trailhead and hike the North Wilson Trail to reach the top of Wilson Mountain.
North Wilson Trailhead at Encinoso Picnic Area:
The North Wilson Trailhead starts at the Encinoso Picnic Area. Parking is limited, so arriving early is recommended, especially during peak hiking seasons in spring and fall.
Amenities here include vault toilets and a picnic area.
Best Time to Hike Wilson Mountain in Sedona
The best times to hike to Wilson Mountain are typically in the spring (March to May) and fall (September to November). During these months, the weather is usually perfect for hiking and other outdoor activities.
This is also peak season for Sedona so expect more people on the trails and full parking lots. Starting your hike early is the best way to beat the crowds and secure a parking spot!
✨ READ THIS: 10 Best Hikes in Sedona, Arizona
🍂 Fall (September – November): This is a popular time to visit Sedona due to ideal weather conditions making it perfect for outdoor adventures.
❄️ Winter (December – February): This season is probably my favorite time to explore Sedona because the crowd-level is at its lowest.
As I mentioned earlier, my husband and I hiked Wilson Mountain in January and had both overlooks completely to ourselves.
On our way down, we only passed a handful of hikers, making for a peaceful experience. However, it was very cold at the summit, with temperatures below freezing.
We were bundled up nicely in multiple layers which made spending time at the top more bearable.
🌷 Spring (March – May): This season offers pleasant temperatures and beautiful desert blooms, but trails will be busy as it’s a popular time to visit Sedona.
☀️ Summer (June – August): Visiting Sedona in the summer is not recommended due to extreme heat.
Many of the trails are exposed, and when combined with a challenging hike it can quickly lead to dehydration and heat-related illness.
Most of the Wilson Mountain Trail is exposed whereas the North Wilson Trail provides more shade. However, it can still get extremely hot, so it’s important to take extra precautions.
🥵 Follow these tips to stay safe in the summer:
- Start early in the morning or later in the day to avoid peak heat
- Bring plenty of water – more than you think you’ll need
- Wear sun-protective clothing like a hat, sunglasses, and lightweight clothing and apply sunscreen
Hike the Wilson Mountain Trail: Step-by-Step Directions
Wilson Mountain Trail
The trail begins behind the bathrooms to the right – be sure not to walk past them, or you might end up on the wrong trail, like we did!
We accidentally started hiking on the Wilson Canyon Trail, but luckily, we caught our mistake quickly and didn’t have to backtrack too far.
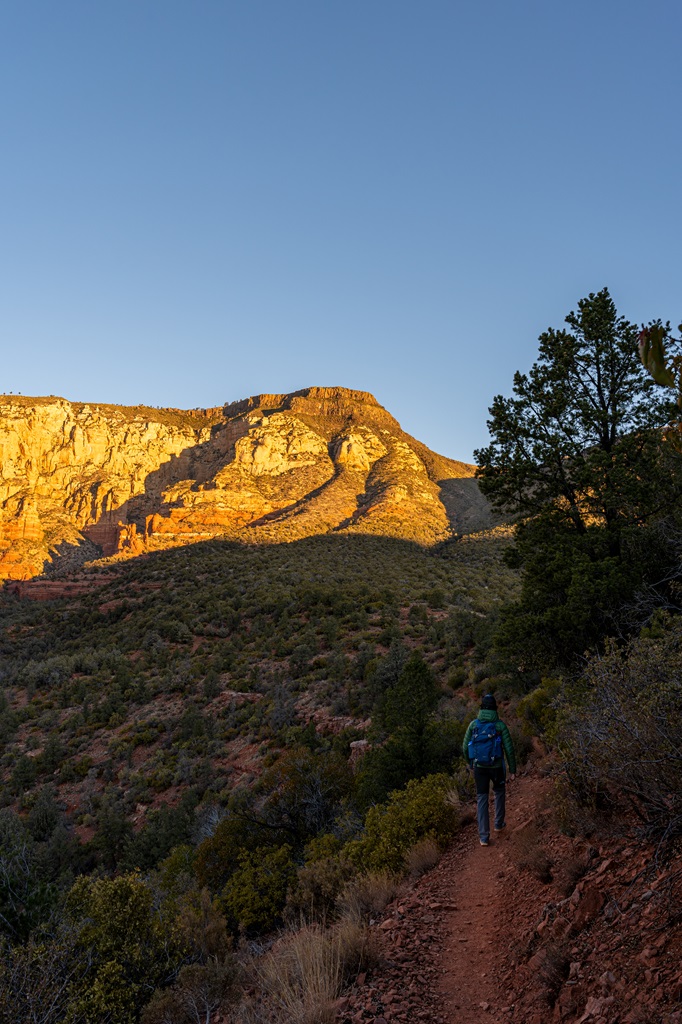
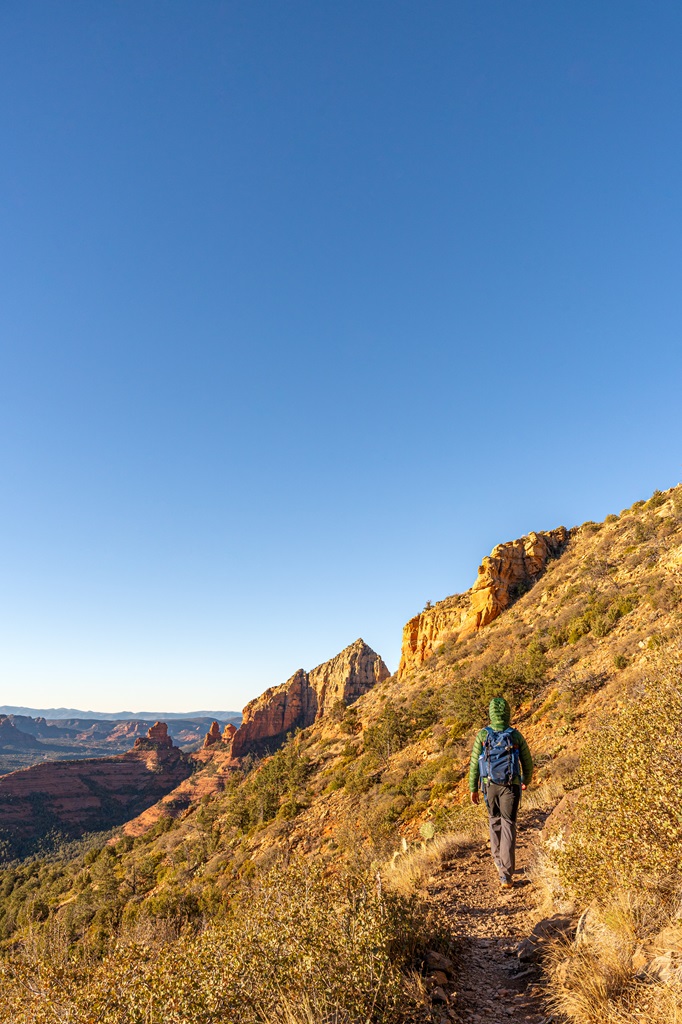
The hike starts with a gradual ascent for the first mile before transitioning into a steep climb with switchbacks leading up to the First Bench of Wilson Mountain.
One of the most challenging aspects of the Wilson Mountain Trail is the loose rocks covering the path.
Thankfully, the stunning views along the way help distract from the tough climb and the frustratingly rocky trail. 😉
First Bench of Wilson Mountain
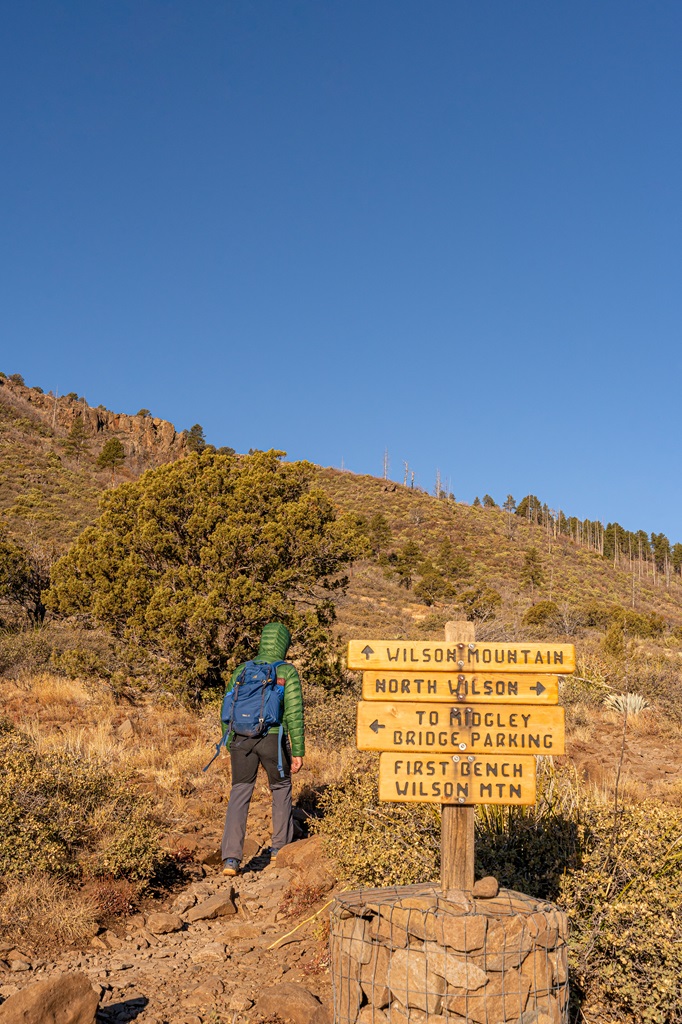
At 6,234 feet of elevation and 3 miles into the hike, you’ll reach the First Bench of Wilson Mountain.
This is where the Wilson Mountain Trail and North Wilson Trail merge. From here, the trail continues west, climbing toward the summit plateau.
While the elevation gain persists, it’s far less intense than the steep switchbacks before the First Bench. Soon you’ll reach the top of Wilson Mountain!
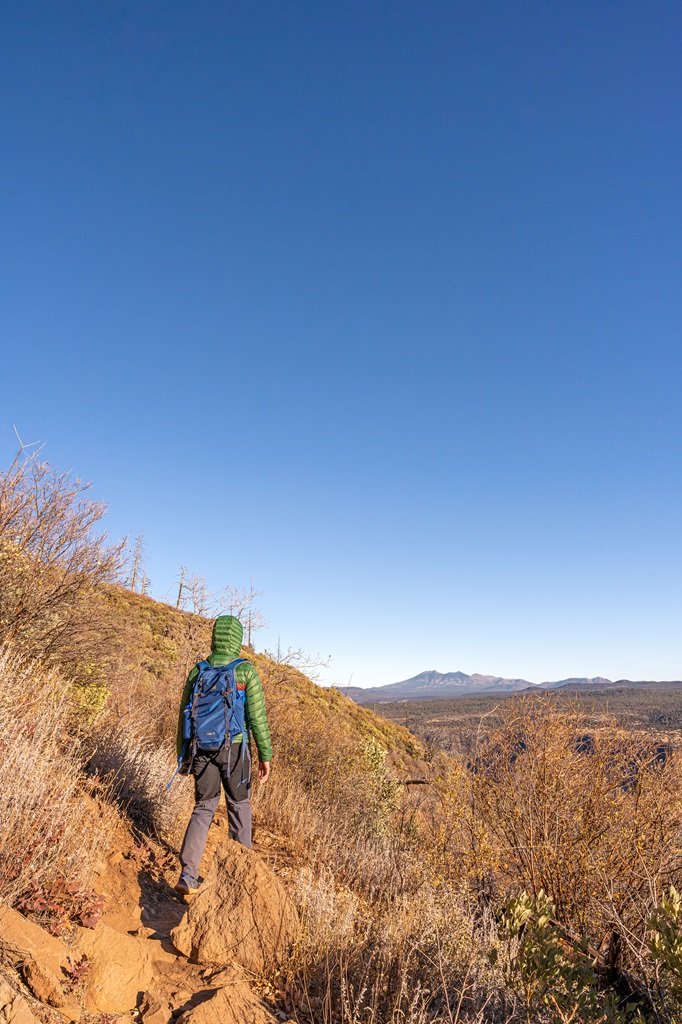
Unlike traditional mountain summits with a pointy peak, Wilson Mountain is a broad, forested plateau. Or mesa.
Apparently, it’s actually a mesa but a lot of people refer to the top as a plateau. That’s why I’ve been using those two words interchangeably to describe Wilson Mountain.
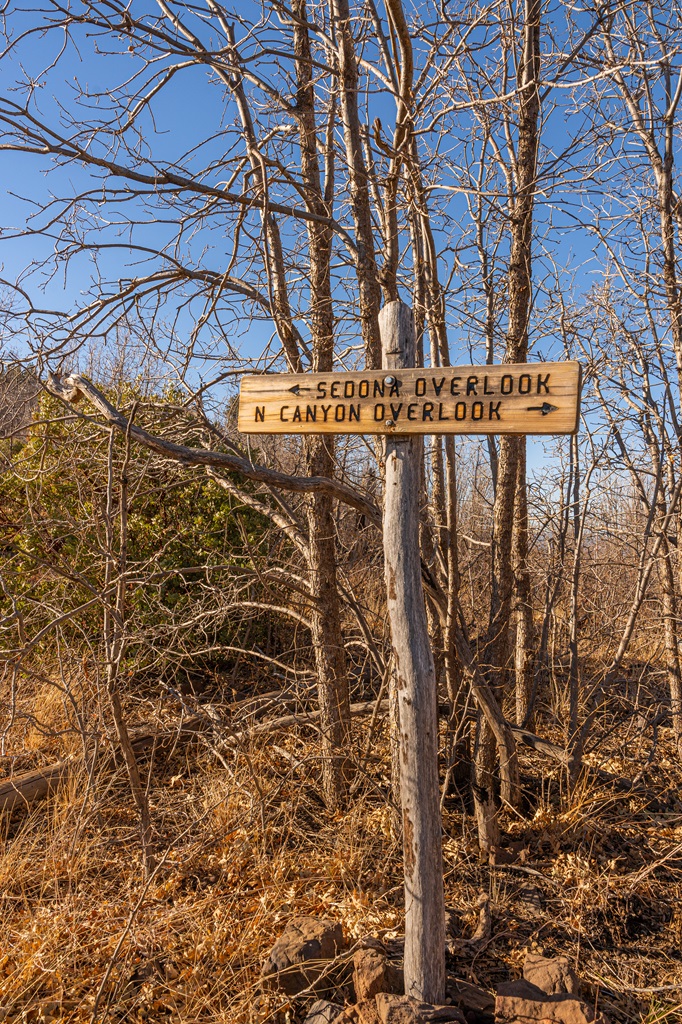
Anyway, as you continue along the trail, you’ll reach a trail junction – take a left to head toward the first overlook.
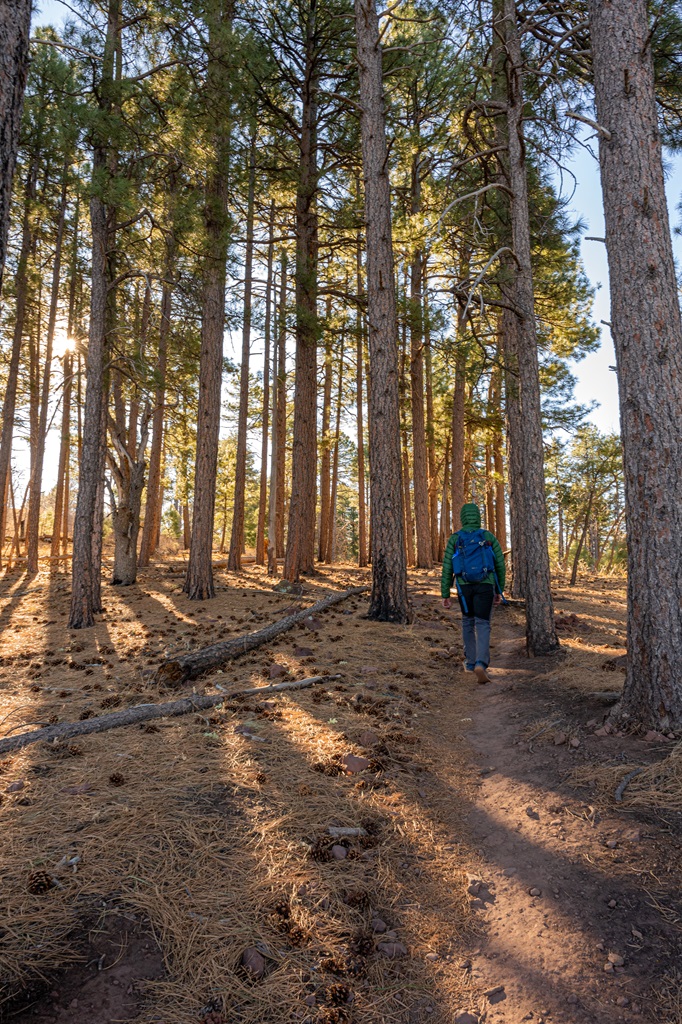
The Sedona Overlook is just 0.5 miles from the junction, leading you through a shaded forest of towering pine trees before the landscape opens up.
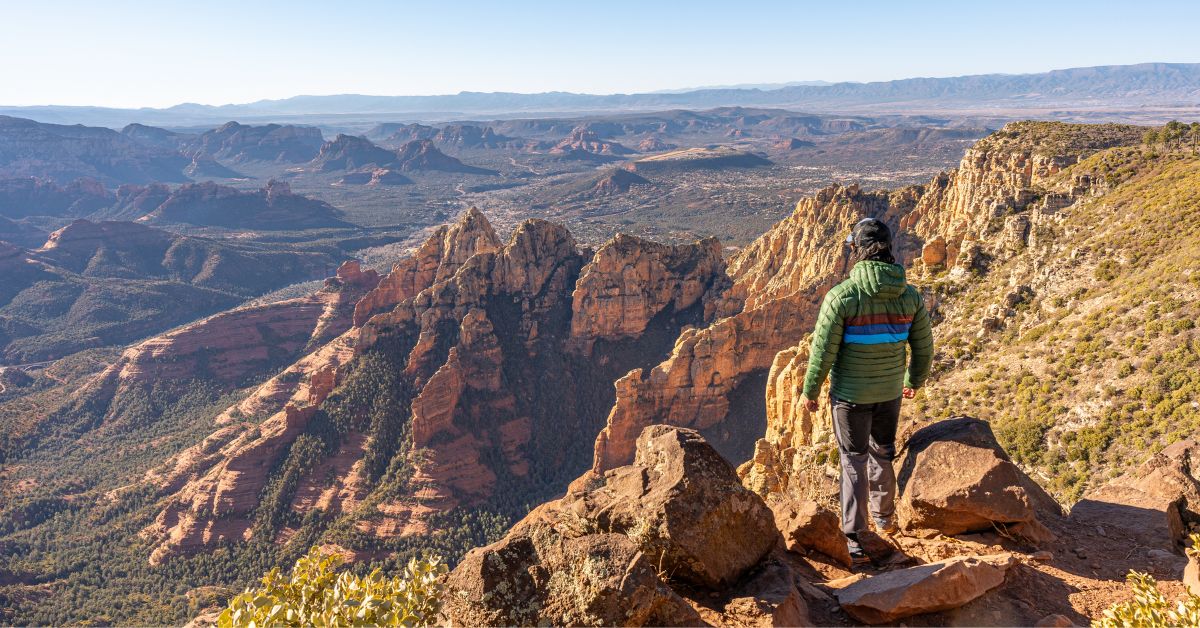
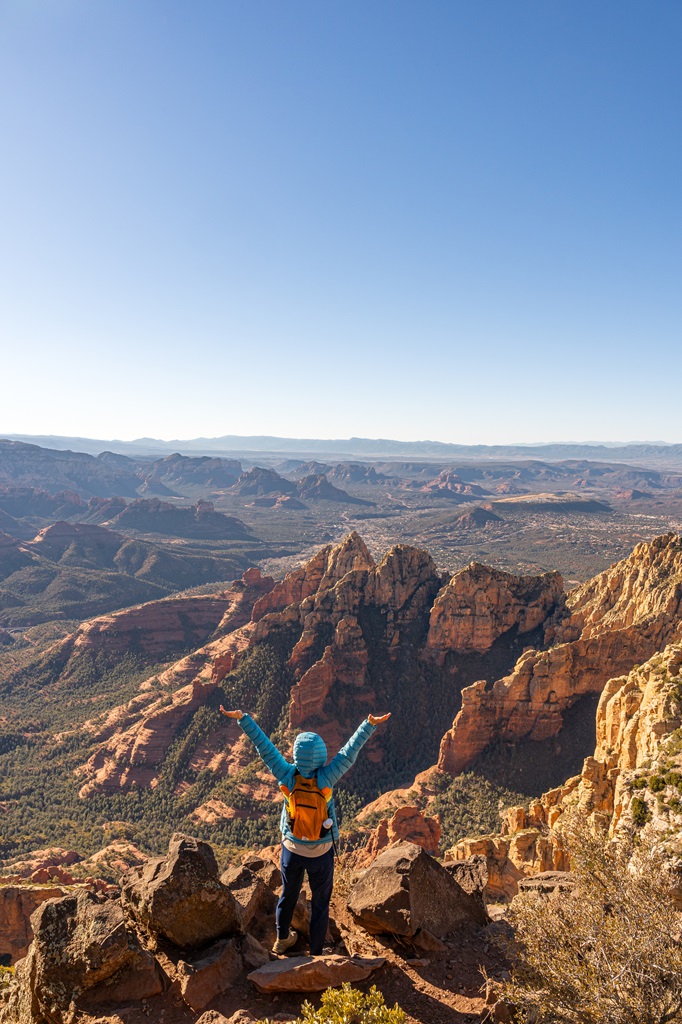
Sedona Overlook
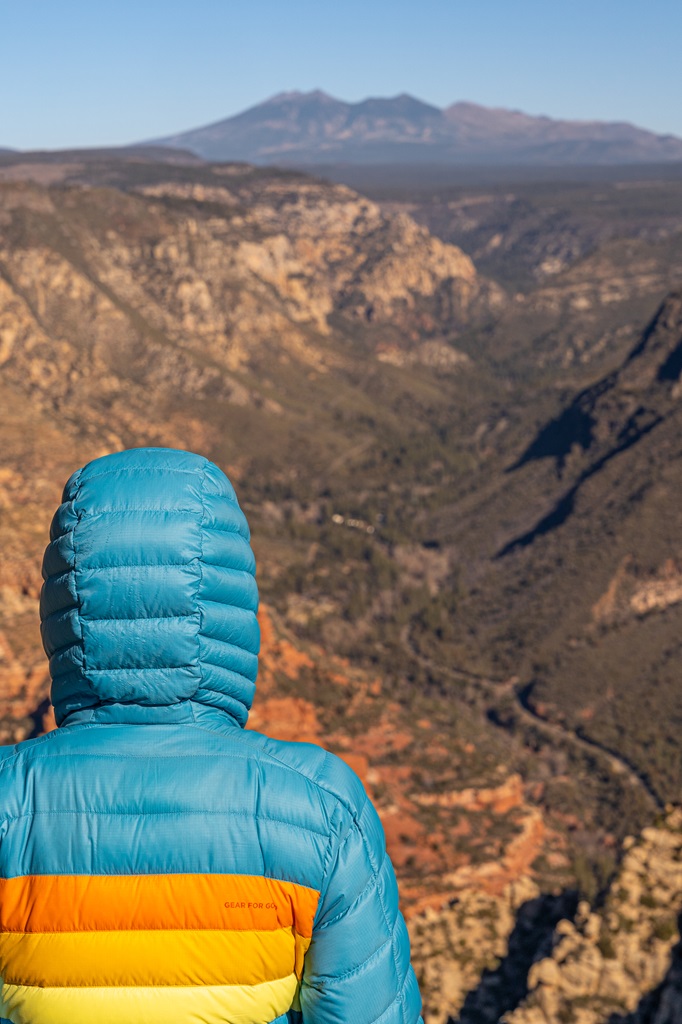
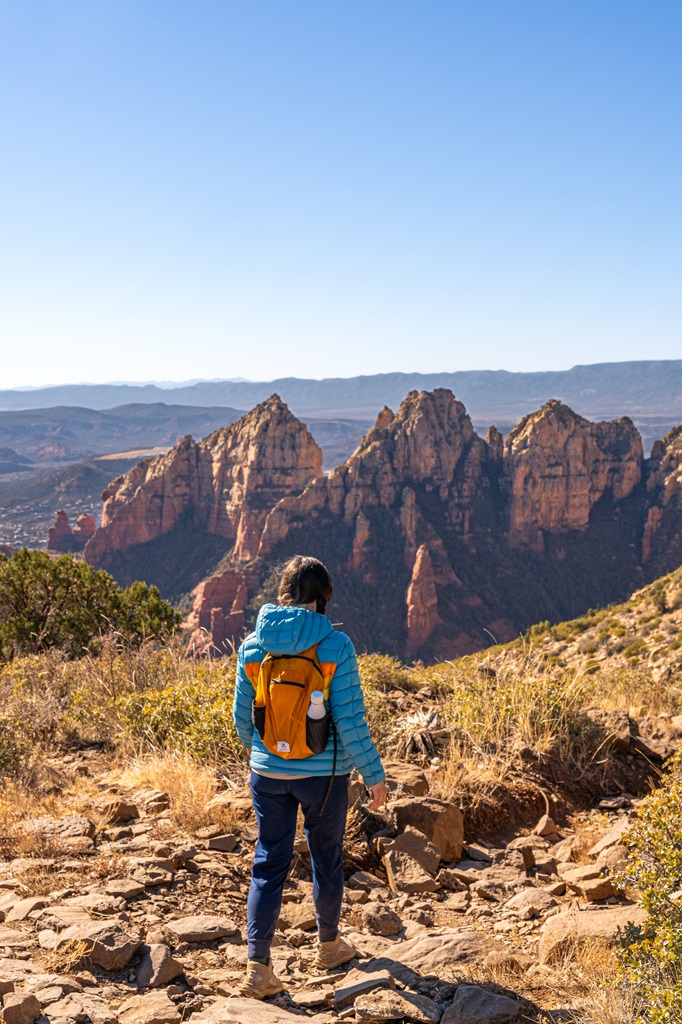
The Sedona Overlook offers a panoramic bird’s-eye view of Sedona and its surrounding landscapes, including Oak Creek Canyon, Coffee Pot Rock, and Capitol Butte.
My husband and I took our time here, soaking in the scenery and resting after the tough climb.
Some AllTrails reviews suggest turning back after reaching the Sedona Overlook instead of continuing to the North Canyon Overlook.
But we didn’t come all this way not to complete the entire trail – especially since the next overlook provides a stunning view of the San Francisco Peaks, which hold a special place in our hearts.
In 2023, we summited Humphreys Peak, the highest mountain in Arizona, so we couldn’t pass up the chance to see it again and reminisce on that incredible experience.
To continue to the North Canyon Overlook, retrace your steps to the junction and take a left.
If you decide to turn back from the Sedona Overlook, your total hike will be 9 miles roundtrip instead of 12.
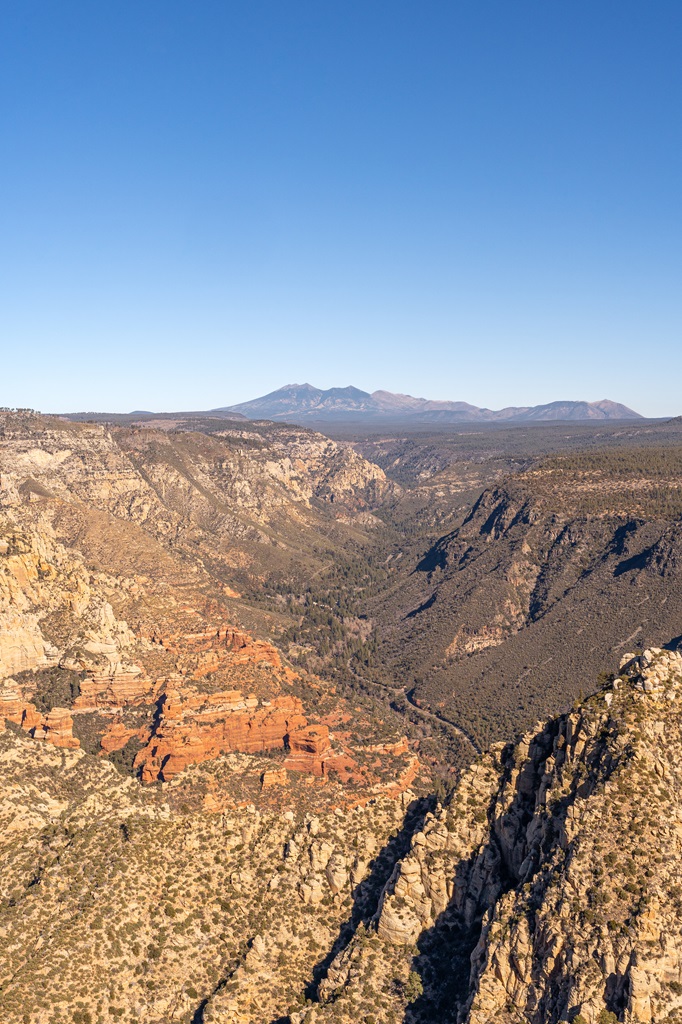
North Canyon Overlook
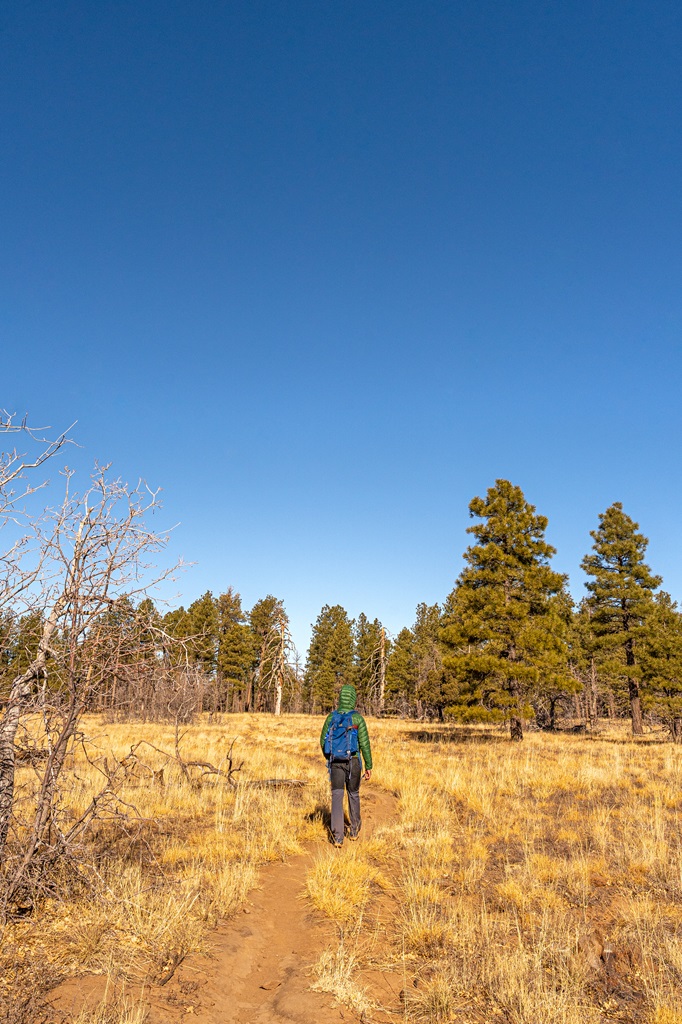
From the junction to the North Canyon Overlook, this section of the trail is easy and mostly flat.
The 1.5-mile stretch takes you through a peaceful open grassy area, with just a few scattered trees here and there.
The trail leads you to another fantastic overlook with views of Sterling Canyon, Oak Creek Canyon, and the San Francisco Peaks.
I’m not sure why this spot doesn’t get more love. Personally, I think it’s worth the few extra miles.
You may find more solitude here if the Sedona Overlook happens to be crowded. The North Canyon Overlook a great place to rest before beginning your descent.
But be careful on the way down, as the rocky trail can make it difficult to find solid footing. Hiking poles are definitely recommended to help with stability.
Once back at the parking area, head into Sedona to treat yourself to a well-deserved meal!
We’re big fans of Indian food, so we ordered from Mradaa Cuisine of India and enjoyed a delicious meal after summiting Sedona’s tallest peak (or shall I say tallest ✨ mesa ✨).

✨ Discover more great hikes in Sedona, Arizona!
- Devil’s Bridge – Tackle this short yet exciting hike to the largest natural sandstone arch in Sedona! The panoramic views from the top will leave you speechless. And don’t forget to walk across the bridge – if you dare!
- Cathedral Rock – This is a short but steep hike to one of the most magical spots in Sedona. Also, it’s an incredible spot to watch the sunset!
- Subway Cave – Take a short detour off the Boynton Canyon Trail to explore one of Sedona’s most popular caves. This adventure offers stunning red rock views, a fun scramble, and a touch of history with ancient Sinagua ruins.
- Birthing Cave – Hike a short distance to a uniquely shaped cave. This spot has a blend of natural beauty and profound cultural significance!
- Soldier Pass Trail – This trail is perfect for families and beginners plus it’s pet-friendly! You’ll encounter remarkable features like Devils Kitchen Sinkhole, the Seven Sacred Pools, and the intriguing Soldier Pass Cave.
- Fay Canyon Arch – The Fay Canyon Trail is a true gem in Sedona, perfect for those seeking a short, scenic hike. The true highlight is the Fay Canyon Arch, a natural arch-shaped rock formation hidden along a side trail.
- Doe Mountain – This is a short, scenic hike to stunning views that are even more spectacular at sunrise – plus there’s a chance to see hot air balloons!
- Bear Mountain – This is Sedona’s toughest hike, with nearly 2,000 feet of steep elevation gain in just 2.3 miles. The trail offers breathtaking views throughout, showcasing Sedona’s iconic red rock formations and the distant San Francisco Peaks.
- Keyhole Cave – Tackle this off-the-beaten-path hike to one of Sedona’s largest caves, offering an adventurous challenge for experienced hikers.
- Wilson Mountain – If you’re up for a challenging climb with unmatched scenery and fewer crowds, tackle this hike to the tallest peak in Sedona!
Wilson Mountain Hiking Tips
1. Start Early: This is a long, strenuous hike with a good amount of elevation gain. An early start not only helps to avoid crowds but also avoid the heat and ensures you have enough time to complete the trek.
2. Red Rock Pass Required: This pass is required for parking at the Wilson Mountain Trailhead and North Wilson Trailhead, or you can use an America the Beautiful Pass. You can purchase one online or at the trailhead kiosk.
3. Choose Your Route Wisely: The Wilson Mountain Trail is more exposed with 2,800 feet of elevation gain, while the North Wilson Trail offers more shade with 2,700 feet of elevation gain. Both meet at the First Bench before continuing to the summit.
4. Download Offline Maps: Both the trails are well-marked and easy to follow but having offline maps on your phone can give you peace of mind.
5. Be Prepared for a Tough Climb: The first few miles on either trail are steep and relentless. Working out consistently and hiking other tough trails can help you prepare for this hike.
6. Check the Weather: Avoid this hike if thunderstorms are in the forecast.
7. Wear Sturdy Hiking Boots: The Wilson Mountain Trail has a lot of loose rocks, so wear solid footwear with good traction and ankle support.
8. Bring Hiking Poles: They’ll help with balance on the loose, uneven terrain, especially on the descent.
9. Summer Safety Tips:
- Take frequent breaks in shaded areas.
- Be sure to bring plenty of water to stay hydrated.
- Eat high-carb and salty snacks to help keep your energy levels up and replenish electrolytes.
- Wear lightweight, breathable clothing, a wide-brimmed hat, and sunscreen to protect yourself from the sun.
- Try to hike during the cooler parts of the day, such as early morning or late afternoon.
10. Keep Sedona Pristine for Future Generations: Take the Sedona Cares Pledge and follow Leave No Trace principles.
Hiking in Sedona Packing List
👚 Layers of Clothing (top) – Pack a moisture-wicking base layer, a fleece mid-layer, an insulated jacket, and an outer shell to protect you from the elements, such as rain and wind. You may not need all these layers, especially in the summer months, but it’s always best to be over-prepared!
Check out my favorite tops 👇
- Base layer: REI Co-op Sahara Shade Hoodie (warm/mild conditions) and REI Co-op Midweight Long-Sleeve Base Layer (cooler conditions)
- Fleece mid layer: Cotopaxi Teca Fleece Full-Zip Jacket
- Down mid layer: Cotopaxi Fuego Hooded Down Jacket
- Outer shell: In the summer I always pack a light windbreaker, such as the Cotopaxi Teca Crop Windbreaker or the RevolutionRace Unit Light Windbreaker. If cold, windy, and rainy conditions are in the forecast (or there’s a slight possibility), I make sure to pack my Patagonia Torrentshell 3L Jacket.
🩳 Hiking Shorts or Pants – Pack a comfortable, durable, and stretchy pair of hiking shorts or pants. Also think about what conditions you might run into, such as warm or cold temperatures, wind and/or rain, bugs, and overgrown trails.
Check out my favorite hiking bottoms 👇
- Cotopaxi Losdos Zip-Off Pants
- RevolutionRace Breezy Ankle Outdoor Pants
- Baleaf Fleece-Lined Jogger Pants
- RevolutionRace Summit Pocket Tights
- Revolution Race Hike & Dive Shorts
🥾 Hiking Footwear – Bring a good pair of hiking boots or shoes with good traction. If I’m not expecting to hike in too much mud or snow, my go-to hiking shoes are the Altra Lone Peak trail runners. They have a wide-toe box, 0 mm heel-to-toe drop, and MaxTrac rubber outsole. Plus, they’re lightweight and so comfy!
🧦 Socks – Moisture-wicking, quick-drying socks are the way to go. My favorite pair of hiking socks are Darn Tough Hiker Micro Crew Cushion Socks. Always pack an extra pair!
🎒 Day Pack – What you plan to do (sightseeing, hiking, etc.), determines what size pack you’ll need. Here is what I typically bring based on what I’m doing that day 👇
- Short walks and sightseeing: Cotopaxi Kapai 1.5L Del Dia Hip Pack
- Short, easy to moderate day hikes: REI Co-op Flash 22L Pack
- Long, moderate to challenging day hikes: REI Co-op Trail 25L Pack or Cotopaxi Luzon Del Dia 24L Pack
🥢 Trekking Poles – Essential for stability, balance, and support when hiking trails, especially on tough, rocky, and uneven terrain. I use REI Co-op Trailmade Trekking Poles and love them!
❄️ Microspikes – Bring a pair of microspikes if you’re visiting in the winter and you’re planning to hike along icy trails. They will give you good traction to avoid slipping! I use Black Diamond Access Spike Traction Device.
🦟 Mosquito/Bug Repellants – In the warmer months, be prepared for annoying gnats, mosquitoes, and flies. Wear long-sleeve clothing, a head net, and use bug spray.
🧤 Extra Warm Layers – If you expect cooler conditions or hiking to higher elevations, make sure to pack extra layers for added warmth, such as gloves, beanie, neck gaiter, and a light jacket.
🗺️ Navigation – Carry a physical topographic map, compass, a satellite messenger (or personal locator beacon), and download offline maps to help you stay on course, find your way in unfamiliar terrain, and call for help if needed.
🔦 Headlamp/Flashlight – A reliable light source with extra batteries, in case you end up hiking in the dark or need it for emergency situations.
💧 Water – Water bottles to carry sufficient water to stay hydrated, along with a filtration system or purification tablets if you plan to refill from natural sources.
🍕 Food – Energy-rich snacks or meals to keep your energy levels up during the hike.
😎 Sun Protection – Sunscreen, sunglasses, and a sunhat to protect yourself from harmful UV rays, even when it’s cloudy. Also, polarized sunglasses are important when it’s bright outside and to reduce glare from reflective surfaces like water, snow, and roads.
🩹 First-Aid Kit – A basic first-aid kit with items like bandages, antiseptic, pain relievers, and any personal medications you may need.
🥶 Emergency Shelter – Pack an emergency bivy sack or space blanket for shelter in case of sudden weather changes.
🔥 Fire – A lighter, matches, or fire starter to help you build a fire for warmth or signaling in case of emergency. Along with matches, I also carry a multi-tool carabiner that has a fire starter, utility blade, screwdriver, and bottle opener.
🗡️ Multi-Tool and Repair Kit – A versatile tool/knife and repair kit to handle any task, from preparing food to making repairs.
💩 Waste Disposal Supplies – WAG bags, trowel, toilet paper, pee cloth, wipes, Ziploc bags – be sure to pack out everything!
Wilson Mountain Trail vs North Wilson Trail: Which One is Right for You
The Wilson Mountain Trail is the more scenic route to the summit, offering breathtaking views early on as you ascend above Sedona’s red rock formations.
However, it is also more exposed with little shade, making it a hot and grueling climb, especially in the summer.
The first few miles pack in the majority of the elevation gain, with steep switchbacks and loose rocks that can be tough on your legs.
On the other hand, the North Wilson Trail is a bit shorter and more shaded, making it a cooler option, especially on hot days. This route is also less crowded, providing more solitude.
I have not personally hiked the North Wilson Trail but others have said it’s not as scenic as the Wilson Mountain Trail.
No matter which route you choose, both trails meet at the First Bench and lead to the same summit, where you’ll enjoy some of the best panoramic views of Sedona and beyond!
Conclusion
Hiking to Wilson Mountain is a rewarding challenge that offers some of the best panoramic views in Sedona.
The hike to the tallest mountain in Sedona seems very underrated, so let me tell you – it’s worth the effort!
Take either the Wilson Mountain Trail or North Wilson Trail to the top and enjoy stunning views from the Sedona Overlook and North Canyon Overlook.
If you’re looking for a challenging adventure away from Sedona’s more crowded hikes, Wilson Mountain is an unforgettable trek that deserves a spot on your itinerary!
If this guide inspires you to hike to the top of Wilson Mountain, I’d love to hear about your adventure. Leave a comment and share your experience!
✨ READ THIS: Best Sunrise Hikes in Sedona with Epic Views
Enjoyed this post? Pin for later!