Winter in Yosemite National Park is when the real magic happens – crisp air, empty trails, and epic snowy adventures. ❄️
Snow can fall anytime in winter from December to March as well as in late fall and early spring.
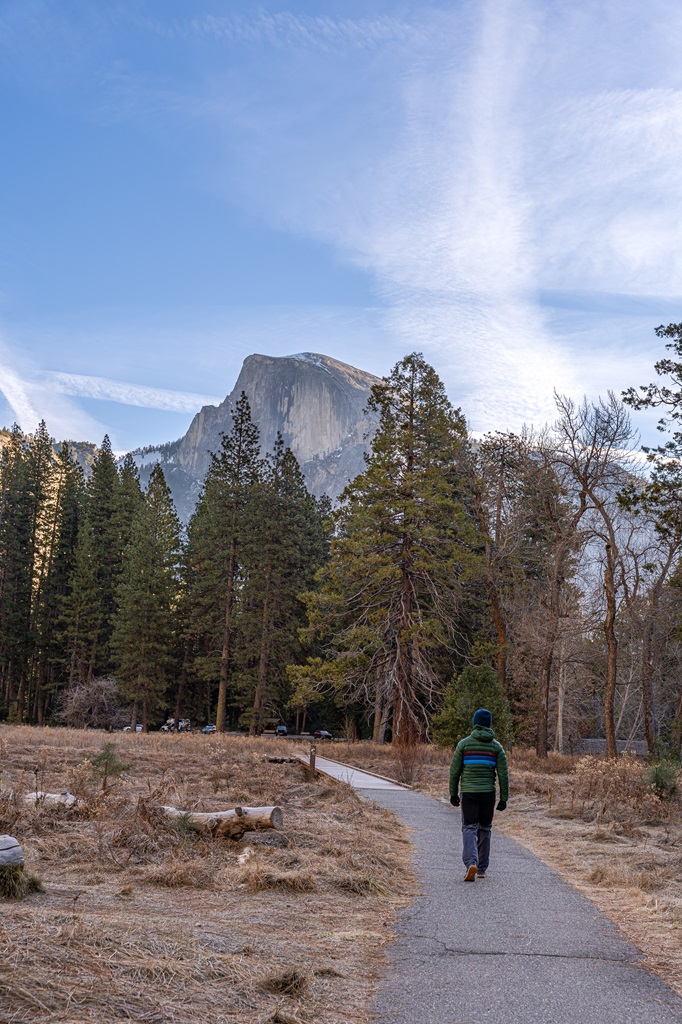
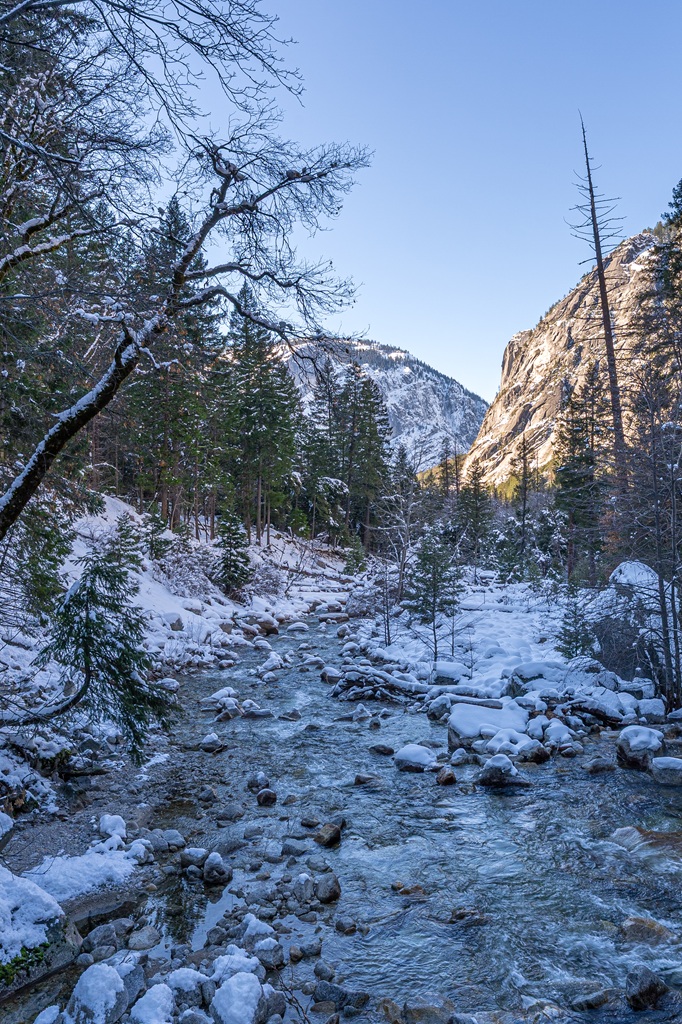
Yosemite Valley sits at 4,000 feet so it won’t get nearly as much snow as higher elevations, but when it does snow, the valley is transformed into a beautiful winter wonderland.
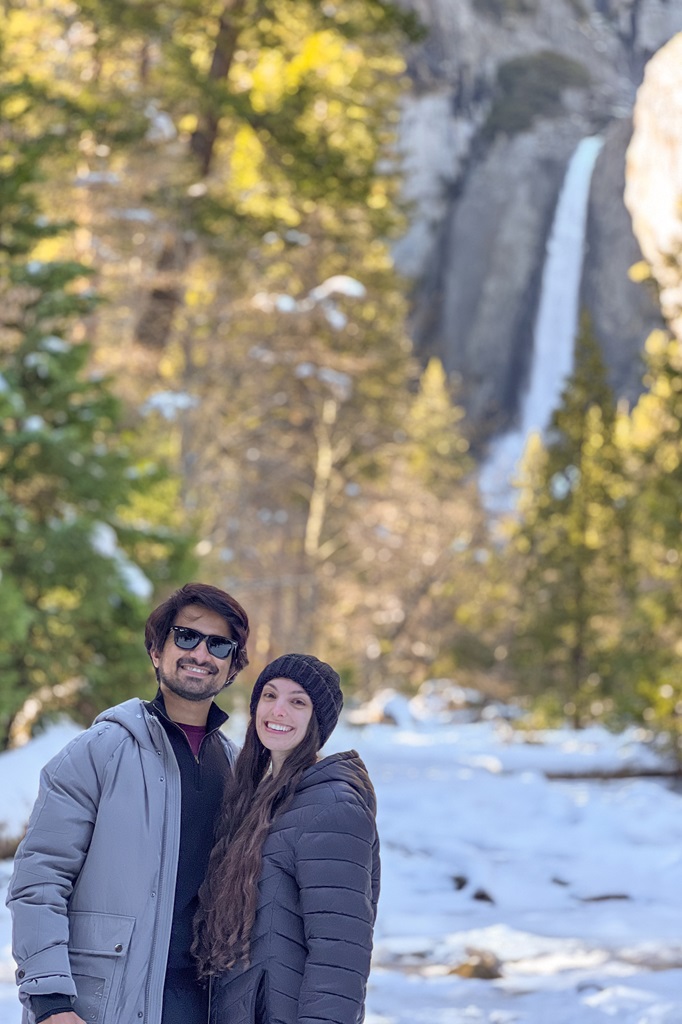
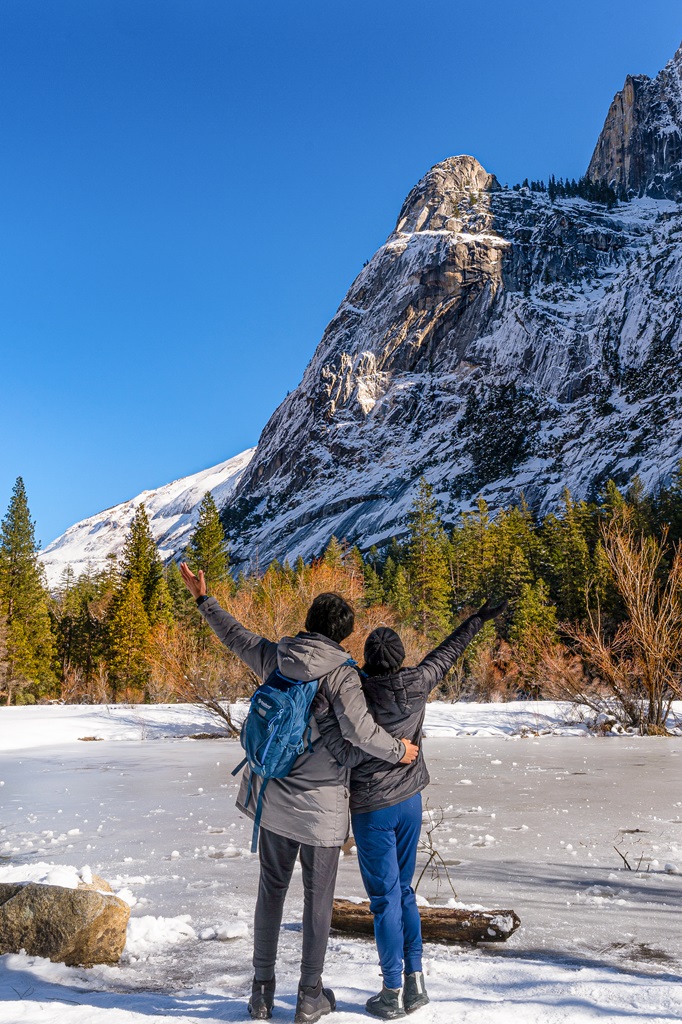
The first time my husband and I visited Yosemite National Park was in January 2023. The year that was full of snow (which later created giant waterfalls) – it was so amazing.
I fell in love after seeing Yosemite covered in a thick blanket of snow. Literally love at first sight! 😍
We explored Yosemite Valley and stuck to the easy trails, including Mirror Lake, Lower Yosemite Fall Trail, and Cook’s Meadow. The snow-covered landscape took my breath away.
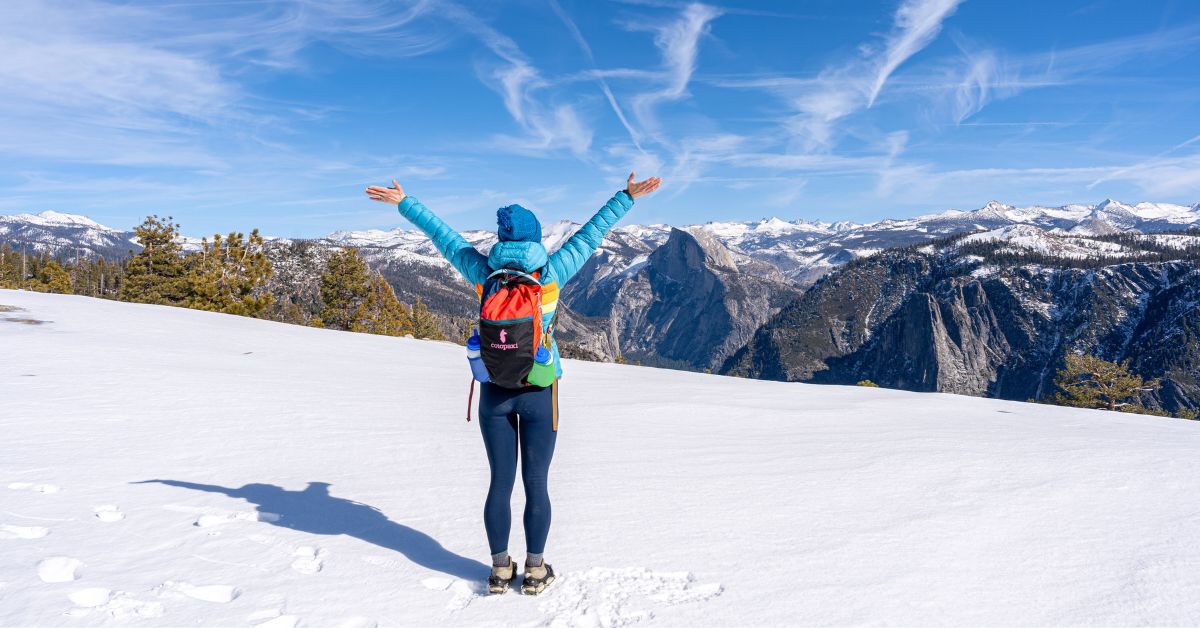
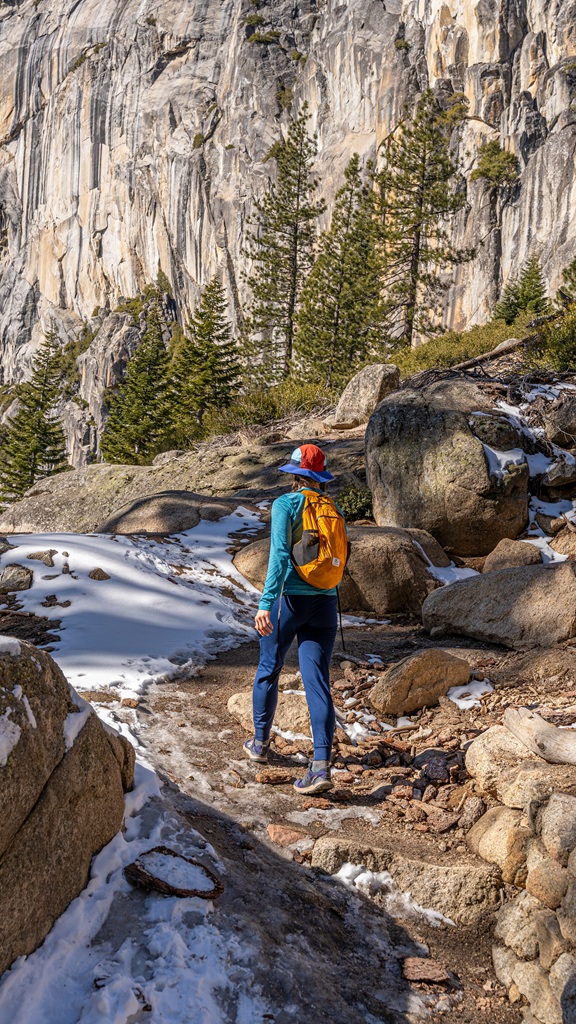
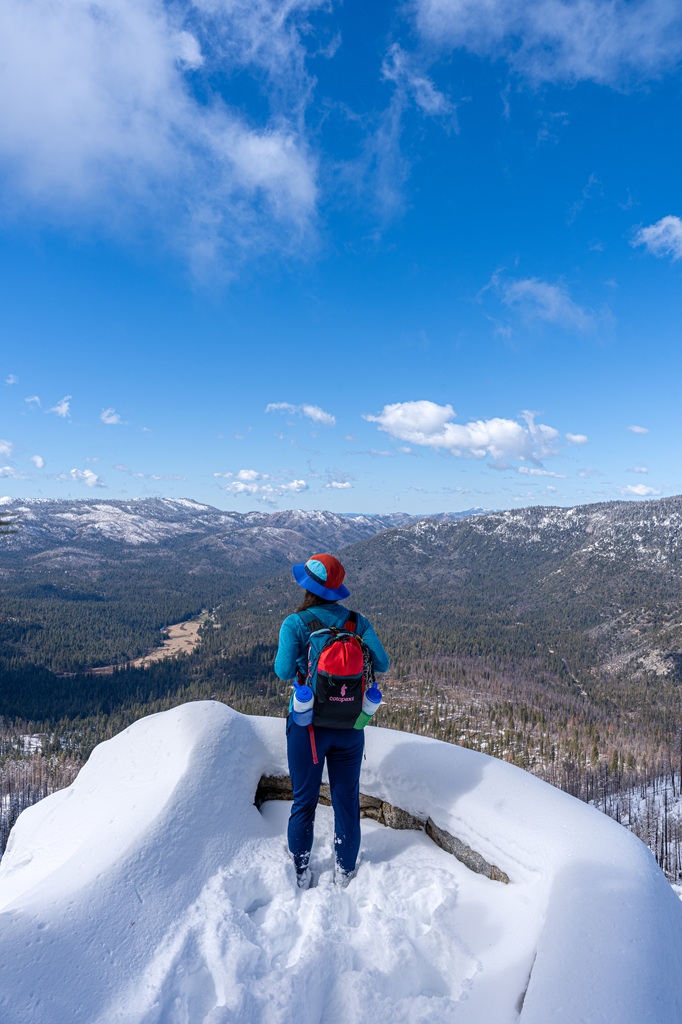
In early 2025, we made trip after trip to Yosemite, visiting countless times between January and April. We hiked all over Yosemite Valley, Glacier Point, and Mariposa Grove, experiencing everything from light snow patches to slick, icy sections and even stretches of knee-deep snow.
What did I learn from hiking in the snow so much? Always bring an extra pair of socks and invest in a good pair of waterproof boots! Wet, cold feet are no fun. Oh, and layer up! Also, microspikes and hiking poles are a life saver on icy trails. Don’t forget those! 🥶
If you plan on tackling Yosemite hikes in winter, you’re in the right place! There are lots of trails to choose from for hikers of all skill levels.
Read through this list of best winter hikes in Yosemite and discover the perfect winter adventure made just for you! ☃️
Affiliate Disclaimer: Some links on this page may be affiliate links, meaning I may earn a small commission at no extra cost to you. As an Amazon Associate, I earn from qualifying purchases. Thanks for supporting the blog! 🫶
Yosemite in Winter: Quick Overview
🎟️ Yosemite’s Entrance Fee and Reservations in Winter
Entrance to Yosemite National Park costs $35 per vehicle for a 3-day pass. However, if you have the America the Beautiful Annual Pass, your entry is free!
For those who love exploring national parks, investing in the Annual Pass is a smart choice. At just $80, for U.S. residents, it grants you access to over 2,000 federal recreation sites across the country!
FEE UPDATES! Beginning January 1, 2026, non-U.S. residents (without an annual pass) will pay a $100 per person in addition to the standard entrance fee. The Annual Pass for non-US. residents will cost $250.
A reservation is not required to visit Yosemite in winter this year! In the past, reservations were required during the Firefall event which takes places in mid to late February. But this year, 2026, reservations are NOT required!
🌨️ Winter Weather in Yosemite
Winter in Yosemite usually runs from December through March, but you can see snowfall as early as October or November and as late as April and May.
In Yosemite Valley, winter temperatures are pretty mild compared to the high country. In January and February, daytime highs usually land in the upper 40s °F (~9 °C), while overnight lows often dip into the upper 20s °F (~-2 °C).
Head up to higher elevation and it’s a totally different world – much colder temperatures and a whole lot more snow.
The valley itself doesn’t get buried every winter. Average annual snowfall, in the valley, is often quoted around 30-40 inches, but it varies depending on the year. Some winters are magical and snowy, and others are pretty light.
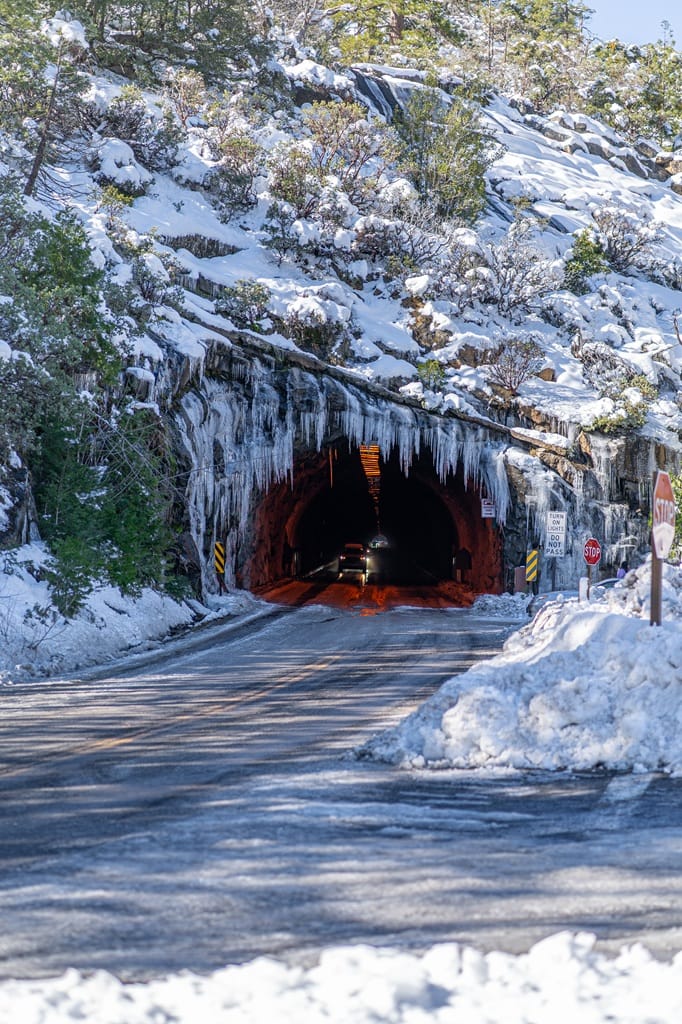
🛣️ Yosemite Road Conditions and Closures in Winter
Some roads in Yosemite shut down for the season due to dangerous winter conditions, such as Tioga Road (Highway 120), Glacier Point Road, and Mariposa Grove Road.
Even the roads that do stay open can be icy and snowy, so expect slower driving, occasional delays, and maybe even temporary closures. Always check road conditions before you go!
⚠️ For the most up-to-date information, call Yosemite’s road-conditions hotline: 209-372-0200 (press 1 then 1 again)
⛓️ Tire Chains and Chain Control in Yosemite
Tire chains are often required in winter, and if chain control is in effect, you MUST carry them and know how to use them, even if you’re in a 4WD/AWD vehicle or have snow tires.
Levels of chain control ⬇️
- R1 – You’ll need to put chains on your car unless you’re in a car, pickup, or SUV under 6,000 pounds AND you have snow tires with at least 6/32 inches of tread or deeper.
- R2 – You’ll need to put chains on your car unless you’re in a car, pickup truck, or SUV under 6,500 pounds AND you have snow tires with at least 6/32 inches of tread or deeper AND your car has 4WD or AWD engaged.
- R3 – Chains are required on ALL vehicles, no exceptions.
⚠️ Bring or purchase tire chains from any local store and practice putting them on before your trip! And make sure they are the right size for your vehicle.
☃️ Winter Yosemite Travel Tips
- Expect slower travel due to icy/snowy roads.
- Bring or purchase tire chains (and know how to use them).
- Pack layers – temperatures can drop quickly.
- Be aware that daylight hours are shorter in the winter.
- Expect traffic congestion and limited parking during winter holidays (late December and early January) as well as during the Firefall event (mid to late-February).
- Always have emergency items, such as water, snacks, blankets, and flashlights, in your car in case you break down or get stranded during an unexpected winter storm.
- Book a stay inside the park to avoid driving back and forth on the roads. Lodging in Yosemite Valley includes Yosemite Valley Lodge, The Ahwahnee, and Curry Village.
- The Yosemite Valley Shuttle System operates all year long, making it super easy to get around the valley, especially when winter weather rolls in. Take advantage of it to keep your visit stress-free and hassle-free.
- There’s also a shuttle from Yosemite Valley to the Badger Pass Ski Area! When it’s open for the season, the bus runs daily to and from the ski area. The arrival and departure schedule may change depending on weather and traffic. Also, seats are limited so arrive to the bus stop early!
✨ Planning a trip to Yosemite this season? Before you book anything, read through my ultimate guide to the best lodges, hotels, and cozy cabins in Yosemite in winter. It’ll save you time and help you find the perfect snowy getaway!
Best Yosemite Hikes in Winter
Easy Yosemite Hikes in Winter
Cook’s Meadow Loop
Starting Point: Yosemite Valley Visitor Center, Sentinel Bridge Parking Area, or Lower Yosemite Fall Trailhead in Yosemite Valley
Length: 1 mile roundtrip
Elevation Gain: 30 feet
Hiking Time: 20 to 30 minutes
Route Type: Loop
Pet-friendly? Yes, must be on leash
Hike Features: Beautiful meadow, views of Yosemite Falls, Half Dome, Glacier Point, Sentinel Rock, and other granite peaks
One of my favorite places to wander in winter in Yosemite Valley is Cook’s Meadow (also called Sentinel Meadow). It’s quiet, wide-open, and framed by some of the most iconic scenery in the park.
This easy 1-mile loop winds through an open meadow with jaw-dropping views of Yosemite Falls, Half Dome, Glacier Point, and Sentinel Rock
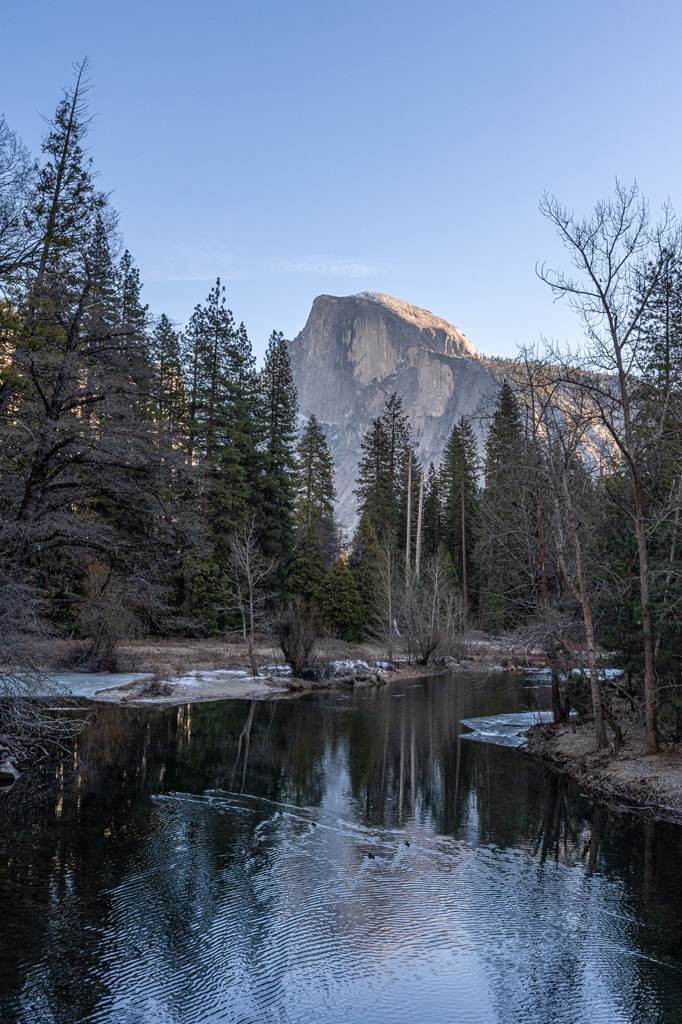
For one of the best photo spots in the valley, make your way to Sentinel Bridge. You’ll snag a postcard-perfect shot of Half Dome reflected in the Merced River.
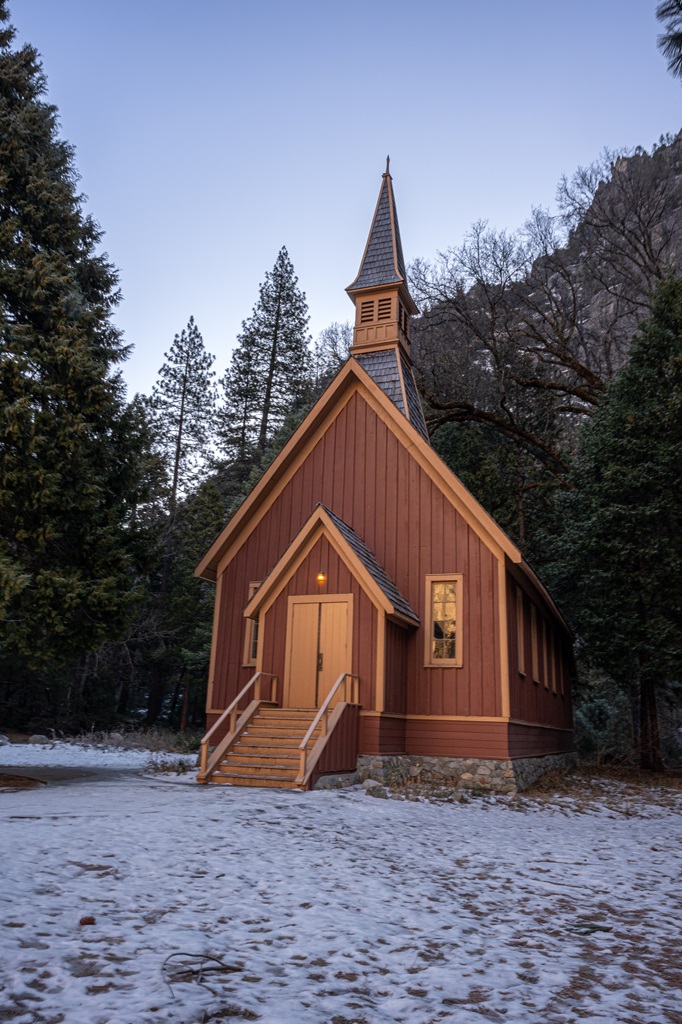
If you follow the bike path across the Superintendent’s Bridge and cross Southside Drive, you’ll reach the Yosemite Valley Chapel. It’s a super quick detour and definitely worth checking out, especially after a fresh snowfall.
Be aware that the Cook’s Meadow Trail, especially along the boardwalks, can become icy and slippery. Be careful and consider carrying microspikes and hiking poles!
There are several spots where you can begin this hike:
- Yosemite Valley Visitor Center (shuttle stop #5)
- Lower Yosemite Fall Trailhead (shuttle stop #6)
- Sentinel Bridge Parking Area
Lower Yosemite Fall Trail
Starting Point: Lower Yosemite Fall Trailhead (shuttle stop #6) in Yosemite Valley
Length: 1.2 miles roundtrip
Elevation Gain: 55 feet
Hiking Time: 30 minutes
Route Type: Loop
Pet-friendly? Yes, must be on leash
Hike Features: Viewpoints of Lower Yosemite Fall and the entire Yosemite Falls
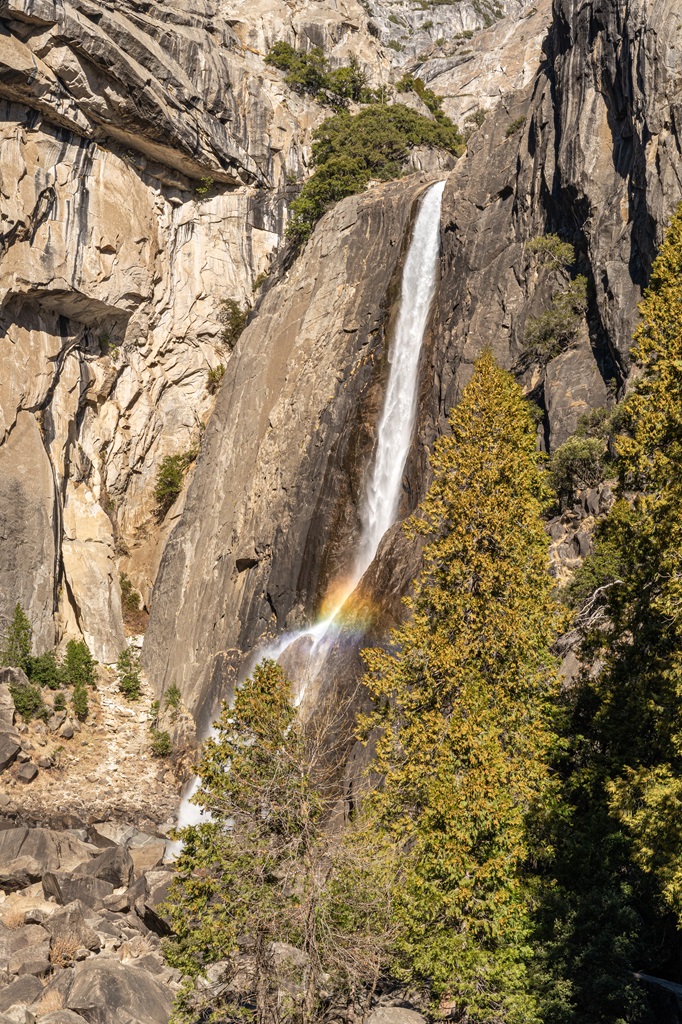
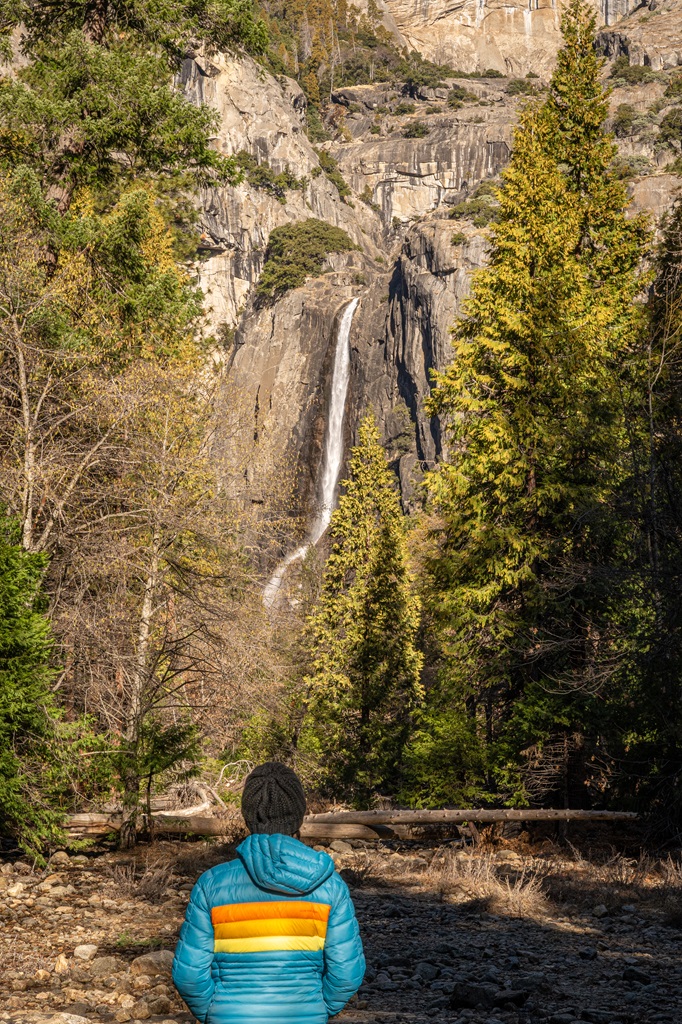
Want to get up close to one of Yosemite’s most iconic waterfalls? The Lower Yosemite Fall Trail brings you right to the base of one of the tallest waterfalls in North America.
Lower Yosemite Fall drops 320 feet and is the final plunge of the entire Yosemite Falls. This short, easy stroll offers several amazing viewpoints along the way.
From the footbridge, you’ll get a front-row look at the thunderous lower cascade. A bit farther back, there’s a great viewpoint where you can see the entire waterfall from top to bottom.
My favorite view is from the western side of the loop where you can see all three tiers of Yosemite Falls lined up perfectly!
Just be prepared for icy patches in winter, especially on the short climb to the footbridge on the western portion of the trail.
Just note that there’s no parking directly at the trailhead. Your best options are to park at Yosemite Village or the Yosemite Falls parking area.
You can also ride the Valleywide Shuttle and hop off at stop #6 (Lower Yosemite Fall Trailhead) for quick and easy access.
Mirror Lake Paved Trail
Starting Point: Mirror Lake Trailhead (shuttle stop #17) in Yosemite Valley
Length: 2 miles roundtrip
Elevation Gain: 110 feet
Hiking Time: 45 minutes
Route Type: Out-and-back
Pet-friendly? Yes, must be on leash
Hike Features: Mirror Lake, view of granite peaks
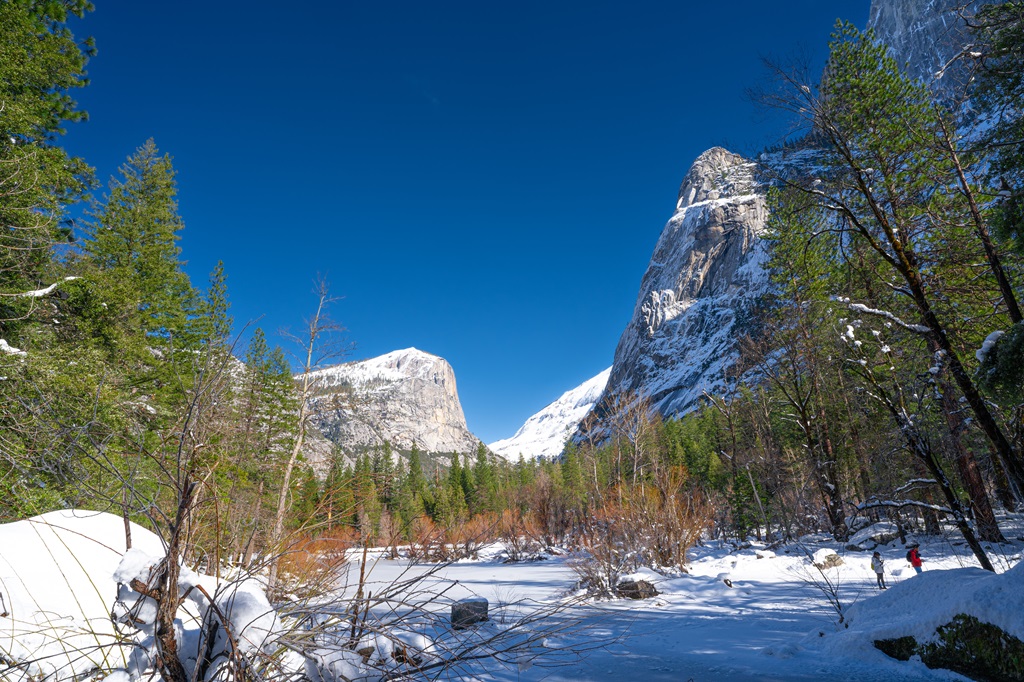
Mirror Lake is a stunning spot in Yosemite Valley where you can see beautiful water reflections and huge granite walls rising around you.
However, you may not see reflections in winter due to the lake being frozen! It’s still incredibly beautiful, especially when snow covers the landscape.
There are two different routes for Mirror Lake, but for right now we’ll focus on the shorter one – an easy 2-mile out-and-back walk along a paved road.
Watch for icy or snowy patches in winter!
There’s no parking right at the trailhead, but the closest parking lots are at Curry Village and the Yosemite Valley Trailhead Parking. Or you can hop on the shuttle and get off at stop #17.
There’s no drinking water at the start or anywhere along the trail, so bring your own. Vault toilets are available about half a mile from the trailhead and again once you reach the lake.
At Mirror Lake, you’ll be treated to stunning views of Half Dome, Tenaya Canyon, Mount Watkins, and Washington Column.
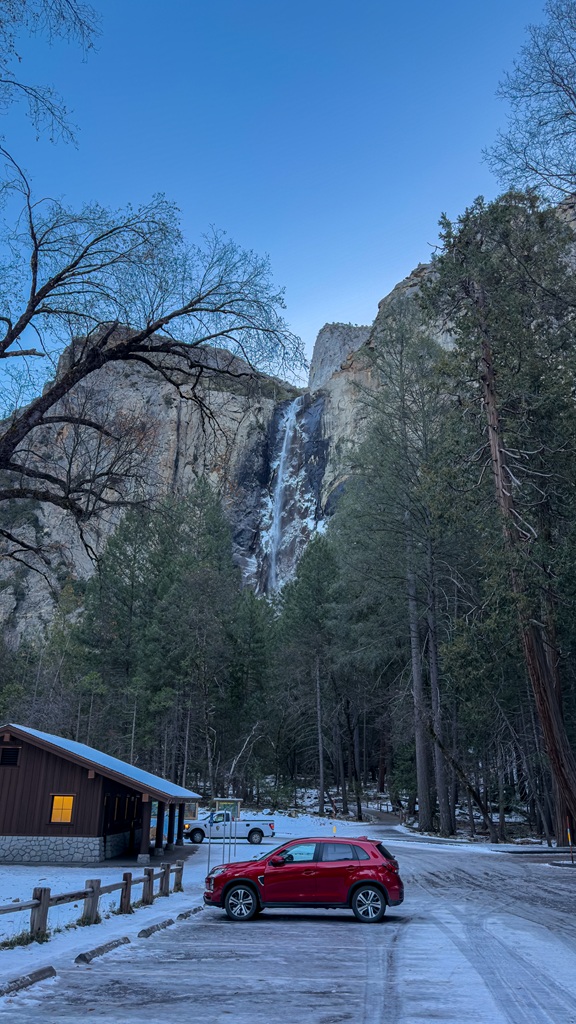
Bridalveil Fall
Starting Point: Bridalveil Fall Trailhead or parking off Southside Drive in Yosemite Valley
Length: 0.5 to 1 mile roundtrip
Elevation Gain: 80 to 115 feet
Hiking Time: 20 to 30 minutes
Route Type: Out-and-back
Pet-friendly? Yes, only on the Bridalveil Fall Trail (not on the Valley Loop Trail)
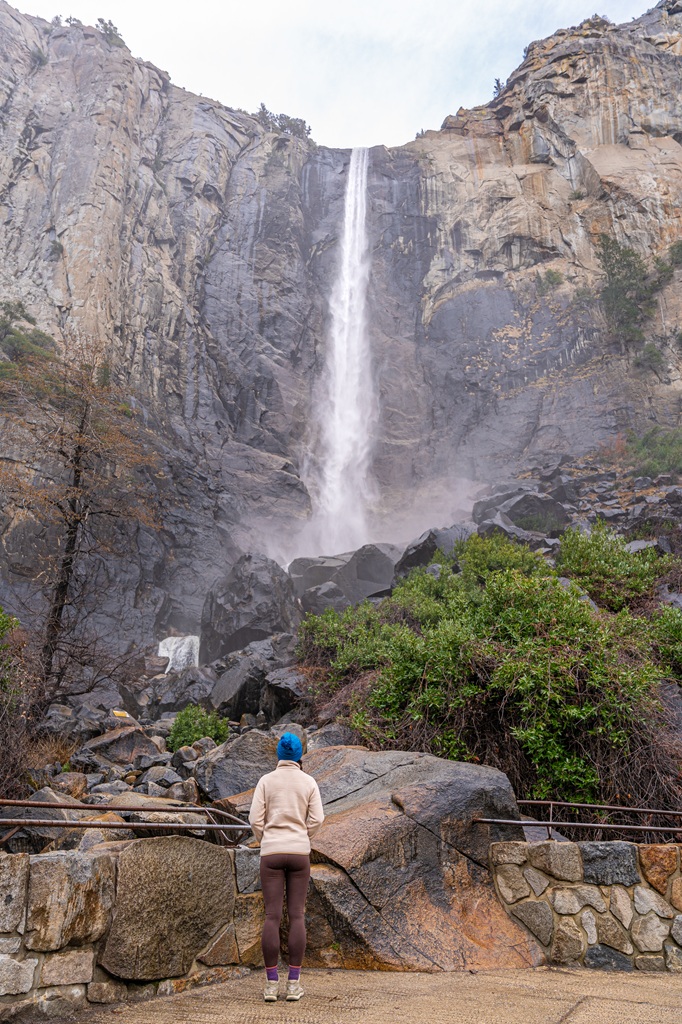
Hike Features: Viewpoint near the base of Bridalveil Fall
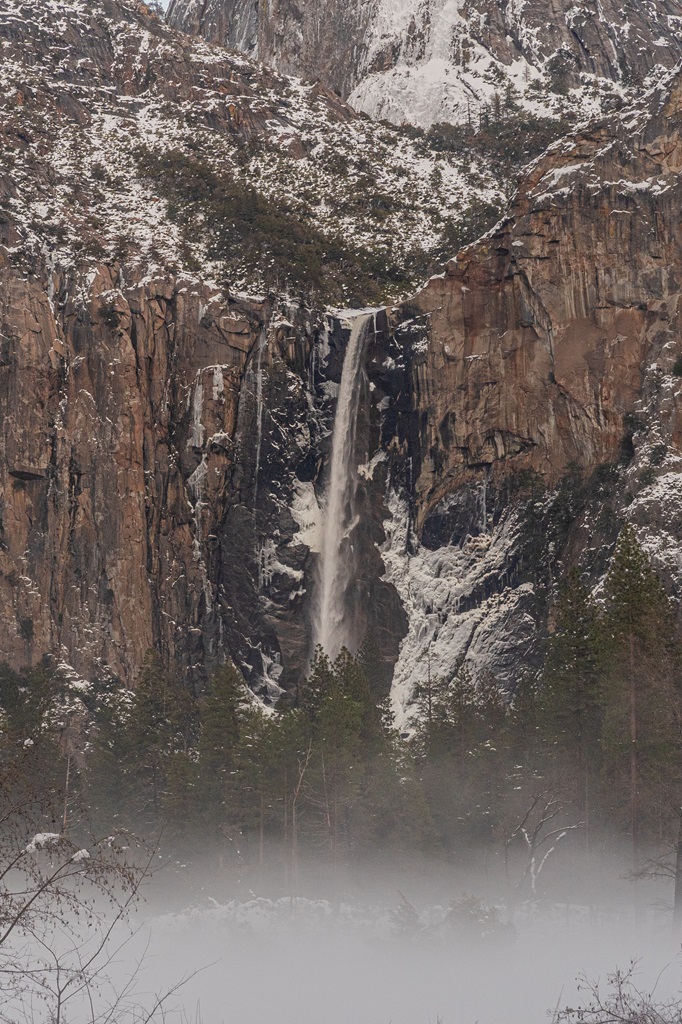
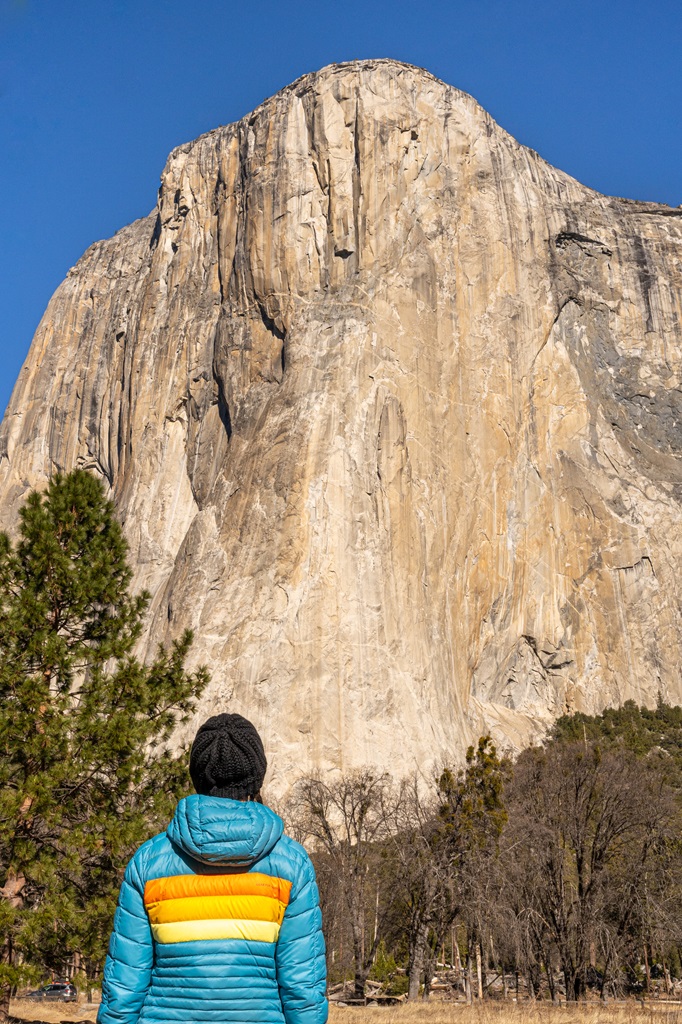
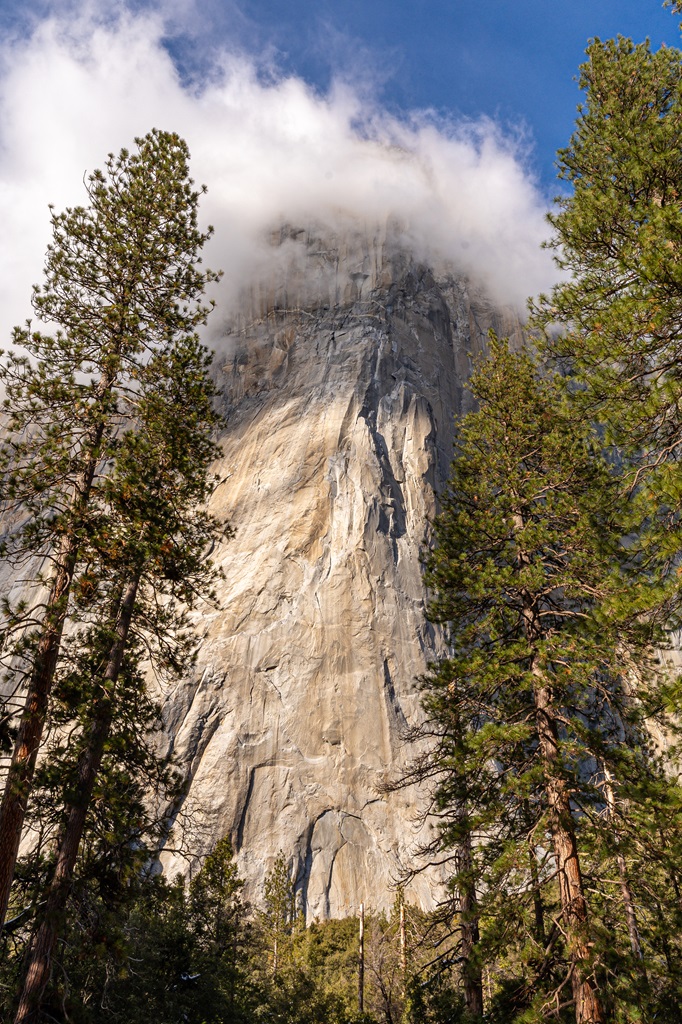
Bridalveil Fall is one of Yosemite’s most iconic waterfalls! It’s easy to spot from famous viewpoints like Tunnel View and Valley View.
This stunning waterfall drops 620 feet and is often the first one you’ll see when entering Yosemite Valley.
In winter, expect icy and slick conditions along the trail, especially at the viewpoint.
If you want to get a closer look, you’ve got two easy options:
- Take the short, paved, 0.5-mile roundtrip walk from the main trailhead.
- Or start farther down Southside Drive for a slightly longer 1-mile roundtrip hike.
The paved trail from the main trailhead is pet-friendly (leashes required), but the Southside Drive approach isn’t, since it follows the Valley Loop Trail.
The main parking lot fits about 60 cars, with additional roadside parking along Southside Drive.
Just keep in mind there’s no shuttle service to Bridalveil Fall, so you’ll need to drive. Restrooms are available at the main parking area.
Crane Flat Lookout Trail
Starting Point: Crane Flat Lookout Road
Length: 2.9 miles roundtrip
Elevation Gain: 400 feet
Hiking Time: 1.5 to 2.5 hours
Route Type: Out-and-back
Pet-friendly? No, pets are not allowed
Hike Features: Abandoned helicopter shell, Crane Flat Fire Lookout Tower, and beautiful views at the top
🥾 Crane Flat Lookout Trail Map
The Crane Flat Lookout Trail is an awesome winter option if you’re craving quiet trails, nice views, and a beginner-friendly snowshoe adventure.
This route follows an old fire road all the way to the historic Crane Flat Fire Lookout, built back in 1931.
The trail is wide, well-groomed, and has a steady incline the whole way. Just enough to warm you up, but never too steep.
Once you reach the top, you’re rewarded with a massive, flat lookout area. There’s plenty of space to spread out, relax, and take in the scenery.
You’ll have 360-degree panorama of Yosemite, with El Capitan and Half Dome visible off to the east and peaceful forest stretching in every direction. There’s even an abandoned helicopter shell at the top!
✨ Planning a winter trip to Yosemite? Follow this 3-day Yosemite winter itinerary for must-see views, top-rated hikes, and can’t-miss experiences.
Moderate Yosemite Hikes in Winter
Mirror Lake Loop
Starting Point: Mirror Lake Trailhead (shuttle stop #17) in Yosemite Valley
Length: 5 miles roundtrip
Elevation Gain: 300 feet
Hiking Time: 2 to 3 hours
Route Type: Loop
Pet-friendly? No, pets are not allowed
Hike Features: Mirror Lake, Tenaya Creek, and views of granite peaks
There are two ways to enjoy the hike to Mirror Lake, depending on how much time and energy you’re working with.
The easy option is 2 miles out-and-back along the paved path (mentioned earlier). It’s a relaxing walk with big granite walls towering over you and a nice reflection of the surrounding peaks when the water is calm.
Of course, in the winter, there’s a chance the lake will be frozen over. With that being said, please don’t walk on the lake! It can be very dangerous.
If you’re in the mood for something a little more adventurous, the full 5-mile loop is an awesome way to explore more of the area.
Be aware that the south side of the loop (the opposite direction from the paved trail) can get really icy and slippery in winter and early spring.
If you are not prepared for wintery conditions, consider hiking an out-and-back route along the north side of the loop. Ice and snow can be present anywhere along the loop, so be prepared and be careful!
The full loop circles all the way around Mirror Lake, follows Tenaya Creek, crosses a couple of bridges just after the Snow Creek Trail junction, and returns along the south side of Tenaya Canyon.
There’s no parking directly at the trailhead, but Curry Village and Yosemite Valley Trailhead Parking are both close options. You can also hop on the free Valleywide Shuttle and get off at stop #17.
Don’t forget to bring water! There’s none at the trailhead or along the trail. There are vault toilets about half a mile from the trailhead and at Mirror Lake.
Valley Loop Trail
Starting Point: Lower Yosemite Fall Trailhead (shuttle stop #6) in Yosemite Valley
Length: 7.2 (half loop) to 11.5 miles (full loop) roundtrip
Elevation Gain: Minimal elevation gain
Hiking Time: 4 to 7 hours
Route Type: Loop
Pet-friendly? No, pets are not allowed
Hike Features: Iconic Yosemite landmarks, Merced River, and meadows
The Valley Loop Trail winds through quiet meadows, shady forests, and stretches along the Merced River. You’ll get incredible views of Yosemite Falls, El Capitan, Bridalveil Fall, Cathedral Rocks, Sentinel Rock, the Three Brothers, and more!
You can start this hike from various spots in the Valley, but a popular place to start is near the Lower Yosemite Fall Trailhead (shuttle stop #6).
From there, head west past Camp 4 and the Three Brothers toward El Capitan, following signs for the full 11.5-mile loop around the Valley floor.
If you want something shorter, cross the Merced River at El Capitan Bridge for a 7.2-mile loop. And if you’re craving a big adventure, AllTrails has a much longer 20.3-mile version that adds in the Mirror Lake loop.
In winter, expect snow and ice, especially on the south side. The trail can be tricky to navigate if covered in snow.
If hiking this trail in wintery conditions, wear waterproof boots with good traction, carry microspikes, and a solid navigation system so you don’t lose the trail!
There’s no water along the way, so fill up at the fountain near the Lower Yosemite Fall Trailhead. Restrooms are available at the start, at Bridalveil Fall, and at a few picnic areas.
You can’t park right at the Lower Yosemite Fall Trailhead, but Yosemite Village or Yosemite Falls parking area are nearby options. The Valleywide Shuttle is super convenient too, with stops at #6 (Lower Yosemite Fall), #9 (El Capitan Meadow), and #11 (Four Mile Trailhead).
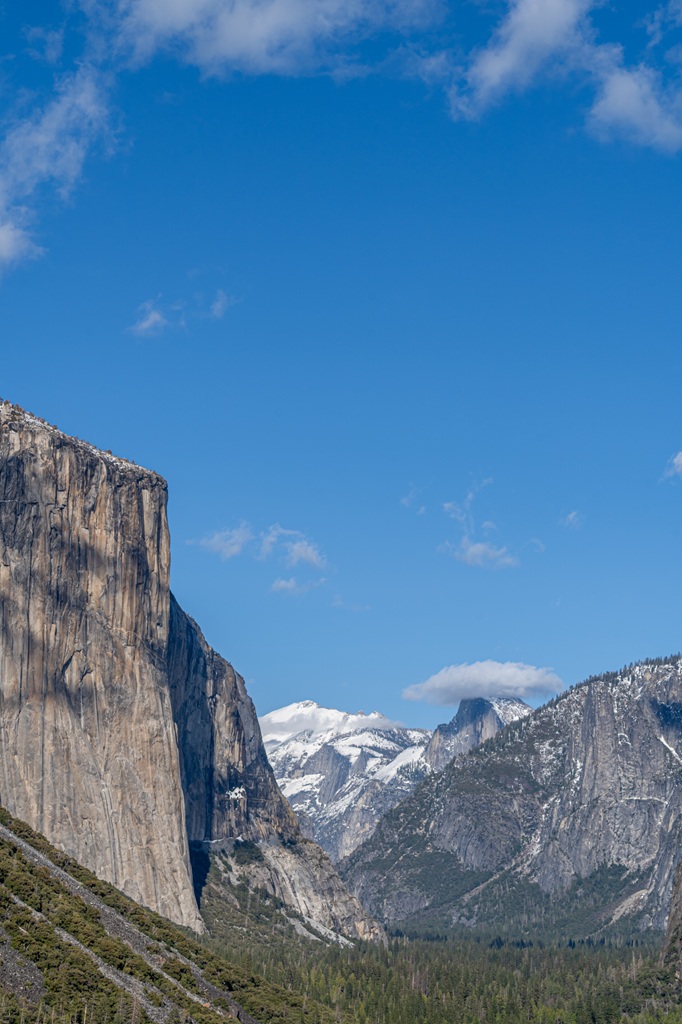
Artist Point Trail
Starting Point: Pohono Trailhead at Tunnel View in Yosemite Valley
Length: 2.2 miles roundtrip
Elevation Gain: 800 feet
Hiking Time: 1.5 to 2 hours
Route Type: Out-and-back
Pet-friendly? No, pets are not allowed
Hike Features: Tunnel View views (El Capitan, Bridalveil Fall, Half Dome, and other granite peaks)
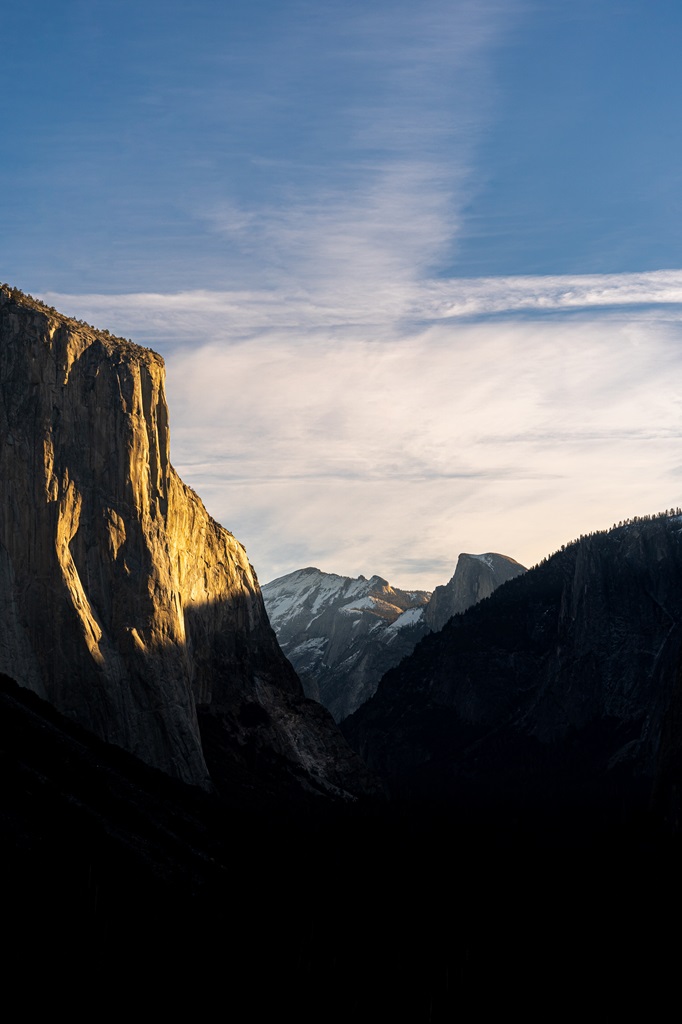
Artist Point gives you the classic Tunnel View panorama, including El Capitan, Bridalveil Fall, Half Dome, and Clouds Rest, but without the crowds.
The trail starts from the Tunnel View parking lot with a steep, rocky climb, then winds through a forest before opening up to a wide clearing with scenic views.
Part of the route follows Old Wawona Road, the historic road that once brought visitors into Yosemite.
The trail can be tricky to follow, so have offline maps downloaded (plus a physical map and compass). And be prepared for icy and snowy conditions in the winter!
Mariposa Grove (lower grove)
⚠️ Road Closure and No Shuttle!! From roughly November to April, the Mariposa Grove Road is closed and the shuttle doesn’t run, which means any hike you do in the grove comes with an extra 4 miles tacked on.
The Mariposa Grove Welcome Plaza parking lot does stay open year-round, so in winter you’ll park there and hike about 2 miles (with 550 feet of elevation gain) along the Washburn Trail to reach the grove. You can also walk along the closed road (it’s about the same distance).
Big Trees Loop Trail
Starting Point: Mariposa Grove Arrival Area
Length: 0.3 miles roundtrip (+4 miles)
Elevation Gain: Relatively flat trail (+550 feet)
Hiking Time: 30 to 45 minutes (+2 hours)
Route Type: Loop
Pet-friendly? No, pets are not allowed
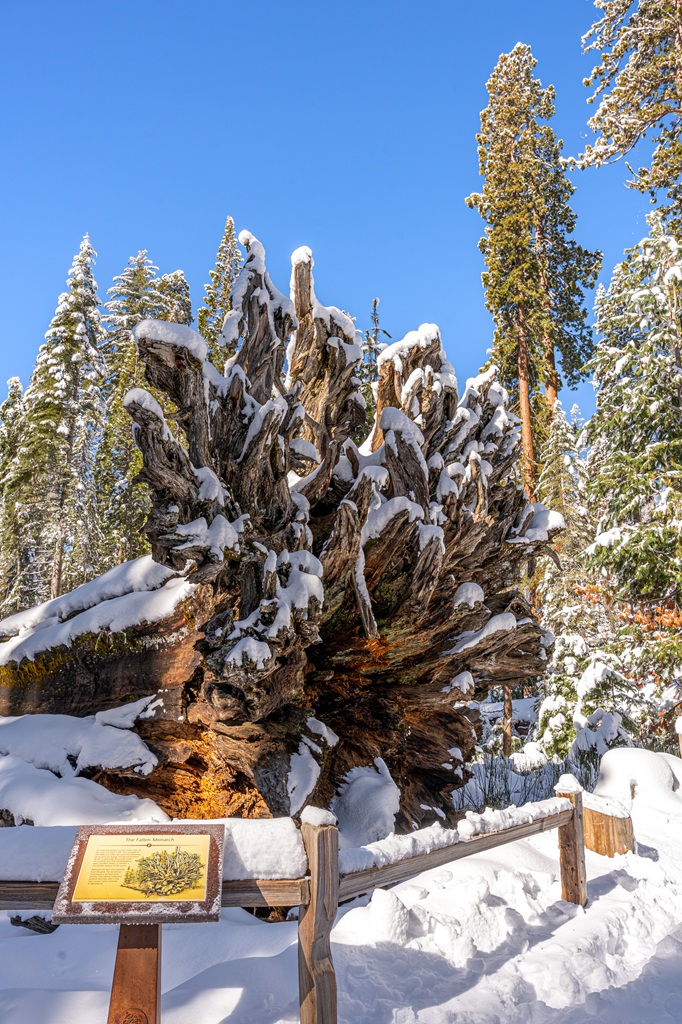
Hike Features: Fallen Monarch and interpretive panels on the life and ecology of giant sequoias
The Big Trees Loop Trail is a great hike for beginners and family friendly. It winds through towering giant sequoias, passes the Fallen Monarch, and has interpretive signs that explain more about these massive trees and their ecosystem.
The trail can get icy and slippery in winter, so take it slow and be cautious.
If there’s enough snow, Mariposa Grove is an awesome place for cross-country skiing or snowshoeing!
Grizzly Giant Loop Trail
Starting Point: Mariposa Grove Arrival Area
Length: 2.1 miles roundtrip (+4 miles)
Elevation Gain: 380 feet (+550 feet)
Hiking Time: 1 hour (+2 hours)
Route Type: Loop
Pet-friendly? No, pets are not allowed
Hike Features: Bachelor and Three Graces, Grizzly Giant, and California Tunnel Tree
Start your hike from the Mariposa Grove Arrival Area and follow the Big Trees Loop Trail for a bit. At the first junction, follow the signs for Grizzly Giant Loop Trail.
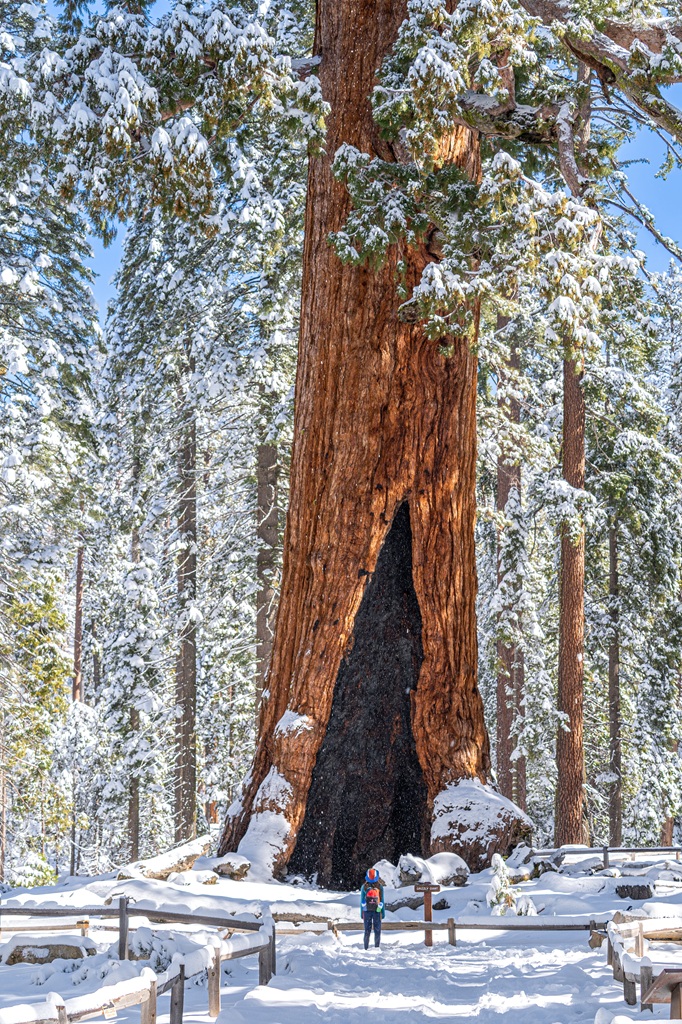
From there, you’ll pass some of the grove’s most famous giants, including the Bachelor and Three Graces, the massive 3,000-year-old Grizzly Giant, and the California Tunnel Tree.
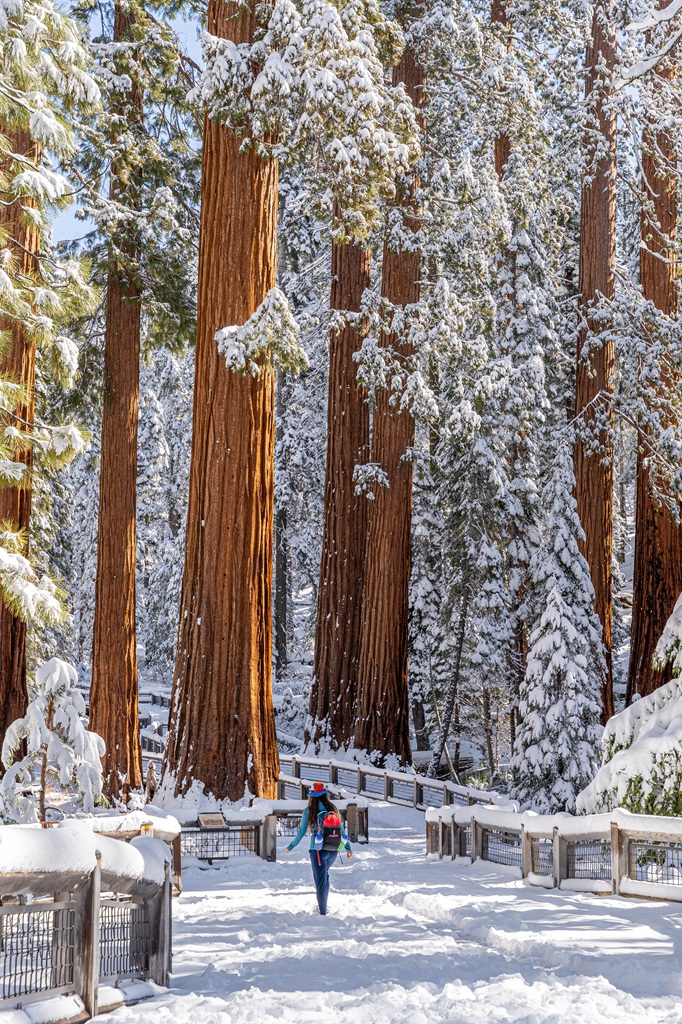
In winter, the whole grove turns into a quiet, snow-covered wonderland. It’s peaceful, beautiful, and a totally different experience.
Snowshoeing and cross-country skiing are awesome ways to explore the grove when conditions allow.

Tuolumne Grove Trail
Starting Point: Tuolumne Grove Trailhead off Tioga Road
Length: 2.5 miles roundtrip
Elevation Gain: 600 feet
Hiking Time: 1.5 to 2.5 hours
Route Type: Lollipop
Pet-friendly? Pets are allowed on the paved trail through the grove, but not on the side trails in the grove.
Hike Features: Dead Giant Tunnel Tree
The Tuolumne Grove Trail starts with a steady downhill walk along an old roadbed (the former Big Oak Flat Road) that leads you right into the heart of the grove.
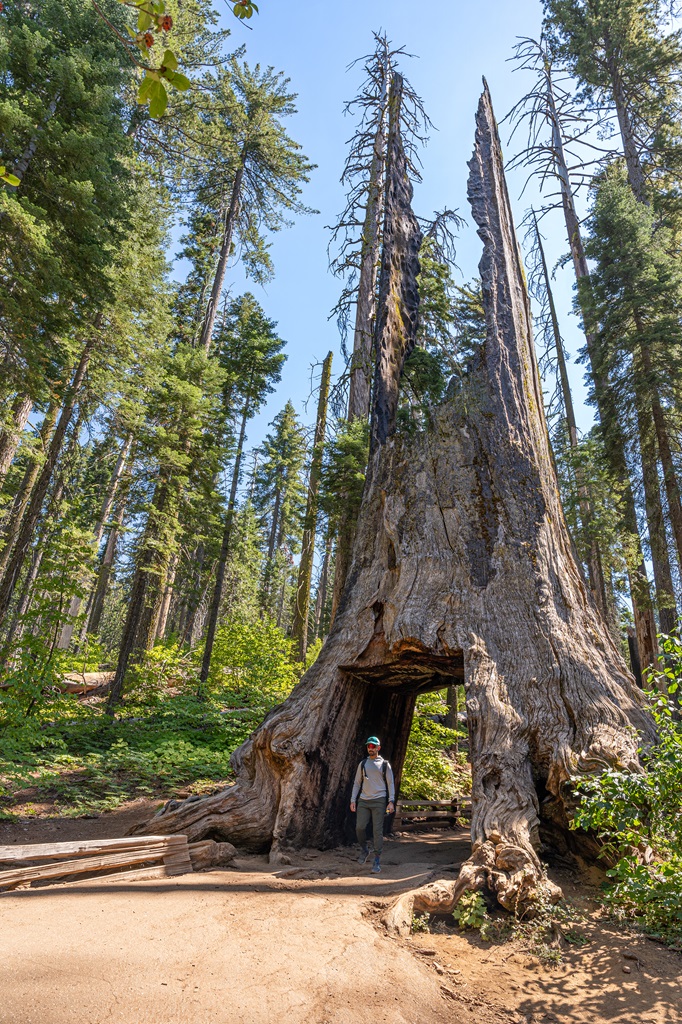
Tuolumne Grove has around two dozen giant sequoias, and the standout is the Dead Giant Tunnel Tree which is a massive sequoia with a tunnel carved through it in the 1870s as a tourist attraction.
It once towered 200 feet tall and has a whopping 120-foot circumference. It’s a fascinating yet devastating glimpse into early tourism and what these ancient trees have had to endure.
This trail is perfect if you’re looking for a quieter Yosemite experience, and in winter, with fresh snow on the ground, it feels even more peaceful and magical.
The Tuolumne Grove Trailhead sits at 6,200 feet in elevation so expect more snow accumulation as compared to Yosemite Valley which sits at 4,000 feet.
It might be a good idea to bring snowshoes (or cross-country skis) rather than just hiking in regular boots due to deep snow.
🌳 READ THIS: Best Spots to Find Giant Sequoia Trees in Yosemite
Wapama Falls Trail
Starting Point: Wapama Falls Trailhead in Hetch Hetchy
Length: 5 miles
Elevation Gain: 500 feet
Hiking Time: 2.5 to 3.5 hour
Route Type: Out-and-back
Pet-friendly? No, pets are not allowed
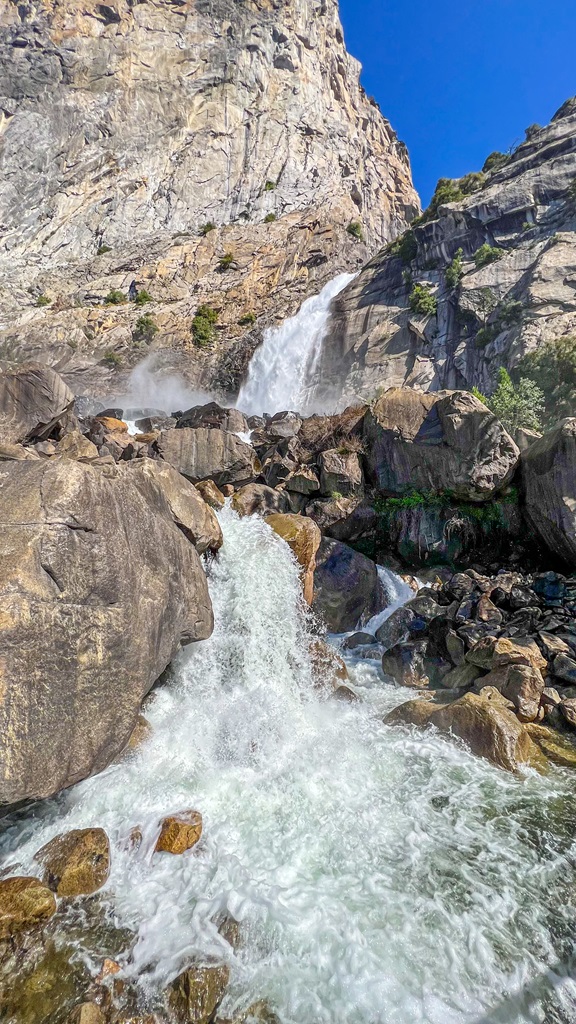
Hike Features: O’Shaughnessy Dam, Tueeulala Falls, Wapama Falls
✨ READ THIS: Wapama Falls Hiking Guide
Just like Yosemite Valley, Hetch Hetchy does not typically receive too much snow. But in winter, Hetch Hetchy is quieter than usual and breathtaking, especially when it does snow!
Keep in mind that the Hetch Hetchy Road can close or require chains when conditions are icy or snowy. The road is also only open from sunrise to sunset!
⚠️ For the latest updates on road status, call 209-372-0200 (press 1, then 1). Also, you can check the current conditions HERE.
The Wapama Falls Trailhead is located at the O’Shaughnessy Dam, and the trail starts at the end of the tunnel across the dam.
Since Hetch Hetchy sits around 4,000 feet, hikes here, like Wapama Falls, are usually doable in winter.
In winter, it’s a great choice, offering cooler weather and fewer crowds than during the summer!
Dewey Point Winter Loop
Starting Point: Badger Pass Ski Area off Glacier Point Road
Length: 7.4 miles roundtrip
Elevation Gain: 900 feet
Hiking Time: 4 to 5 hours
Route Type: Loop
Pet-friendly? No, pets are not allowed
Hike Features: Stunning views from Dewey Point
⛷️ Dewey Point Winter Loop Map
This is an epic half-day snowshoe adventure! You’ll start from Badger Pass Ski Area with about a mile along Glacier Point Road before turning into the forest on the winter route.
The trail splits onto Ridge Trail (#14) or Meadow Trail (#18), with Ridge Trail being more open and challenging, and Meadow Trail winding through forest clearings.
As you near Dewey Point, the trees thin and the surrounding peaks come into view.
The recommended direction is clockwise, which makes the return easier and lets you enjoy the ridge views early. You can do an out-and-back or the full loop. The latter is usually the preferred choice.
⚠️ This trail is only meant for snowshoeing or cross-country skiing, so please don’t hike in boots or microspikes! Post-holing damages the ski trail and makes it unsafe.
You can rent snowshoes or rent cross-country skis at Badger Pass Ski Area. Guided tours are also available!
I haven’t tried this trail yet, but my husband and I are hoping for a good snowfall this winter so we can try new winter activities, such as snowshoeing and cross-country skiing.
Gin Flat Loop Trail
Starting Point: Tioga Road near Tuolumne Grove parking area
Length: 5 miles roundtrip
Elevation Gain: 770 feet
Hiking Time: 3 to 4 hours
Route Type: Loop
Pet-friendly? No, pets are not allowed
Hike Features: Peaceful winter forest vibes
This is a cross-country skiing and snowshoeing route meant for winter use. The trail loops along Old Big Oak Flat Road and Tioga Road, with an optional detour through the meadow.
It’s a great way to enjoy Yosemite’s winter scenery and the peaceful solitude of the park. You can go either direction, but counter-clockwise is recommended as it offers a gentler climb and a steeper descent, which works well for skiers.
If you’re new to snowshoeing, this trail can be a bit challenging, so start early, take it slow, and soak in the quiet beauty of the forest covered in snow.
Challenging Yosemite Hikes in Winter
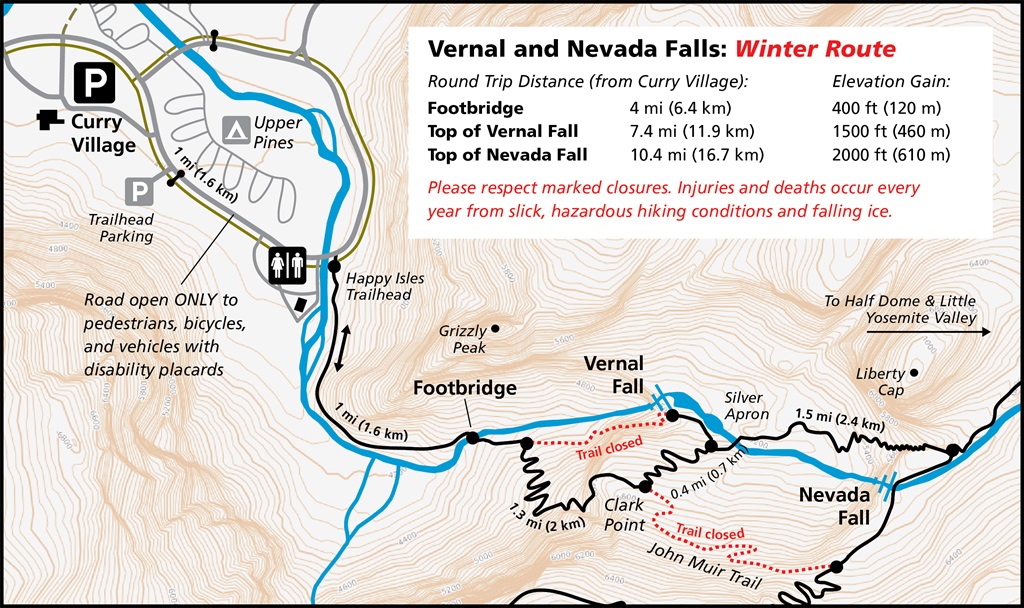
Mist Trail and John Muir Trail to Vernal Fall and Nevada Fall (winter route)
Starting Point: Happy Isles (shuttle stop #16) in Yosemite Valley
Length: 10.4 miles roundtrip
Elevation Gain: 2,000 feet
Hiking Time: 6 to 8 hours
Route Type: Out-and-back
Pet-friendly? No, pets are not allowed
Hike Features: Vernal Fall Footbridge, Vernal Fall, Clark Point, and Nevada Fall
✨ READ THIS: Mist Trail vs John Muir Trail Hiking Guide
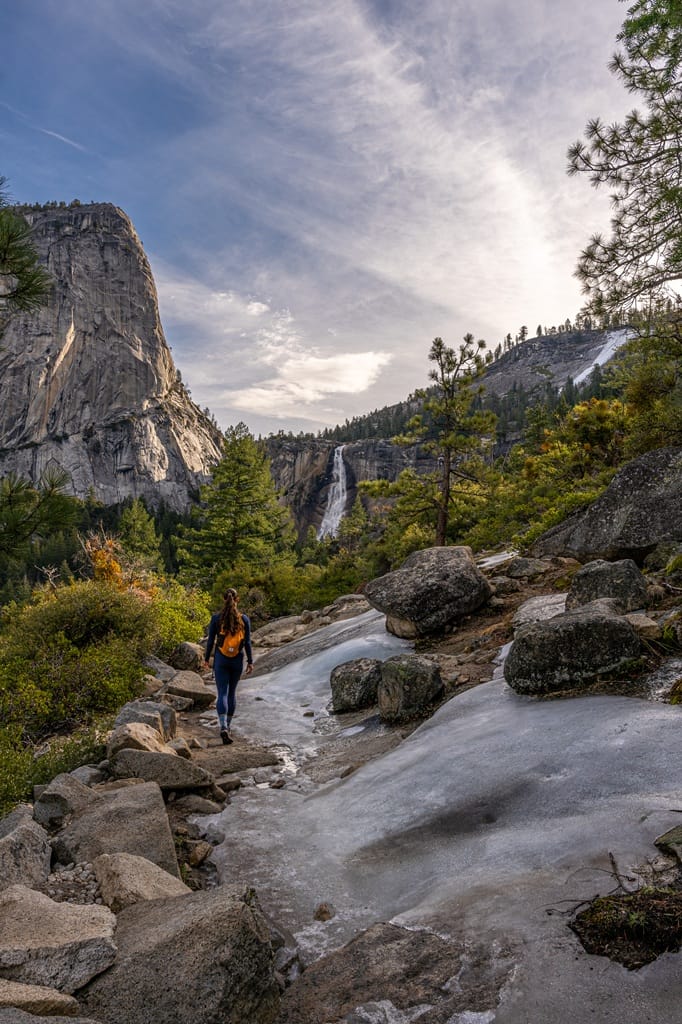
Hiking the Mist Trail and John Muir Trail to Vernal Fall and Nevada Fall is a bucket-list adventure in Yosemite. It’s challenging but absolutely worth it!
In winter, parts of the trail are closed due to dangerous conditions from November to May. The closing dates vary year by year depending on how gnarly the winter season is.
The stairs section of the Mist Trail near Vernal Fall is off-limits because of the risk of rock fall and steps being covered in ice, and the upper portion of the John Muir Trail from Clark Point to the top of Nevada Fall is also closed due to treacherous icy conditions.
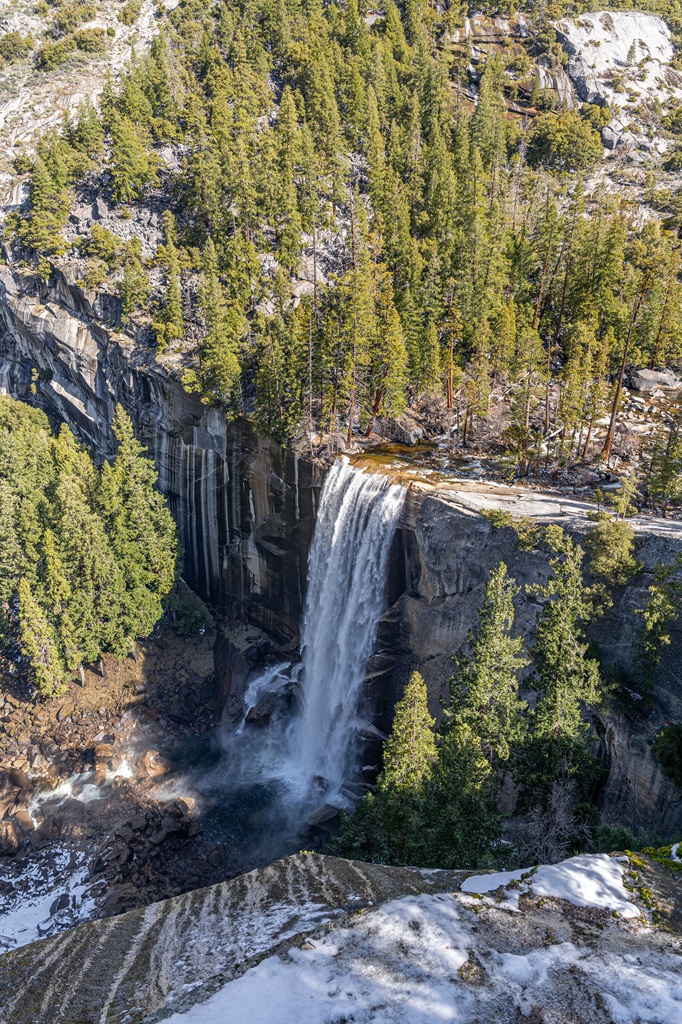
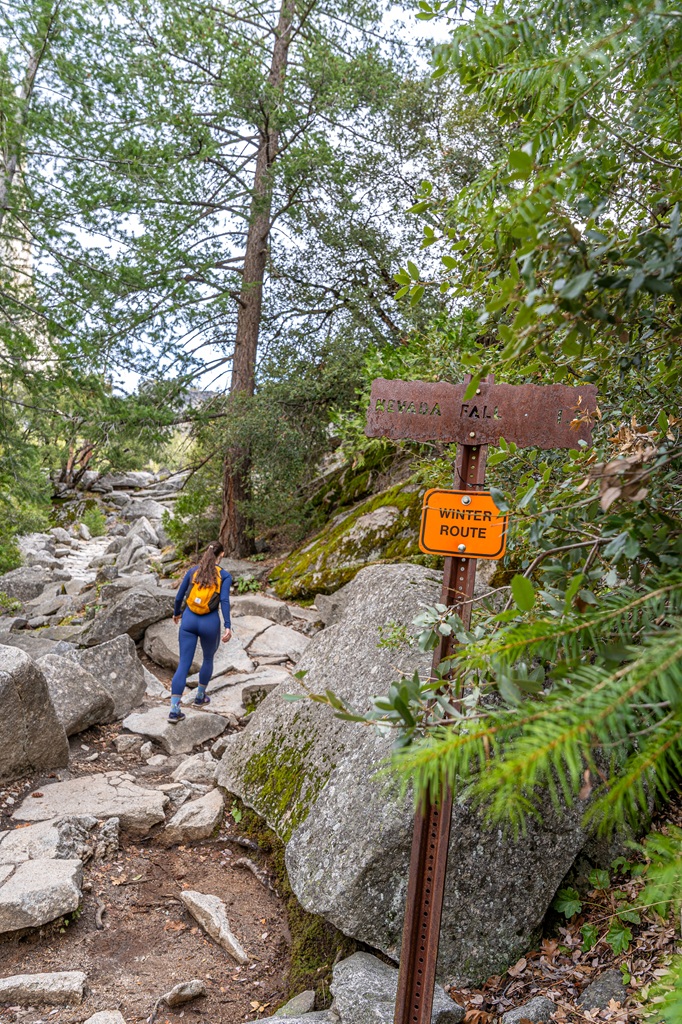
There is an alternate winter route that allows you to reach the top of Vernal Fall and Nevada Fall.
The winter route begins along the Mist Trail just past the Vernal Fall Footbridge where you’ll come to a junction and a closed gate. Take a right to hop on the John Muir Trail.
Follow the John Muir Trail until you reach Clark Point. There will be a gate to the right indicating that the rest of the John Muir Trail is closed. Continue straight along the “Clark Point cutoff.”
You will reach the top of Vernal Fall. Continue down the granite slab and veer to the right to hop onto the Mist Trail.
Follow the trail until you reach the top of Nevada Fall. Then retrace your steps to complete a 10.4 mile out-and-back hike.
Be cautious as the sections that remain open can be very icy and snowy, so be prepared with microspikes and hiking poles!
⚠️ Always check current trail conditions before heading out!
Four Mile Trail (below Union Point)
Starting Point: Four Mile Trailhead (shuttle stop #11)
Length: 5.6 miles roundtrip
Elevation Gain: 2,000 feet
Hiking Time: 3 to 4 hours
Route Type: Out-and-back
Pet-friendly? No, pets are not allowed
Hike Features: Incredible views of Yosemite Valley
✨ READ THIS: Four Mile Trail Hiking Guide
The Four Mile Trail is partially open in winter, giving you access to the lower 2.8 miles up to the gate just below Union Point.
Even with the closure, you still get some incredible views of Yosemite Valley, including El Capitan, Yosemite Falls, and Half Dome.
Just be extra careful! The trail sits in the shade most of the day and can become really icy. Microspikes and hiking poles are a must.
The entire trail usually opens sometime in May and then closes back down to the gate once winter conditions hit, typically by November or December. After big snowstorms, the whole trail may close.
⚠️ Check current trail conditions to make sure the lower portion of the trail is open!

Upper Yosemite Fall Trail
Starting Point: Upper Yosemite Fall Trailhead (shuttle stop #7)
Length: 7 miles
Elevation Gain: 3,200 feet
Difficulty: Challenging
Hiking Time: 4 to 8 hours
Route Type: Out-and-back
Pet-friendly? No, pets are not allowed
Hike Features: Columbia Rock, different angles of Yosemite Falls, Yosemite Falls Overlook, and insane views of the valley
✨ READ THIS: Upper Yosemite Fall Hiking Guide
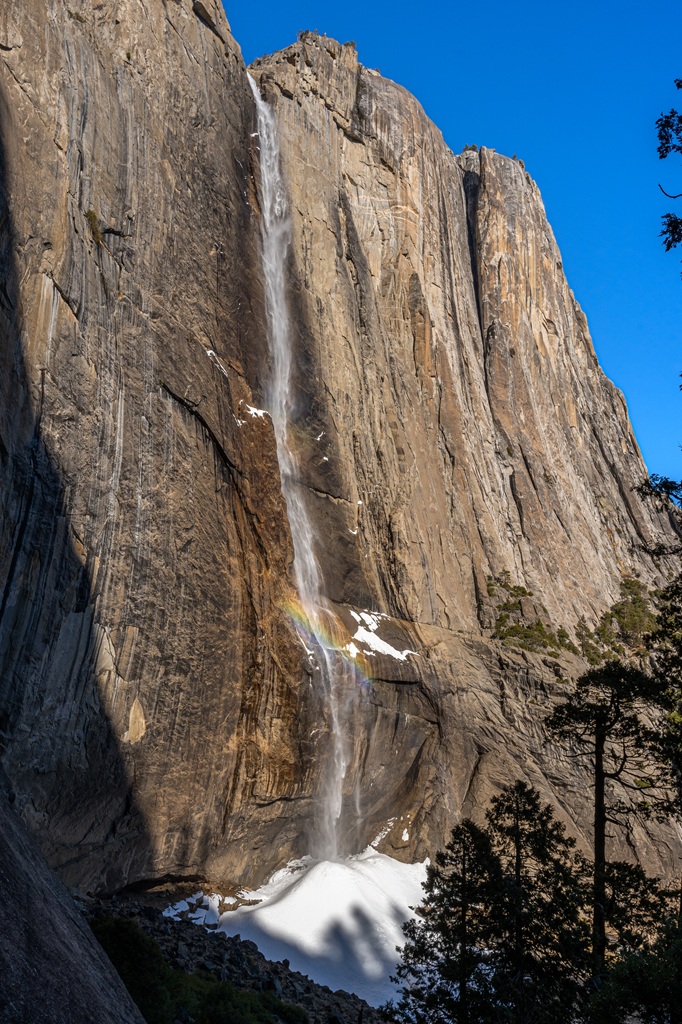
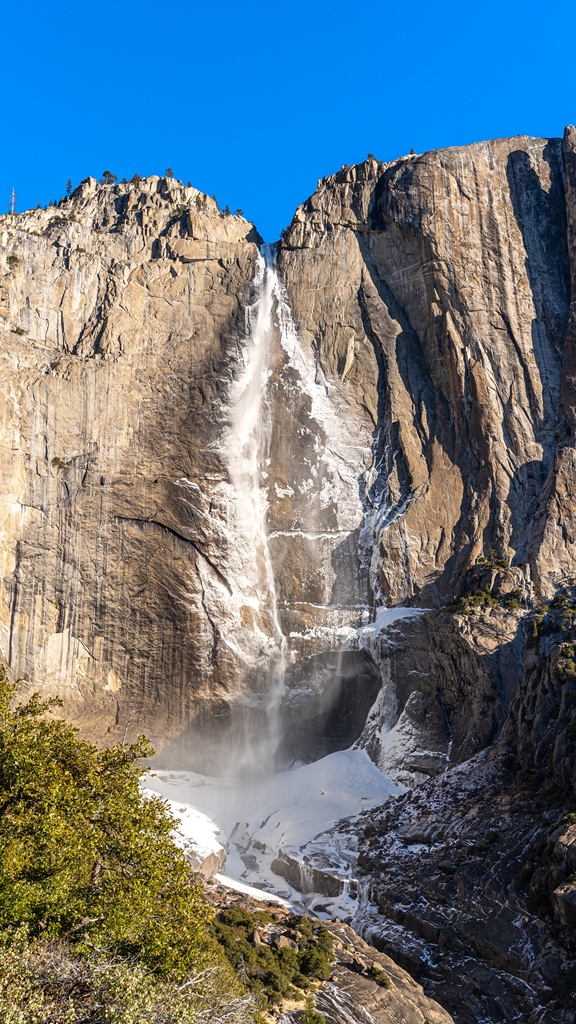
Yosemite Falls is one of the tallest waterfalls in North America, plunging an incredible 2,425 feet from top to bottom.
It’s made up of three parts: the massive Upper Yosemite Fall (1,430 feet), the Middle Cascades (675 feet), and the shorter but still gorgeous Lower Yosemite Fall (320 feet).
If you’re looking for a challenge, the Upper Yosemite Fall Trail is one of the most rewarding hikes in the park. It climbs about 3,000 feet in just 3.5 miles, so expect steep switchbacks, rocky terrain, and a serious leg workout!
In winter, you might hear a thunderous BOOM while hiking closer to the falls due to ice from the top falling down the waterfall. The ice along with snow formed from the waterfall’s spray creates a “snow cone” at the base.
You’ll get nonstop views of Yosemite Falls, Yosemite Valley, Half Dome, and the surrounding granite cliffs. And if you want to go even farther, you can tack on another mile to reach Yosemite Point for even bigger, jaw-dropping views.
In winter, the lower section of the trail gets plenty of sun, so it’s often clear of snow, whereas the upper portion barely sees any sunlight, so it can be extremely icy, slick, or even buried under several feet of snow.
There are no restrooms along the trail, so use the facilities at Camp 4 near the trailhead before you start your climb.
There is a big parking area in front of Camp 4 where you can park. You can also take the shuttle bus to Yosemite Falls parking area (stop #7).
➡️ Enjoy waterfalls?? Explore the best waterfall hikes in Yosemite National Park!
El Capitan from Yosemite Valley
Starting Point: Upper Yosemite Fall Trailhead (shuttle stop #7)
Length: 16 miles roundtrip
Elevation Gain: 4,800-5,200 feet (different sources say different things)
Hiking Time: 8-12 hours
Route Type: Out-and-back
Pet-friendly? No, pets are not allowed
Hike Features: Upper Yosemite Fall, views of Yosemite Valley, and standing on top of the most iconic landmark in Yosemite – El Capitan
✨ READ THIS: El Capitan from Yosemite Valley Hiking Guide
If you’re into big challenges and love winter hiking, tackling El Capitan in the snow is an epic adventure!
You’ll likely encounter snow at this elevation so be prepared with microspikes, snowshoes, or sometimes both to safely complete this hike.
This trail is no joke! It’s long, steep, and seriously tough, but the views from the top are so worth the grind.
My husband and I hiked it for the first time in February 2025, and once we passed the Upper Yosemite Fall Trail junction, everything was completely buried in snow.
It ended up being one of the hardest hikes we’ve ever done but also one of our favorites!
The trail starts at the Upper Yosemite Fall Trailhead which is located near Camp 4. Look for the trail sign at the back left of the Camp 4 parking area.
You can either park at the Yosemite Falls parking area or take the shuttle to stop #7 (Camp 4/Yosemite Falls).


Mariposa Grove (upper grove)
⚠️ Road Closure and No Shuttle!! From roughly November to April, the Mariposa Grove Road is closed and the shuttle doesn’t run, which means any hike you do in the grove comes with an extra 4 miles tacked on.
The Mariposa Grove Welcome Plaza parking lot does stay open year-round, so in winter you’ll park there and hike about 2 miles (with 550 feet of elevation gain) along the Washburn Trail to reach the grove. You can also walk along the closed road (it’s about the same distance).
Guardians Loop Trail
Starting Point: Mariposa Grove Arrival Area
Length: 6.5 miles roundtrip (+4 miles)
Elevation Gain: 1,000 feet (+550 feet)
Hiking Time: 4 to 6 hours (+2 hours)
Route Type: Lollipop
Pet-friendly? No, pets are not allowed
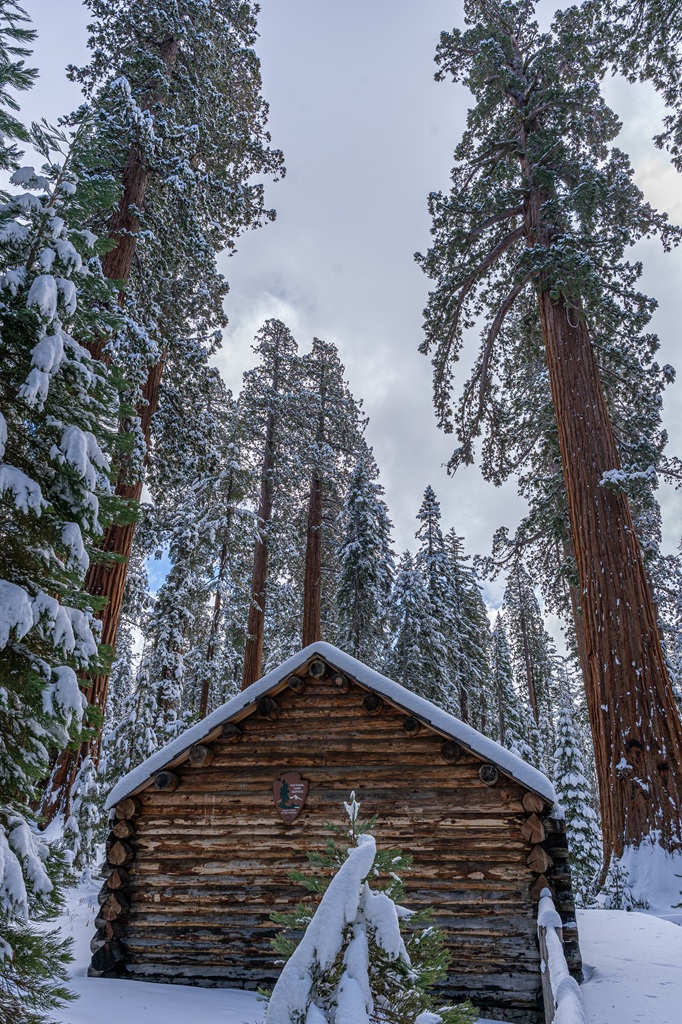
Hike Features: Columbia Tree, Mariposa Grove Cabin, Telescope Tree, and Fallen Tunnel Tree
Take the Mariposa Grove Trail up to the upper grove, then hop onto the 1.5-mile Guardians Loop Trail.
Along the way, you’ll pass tons of beautiful giant sequoias beyond what you see in the lower grove, including highlights like the Columbia Tree, Telescope Tree, and the Fallen Tunnel Tree.
It’s also an awesome winter route for cross-country skiing or snowshoeing.
❄️🌲 Don’t miss Mariposa Grove this winter! Want to snowshoe along peaceful trails and see giant sequoias covered in snow? Read my ultimate guide to visiting Mariposa Grove in winter!
Wawona Point via Mariposa Grove Trail
Starting Point: Mariposa Grove Arrival Area
Length: 7 miles roundtrip (+4 miles)
Elevation Gain: 1,200 feet (+550 feet)
Hiking Time: 4 to 6 hours (+2 hours)
Route Type: Out-and-back
Pet-friendly? No, pets are not allowed
Hike Features: Bachelor and Three Graces, Grizzly Giant, Faithful Couple, Clothespin Tree, Mariposa Tree, Galen Clark Tree, and Wawona Point
Start your hike from the Mariposa Grove Arrival Area and follow the historic trail all the way up to Wawona Point.
Sitting at 6,800 feet, this overlook delivers gorgeous wide-open views that make the climb totally worth it.
My husband and I did this one in winter 2025, and it was so much fun. The snow near Wawona Point was knee-deep! Snowshoes would have been ideal.
If there’s enough snow during your visit, exploring Mariposa Grove on snowshoes or cross-country skis is an awesome way to experience it!
Snow Creek Trail
Starting Point: Mirror Lake Trailhead (shuttle stop #17) in Yosemite Valley
Length: 9.4 miles roundtrip
Elevation Gain: 3,000 feet
Difficulty: Challenging
Hiking Time: 6 to 7 hours
Route Type: Out-and-back
Pet-friendly? No, pets are not allowed
Hike Features: Mirror Lake, and amazing views of Half Dome and Tenaya Canyon
This tough 9.4-mile trail starts at the Mirror Lake Trailhead, then continues climbing out of Tenaya Canyon toward Snow Creek.
It’s steep! One of the quickest, hardest ways out of Yosemite Valley, but the payoff is huge. As you gain elevation, you’ll get incredible views of Half Dome, the Quarter Domes, Clouds Rest, and the whole stretch of Tenaya Canyon.
In winter it’s a popular route for well-prepared backpackers heading into the backcountry. If you’re tackling it in the colder months, you must be equipped with proper winter gear like microspikes, snowshoes, or cross-country skis.
The lower section can get extremely icy and snow-covered, while the upper portion usually melts out faster thanks to more sunlight.
It’s a demanding hike on par with the trek up to Upper Yosemite Fall, so don’t underestimate it. But if you’re up for a challenge and fully prepared for winter conditions, then it’s an epic adventure!
Glacier Point Road
Starting Point: Badger Pass Ski Area
Length: 22 miles roundtrip
Elevation Gain: 2,660 feet
Hiking Time: 10+ hours
Route Type: Out-and-back
Pet-friendly? No, pets are not allowed
Hike Features: Jaw-dropping views from Glacier Point and Washburn Point
In winter, Glacier Point Road closes to cars and transforms into one of Yosemite’s most iconic cross-country ski and snowshoe routes.
The route is about 22 miles roundtrip, so snowshoeing the full distance will take all day! If you want a faster, smoother experience, cross-country skiing is definitely the way to go.
Many people choose to make the one-way 11-mile trip out to Glacier Point and stay overnight at the Glacier Point Ski Hut.
The trail starts at the Badger Pass Ski Area. If you’re staying overnight, grab your free wilderness permit there. Rangers can also update you on weather and trail conditions, and you can rent skis or snowshoes at Badger Pass.
It’s a super popular winter adventure because the views at the end are absolutely next level! Plus, you get to enjoy Glacier Point without the usual summer crowds.
Since the road is machine-groomed with set ski tracks, it’s a great option for beginners. Just keep in mind that this is primarily a ski route, so please avoid walking in the tracks.
Hiking in boots and microspikes can really mess up the snow surface and make it tough for skiers to move smoothly. So tackle this winter route in either snowshoes or skis!
Yosemite Hikes in Winter Map
❄️ Yosemite Winter Guides
- Ultimate Guide to Visiting Yosemite in Winter
- The Only Yosemite Winter Itinerary You Need!
- Where to Stay in Yosemite in Winter: 15+ Best Lodges, Hotels, and Cozy Cabins
- The Ultimate Yosemite Winter Packing List
- 20 Best Yosemite Hikes in Winter (Guide to Snowy Adventures)
- 18 Best Yosemite Winter Activities You Can’t Miss!
- Yosemite Firefall: A Complete First-Timer’s Guide
- Beginner’s Guide to Visiting Mariposa Grove in Winter
Tips for Tackling Yosemite Trails in Winter
1. Check Road Status: Tioga Road, Glacier Point Road, and Mariposa Grove Road all close for the winter season. All other roads in Yosemite stay open year-round, but weather can still cause temporary closures.
⚠️ Check road conditions before you go!
2. Always Carry Tire Chains: Make sure you have tire chains in your vehicle when visiting Yosemite in winter or anytime there’s a chance of snow. It’s the law!
Tire chains help your car get traction on icy or snowy roads. Chains come in different sizes and styles, so double-check that yours fit your vehicle before hitting the road. And know how to put them on and take them off!
Chain control is usually in effect from November through March, but it can start as early as September or stretch as late as May. Don’t have your own? No worries! You can purchase them from many stores in nearby towns.
3. Download Offline Maps: Winter snow can bury parts of Yosemite’s trails, especially at higher elevations, making it tricky to stay on course. Make sure to download offline maps on your phone AND bring a physical map and compass too!
4. Make Sure Someone Knows Your Plans: Let a trusted friend or family member know your plans and check in with them as soon as you have cell service,
5. Check the Weather Forecast: Don’t attempt these trails in bad weather, especially if you’re new to winter hiking. Always check the forecast for snowstorms or thunderstorms and check the Yosemite webcams as they can give you a real-time look at conditions.
6. Winter Trail Closures: Many of the park’s trails remain open year-round, however, some close due to hazardous conditions. Typically, these trails include a portion of the Four Mile Trail and portions of the Mist Trail and John Muir Trail to Vernal and Nevada Falls.
⚠️ Check the trail conditions before you head out on your adventure!
7. Start Your Winter Hike Early: Hiking in the snow usually takes longer as compared to dry, non-snowy conditions. And with shorter daylight hours in winter, it’s important to start early. Bring a headlamp just in case you have to hike in the dark!
8. Know Your Limits and Skill Levels: A lot of Yosemite’s trails stay open in winter, but that doesn’t mean they’re easy to navigate. Some sections can be icy, while others might be buried under deep snow.
Know the trail conditions, bring the right gear, and be honest about your skill level. Winter hiking can be amazing, but it can also be dangerous!
If you’re planning to venture deep into the wilderness, especially at higher elevations, be ready for some serious snow and make sure you have avalanche training.
For experienced winter adventurers wanting to explore Tuolumne Meadows, the winter ranger blog is a great resource for updates.
9. Avoid Hypothermia: Bring plenty of layers to stay warm but understand the importance of proper layering to avoid becoming too cold or sweating too much which can result in you quickly becoming cold if you stop to rest.
Also, watch out for iced-over water, such as streams and lakes. Plunging into a cold body of water in winter can be very dangerous!
10. Be Bear Aware: Black bears are active within Yosemite. Follow these guidelines to avoid any negative interactions with a black bear.
🐻 Note: bear spray is prohibited in Yosemite!
11. Respect Nature: Follow Leave No Trace principles – plan ahead, pack out all trash, avoid disturbing wildlife, be considerate of others, and respect the natural beauty of Yosemite National Park.
Essential Gear for Winter Hiking in Yosemite
Some winter hikes in Yosemite may not require any special gear, depending on trail conditions.
Others may need microspikes or snowshoes, and for more advanced winter adventures, skis might be necessary.
⚠️ Check trail conditions before heading out and pack your winter gear based on the trail conditions, weather conditions, and your planned route. It’s better to be over-prepared than caught off-guard!
Here’s a list of winter hiking essentials:
🎒 Backpack – A pack around 22–30 liter works well to carry layers, snacks, water, and gear. I’ve been using the Cotopaxi Luzon Del Dia 24L Pack and my husband uses the REI Co-op Trail 25L Pack.
🥾 Winter Boots – Waterproof, insulated boots are a must!
🧊 Microspikes – Bring a pair of microspikes if you’re visiting in the winter and you’re planning to hike along icy trails. They will give you good traction to avoid slipping! I use Black Diamond Access Spike Traction Device.
❄️ Snowshoes – Best used when hiking on deep, soft, or loose snow, usually anything over six inches, to prevent sinking, also known as postholing. Don’t own any? You can rent them at the Badger Pass Ski Area!
☃️ Gaiters – Keep snow out of your boots when snowshoeing or hiking in deep snow.
🥢 Trekking Poles – Essential for stability on snow and slippery trails. I use REI Co-op Trailmade Trekking Poles and love them!
🧥 Warm Layers (top) – Pack a moisture-wicking base layer, a fleece mid-layer, an insulated jacket, and an outer shell to protect you from the elements, such as rain, snow, and wind. Check out my favorite tops 👇
- Base layer: REI Co-op Midweight Long-Sleeve Base Layer
- Fleece mid layer: Cotopaxi Teca Fleece Full-Zip Jacket
- Down mid layer: Cotopaxi Fuego Hooded Down Jacket
- Outer shell: Patagonia Torrentshell 3L Jacket
👖 Warm Layers (bottom) – Pack a breathable base layer, fleece-lined mid-layer, and soft-shell pants. A pair of hard-shell pants might be overkill but depends on the conditions and the winter adventure you plan to go on. My favorite fleece bottoms are the Baleaf Fleece Jogger Pants and the Baleaf Fleece Leggings.
🤠 Warm Hat/Beanie – Keeps your head and ears warm on cold winter hikes. My favorite beanie is the Cotopaxi Tozo Beanie!
🧦 Socks – Moisture-wicking, quick-drying socks are the way to go. My favorite pair of hiking socks are Darn Tough Hiker Micro Crew Cushion Socks. I’m obsessed with them!
🥶 Emergency Shelter – Pack an emergency bivy sack or space blanket for shelter in case of sudden weather changes.
🗺️ Navigation – Carry a physical topographic map, compass, a satellite messenger (or personal locator beacon), and download offline maps to help you stay on course, find your way in unfamiliar terrain, and call for help if needed.
🔦 Headlamp/Flashlight – A reliable light source with extra batteries, in case you end up hiking in the dark or need it for emergency situations.
🩹 First-Aid Kit – A basic first-aid kit with items like bandages, antiseptic, pain relievers, and any personal medications you may need.
💧 Water – Water bottles to carry sufficient water to stay hydrated, along with a filtration system or purification tablets if you plan to refill from natural sources.
🍕 Food – Energy-rich snacks or meals to keep your energy levels up during the hike.
😎 Sun Protection – Sunscreen, sunglasses, and a sunhat to protect yourself from harmful UV rays, even when it’s cloudy. Also, polarized sunglasses are important when it’s bright outside and the ground is covered in snow/ice.
🔥 Fire – A lighter, matches, or fire starter to help you build a fire for warmth or signaling in case of emergency. Along with matches, I also carry a multi-tool carabiner that has a fire starter, utility blade, screwdriver, and bottle opener.
🗡️ Multi-Tool and Repair Kit – A versatile tool/knife and repair kit to handle any task, from preparing food to making repairs.
🚙 Winter Car Kit – Pack a basic winter car kit, including blankets or sleeping bags, extra warm layers, ice scraper, small shovel, extra water, snacks, flashlights, portable power bank with chargers, and signaling devices. Just in case you get stranded or caught in an unexpected winter storm!
✨ Need help figuring out exactly what to pack for Yosemite this winter? Read my complete Yosemite winter packing list and download the PDF checklist to make packing quick and easy!
Conclusion
‘Tis the season when Yosemite transforms into a beautiful and serene winter wonderland!
From Yosemite Valley to Glacier Point and Mariposa Grove to Hetch Hetchy, every winter hike in Yosemite delivers stunning views and unforgettable adventures. ☃️
With the right gear and preparation, winter hiking in Yosemite can be an incredibly rewarding experience!
If this guide inspires you to tackle any of these amazing Yosemite hikes in winter, I’d love to hear about your adventure. ❄️
Leave a comment and share your experience!
🤩 Yosemite Trip Planning Resources
- 1-Day Yosemite Itinerary for First-Time Visitors
- Where to Stay Outside of Yosemite (best places in 2026)
- 13 Best Hikes in Yosemite Valley You Can’t Miss!
- Best Spots to Find Giant Sequoia Trees in Yosemite
- 10 Must-Do Easy Hikes in Yosemite for All Skill Levels
- Hetch Hetchy Hikes: Explore This Hidden Gem
- Best Yosemite Waterfall Hikes: Complete Guide
- Ultimate Guide to Visiting Yosemite in May
- Is Tioga Pass Open? Plan an Epic Trip with This Guide
- 12 Best Tioga Pass Hikes for Adventure Lovers
Enjoyed this post? Pin for later!