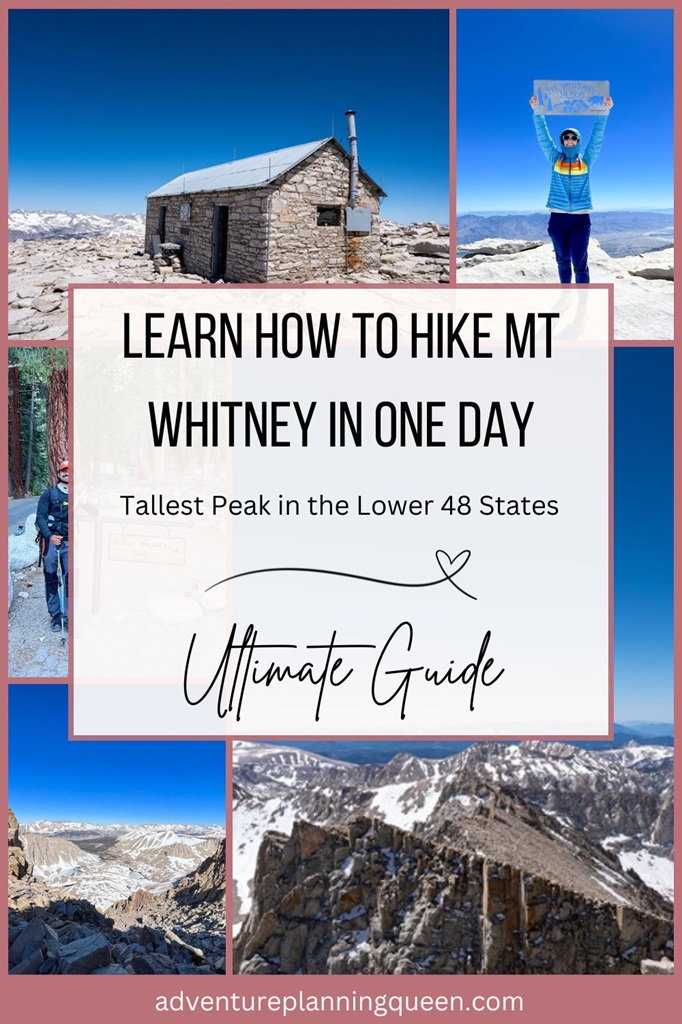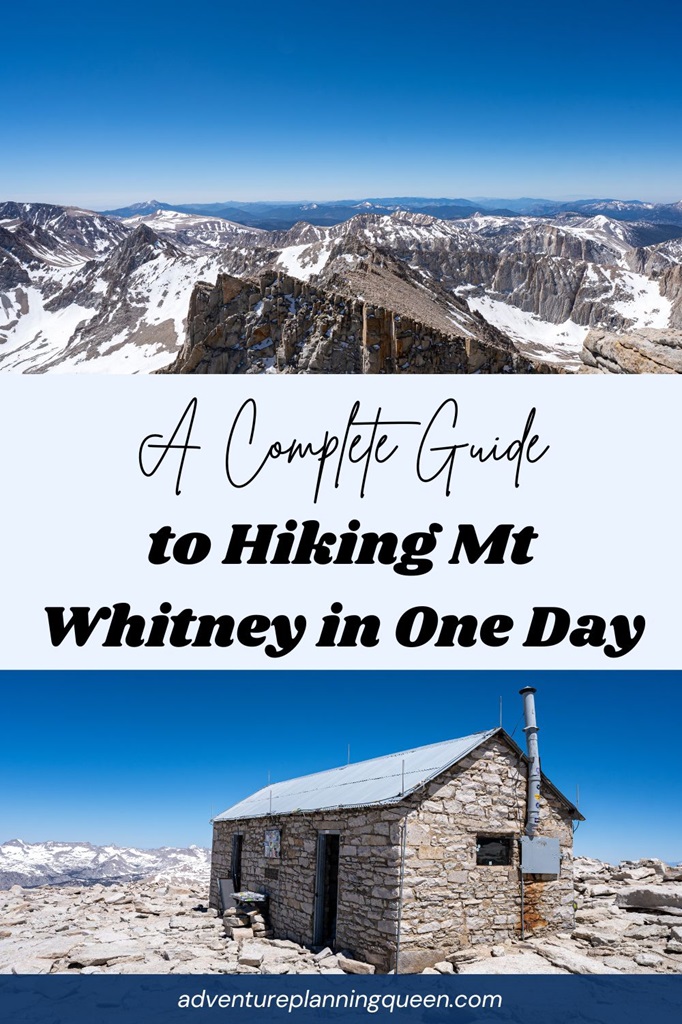
Mt Whitney, standing at 14,505 feet, is the tallest peak in the contiguous United States and a dream destination for many hikers and mountaineers.
Located in California’s Eastern Sierra, the Mt Whitney Trail is a 22-mile roundtrip trek with 6,600 feet of elevation gain.
The trail is well-maintained and non-technical during the typical hiking season from July to September, but the high altitude, distance, and elevation gain make hiking Mt Whitney in a day extremely demanding.
While thousands of hikers successfully summit Mt Whitney each year, this hike requires careful planning, physical training, and proper acclimatization.
Hiking Mt Whitney in a one day is a demanding challenge, best suited for experienced hikers who have thoroughly researched and prepared for the journey.
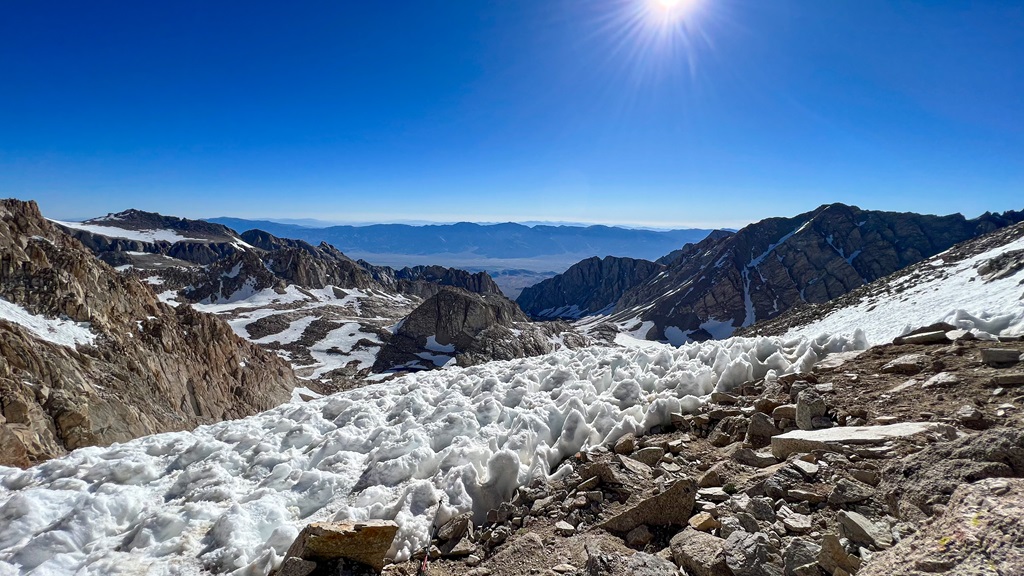
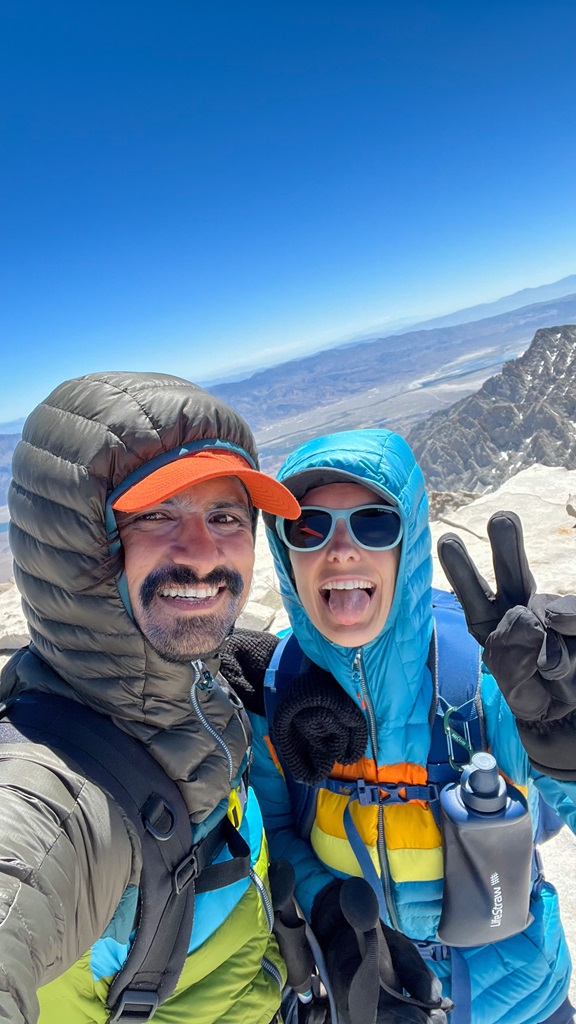
My husband and I tackled this trail in July 2023, during a record snow year.
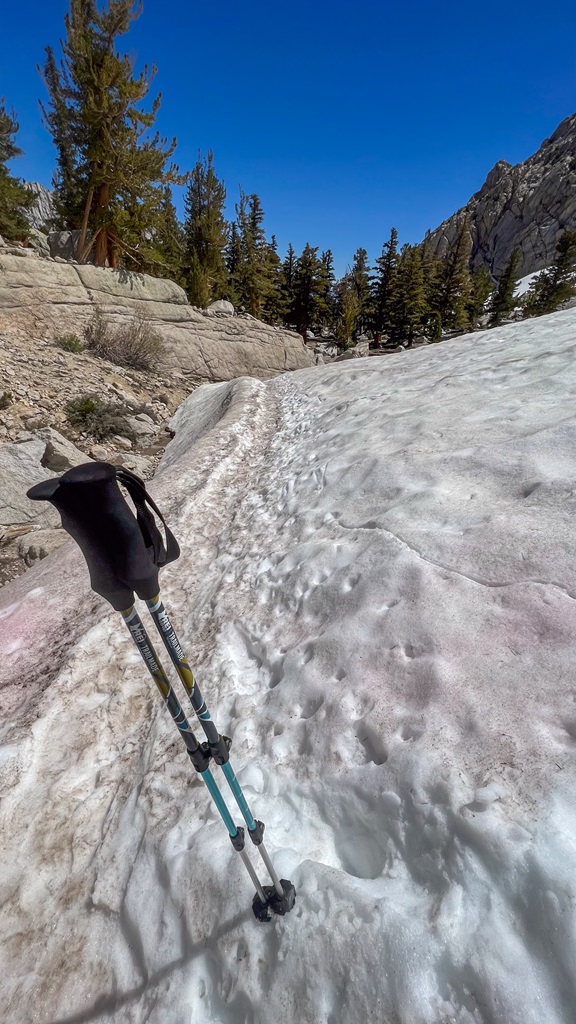
The trail beyond Lone Pine Lake was completely covered in snow, requiring the use of microspikes and an ice axe for a safe ascent.
Despite the extreme conditions, we successfully reached the summit, making it the most difficult yet rewarding hike of our lives! 🤩
We plan to attempt it again in 2025, but this time we’re hoping for snow-free trail conditions.
If you’re aiming on hiking Mt Whitney in a day, this guide will equip you with essential knowledge and preparation tips – but success ultimately depends on your dedication, training, and planning for a safe and unforgettable adventure!
Affiliate Disclaimer: Some of the links below may be affiliate links. Support the blog by signing up or purchasing through those links at no additional cost to you. We greatly thank you and appreciate you all for supporting us!
- Hiking Mt Whitney in One Day: Trail Stats, Map, + Chart
- Best Time to Hike Mt Whitney
- Mt Whitney Permits
- Mt Whitney Day Hike: How to Prepare + Gear List
- Day Hike Mt Whitney Logistics: Parking + Where to Stay
- Mt Whitney Summit via Mt Whitney Trail: Step-by-Step Directions
- FAQs: Hiking Mt Whitney in a Day
- Hiking Mt Whitney in One Day Trip Report
- Conclusion
Hiking Mt Whitney in One Day: Trail Stats, Map, + Chart
Mt Whitney Trail Stats
Starting Point: Mt Whitney Trailhead
Length: 22 miles roundtrip
Elevation Gain: 6,600 feet
Difficulty: Extremely challenging
Hiking Time: 12 to 20 hours (varies a lot depending on the conditions, fitness level, experience, etc.)
Route Type: Out-and-back
Pet-friendly? Technically yes (until you enter Sequoia National Park on Trail Crest), but it’s not recommended due to this hike being long and strenuous
Hike Features: Alpine lakes, meadows, “99 switchbacks”, Trail Crest, Mt Whitney summit
Mt Whitney Trail Map
Mt Whitney Trail Chart
| Landmarks | Elevation | Mile Marker |
|---|---|---|
| Mt Whitney Trailhead | 8,360 feet | 0.0 |
| Lone Pine Lake | 10,000 feet | 2.9 |
| Outpost Camp | 10,380 feet | 3.8 |
| Mirror Lake | 10,640 feet | 4.3 |
| Trailside Meadow | 11,360 feet | 5.2 |
| Consultation Lake | 11,680 feet | 5.8 |
| Trail Camp | 12,000 feet | 6.0 |
| 99 Switchbacks | 12,000 to 13,700 feet | 6.0 to 8.2 |
| Trail Crest | 13,700 feet | 8.2 |
| Mt Whitney Summit | 14,505 feet | 11.0 |
Best Time to Hike Mt Whitney
Most hikers attempt to summit Mt Whitney in late summer when the snow has melted, making the trail more accessible and safer to navigate.
The ideal time to hike the Mt Whitney Trail is typically from July to early September.
However, heavy snowfall during the previous winter can cause snow to linger well into late summer, so always check current trail conditions before setting out.
Now, let’s explore what to expect during each season, the best time to start your hike, and the unpredictable weather challenges that come with high-altitude terrain.
Seasonal Considerations
🌷 May to June
As winter snow gradually melts, expect lingering snow above Lone Pine Lake and on the switchbacks above Trail Camp well into June.
Nighttime temperatures often drop below freezing, and winter-like storms can still occur, making conditions unpredictable.
☀️ July to early September
If you prefer to avoid snow, plan your hike for late summer and always check current conditions before heading out.
During the late summer months, be prepared for cold, windy conditions above 12,000 feet as well the potential for thunderstorms and lightning developing early in the day.
If storms are in the forecast, consider rescheduling your hike or closely monitoring weather conditions as you ascend.
Plan to leave the summit well before noon – or even earlier if conditions worsen.
At the first sign of lightning, quickly descend from the summit or any exposed ridges! 🏃♀️💨
🍂 Late September to October
Shorter days and dropping temperatures make reaching the Mt Whitney summit more challenging.
There’s also the risk of extreme cold and heavy snowfall during early to mid-fall months.
☃️ November to April
Only those with high-altitude, mountaineering experience should attempt to summit Mt Whitney during winter and early to mid-spring months.
Hiking Mt Whitney during these months requires specialized gear and skills due to the harsh winter conditions and deep snow along the trail.
I assume people would take the Mountaineers Route in the winter months, but I don’t know much about that route.
Additionally, Whitney Portal Road usually closes from mid-November to late April, adding extra mileage to the hike.
⚠️ Check for updates on the road conditions HERE.
Best Time to Start
If you’re hiking Mt Whitney in a day, an early start is crucial.
Most hikers begin between 1 AM and 3 AM to ensure enough time for the long ascent and descent.
When my husband and I attempted the hike in July 2023, we started at 11 PM due to snowy conditions along the trail.
Furthermore, we weren’t acclimated to elevations above 10,000 feet, so I knew we would be hiking at a slower pace.
Like I mentioned above, afternoon thunderstorms are a frequent occurrence in the summer, making it essential to reach the summit by noon (12 PM).
Mt Whitney Weather
Even if it’s warm and sunny at the trailhead, higher elevations can bring unpredictable conditions, including high winds, subfreezing temperatures, and sudden storms.
⛅ Use THIS resource to check the Mt Whitney summit weather.
From May through June, snow still covers parts of the trail, and nighttime temperatures often dip below freezing.
During the peak hiking season of July to early September, conditions are generally fair, but afternoon thunderstorms and lightning are common hazards.
⚠️ Hikers should aim to leave the summit by noon (12 PM) to avoid exposure to dangerous weather.
As fall approaches, shorter days and colder temperatures make the hike more difficult, and early-season snowstorms become a possibility.
Winter storms from November through April can bring extreme cold, heavy snowfall, and winds exceeding 100 mph, making the trail extremely challenging and dangerous.
It’s important to always be prepared for the worst and have a game plan if conditions were to change suddenly.
Later in this blog post, I have a list of emergency gear you should pack just in case you get caught in dangerous weather – these items could save your life!!
Mt Whitney Permits
With its non-technical trail and the opportunity to summit the tallest peak in the lower 48 states, Mt Whitney is a highly popular hiking destination.
To manage the high demand and protect the environment, a lottery and permit system is in place for both day hikes and overnight trips between May 1 and November 1.
Each day, only 100 day-hike permits and 60 overnight permits are issued, making the application process competitive.
Mt Whitney Lottery Overview
- Quota Season: May 1 to November 1 (permits limited to 100 day hikers and 60 backpackers per day during this time)
- Where to Apply: Recreation.gov
- Lottery Application Dates: February 1 to March 1 (winners announced March 15)
- Permit Fees: $6 per permit application + $15 per person (required to claim awarded permit – due by April 21)
- Group Size Limit: 15 hikers per group
- Print and Pack Your Permit: Rangers patrol the trail and check for permits
Mt Whitney Permits (dates and info)
| Important Dates | Permit Information |
|---|---|
| November 2, 2024 – April 30, 2025 | A permit is still required during the non-quota season, but there is no limit on the number issued. You can reserve one up to two weeks before your hike. |
| February 1, 2025 – March 1, 2025 | Apply for the Mt Whitney Lottery |
| March 15, 2025 | Lottery winners announced |
| April 21, 2025 | The deadline to confirm your awarded lottery reservation and submit the $15 per person fee. |
| April 22, 2025 | Unclaimed lottery dates become available for online reservation at 7 AM PST. |
| May 1, 2025 – November 1, 2025 | The quota season restricts the number of hikers allowed per day. |
| November 2, 2025 – April 30, 2026 | A permit is required, but there is no limit on the number issued during the non-quota season. Reservations can be made up to two weeks in advance. |
How to Get a Permit to Hike Mt Whitney
Permits are obtained through a lottery system on Recreation.gov from February 1 to March 1, with winners announced on March 15.
If you don’t secure a permit in the lottery, don’t lose hope!
Unclaimed permits are released on April 22 and can be reserved on a first-come, first-served basis.
Additionally, cancellations pop up throughout the season, so it’s worth checking back frequently.
Many hikers have successfully snagged last-minute permits this way – that’s how my husband and I got our permits in 2023! 🙌
Another option is joining a hiking group on Facebook or Reddit – sometimes groups have extra spots when a member drops out.
Offseason Permits (November 2 – April 30)
Outside of the quota season, a permit is still required, but there is no limit on the number issued.
You can easily obtain one through Recreation.gov.
However, winter conditions on Mt Whitney can be extreme, with deep snow, subzero temperatures, and high winds.
Only experienced winter hikers and mountaineers should attempt to summit Mt Whitney during this time.
You Got a Permit, Now What?
First off, make sure you claim your awarded permit and pay the $15 per person fee by April 21.
Next, print and sign your permit.
Day-use permits must be printed by noon (12 PM) the day before your hike, while overnight permits must be printed by 10:30 AM on the day of entry.
⚠️ Failure to print your permit by the deadline will result in a no-show status, and your permit will be canceled!
Keep your permit securely in your backpack, preferably in a waterproof bag, as park rangers regularly patrol the trail and may request to see it.
If you’re caught without a permit, expect to be escorted back to the trailhead.
For groups, the designated leader is responsible for carrying the permit at all times.
🎟️ Find more information about Mt Whitney permits HERE.
Mt Whitney Day Hike: How to Prepare + Gear List
Hiking Mt Whitney in a day requires months of preparation, and I want to make sure you’re fully ready for this demanding trek.
You’ll need to be familiar with the route, pack the right gear, understand essential safety measures, and be prepared for the challenges of high-altitude hiking, such as the risk of altitude sickness and unpredictable weather.
I’ll also cover how to train effectively to give you the best chance of reaching the summit and making it back safely.
Training for Mt Whitney
Disclaimer: The information provided in this section of the blog post (“Training for Mt Whitney”) is for educational purposes only and is not intended to substitute professional medical advice or treatment. Always seek advice from your physician or other qualified healthcare provider before beginning a new exercise regimen.
Training for Mt Whitney should include a combination of strength training, endurance hikes, and high-altitude conditioning to ensure you’re physically prepared for this demanding trek.
Strength Training
Focus on building strength in key muscle groups, particularly your legs, core, back, and shoulders.
Compound lifts are excellent for overall strength and stability.
🏋️♀️ Compound lifts include:
- Squats
- Deadlifts
- Shoulder Press
- Pull-ups
- Chest Press
In addition to these foundational lifts, single-leg exercises are crucial for single-leg strength, balance, stability, and injury prevention.
🦵 A few great single-leg exercises include:
- Bulgarian Split Squats
- Pistol Squats
- Single-Leg Romanian Deadlifts
- Lateral Lunges
- Step-Ups
- Single-Leg Hip Thrusts or Glute Bridges
Endurance Training
Since Mt Whitney is a long, grueling hike, the best way to train is by gradually increasing your hiking distance and elevation gain.
If you’re new to hiking, start with shorter, easier trails and work your way up to longer and more strenuous routes.
Aim to build up to 18 to 22 miles in a single day with 6,600 feet of elevation gain – similar to the Mt Whitney hike.
If you don’t have access to trails like this, use a treadmill with an incline, train on a stair master, or find steep terrain to hike up and down for multiple repetitions.
Another important tip – get used to being on your feet and moving for 12+ hours!
For the best preparation, load your backpack with all the gear, water, and food you’ll be carrying on the Mt Whitney Trail during your training hikes.
This will help your body adjust to the added weight and improve endurance.
High-Altitude Conditioning
One of the biggest challenges hikers face on Mt Whitney is altitude sickness.
Sometimes hikers are forced to turn back before reaching the summit due to symptoms of altitude sickness (more on this later).
If possible, train at high altitude to help your body acclimate.
If that’s not an option, try spending a few nights in the Whitney Portal area before your hike.
A great way to adjust is to hike to Lone Pine Lake a few days before your summit attempt and spend time there.
This is exactly what my husband and I did, and it helped significantly.
We felt good until about 13,000 feet, where we experienced mild altitude sickness – but thankfully, it wasn’t severe enough to turn us around.
🏔️ Tip: If you’re unsure where to start or need a personalized training plan, consider reaching out to a professional who specializes in high-altitude endurance training!
Mt Whitney Gear List
I’ve created two separate gear lists for hiking Mt Whitney, tailored to different trail conditions.
The first list is for when the trail is clear and there’s little to no snow, while the second is for when the trail is mostly covered in snow.
Keep in mind, these lists are designed for day hikers only, so it doesn’t include camping gear like tents, stoves, sleeping bags, etc.
Mt Whitney Day Hike Gear:
- Backpack (22- to 35-liter sized pack)
- Hiking boots or shoes
- Water bottles or Hydration bladder
- Water filtration and treatment system
- Insulated, warm layers (what you wear depends on the weather forecast and conditions on the summit – always bring extra layers just in case)
- Moisture-wicking base layer (I prefer lightweight long-sleeve to protect myself from the sun)
- Mid-layer (lightweight or midweight down jacket / fleece pullover)
- Windbreaker / Rain jacket
- Gloves and warm beanie
- Extra socks (midweight, merino wool socks)
- Buff (protects your face and neck against the sun and wind)
- Headlamps (with extra batteries)
- Hiking poles
- Microspikes (may or may not be needed but beneficial if ice/snow is present anywhere on the trail – always research the current trail conditions before heading out)
- Sun protection
- Sunscreen
- Hat
- Sun-protective clothing
- Lip balm with SPF
- Sunglasses
- Bug repellent and/or Mosquito Head Net
- Waste disposal supplies (WAG bags, toilet paper, pee cloth, wipes, Ziploc bag – be sure to pack out everything!!)
- Phone with a reliable power bank and charger
- Printed copy of your Mt Whitney permit
Mt Whitney Emergency Supplies:
- GPS Satellite Communicator (used for emergency situations)
- Navigation System (bring a physical map, compass, GPS device to stay on track and navigate unfamiliar terrain, and downloaded offline map on your phone)
- Water (ensure you have enough water, along with a filtration system or purification tablets)
- Food (energy-rich snacks or meals to keep you fueled – we brought trail mix, peanut butter pretzel bites, energy gels, Clif bars, sour patch kids, and ginger chews)
- First-Aid Kit (a basic kit with bandages, antiseptic, pain relievers, blister care, and any personal medications)
- Rain Gear and Emergency Shelter (rain jacket or poncho, plus an emergency bivy sack, emergency sleeping bag, and emergency tent)
- Fire (matches, a lighter, or fire starter for warmth or signaling in emergencies)
- Multi-tool or Knife (versatile tool for various tasks like food prep or repairs)
Mt Whitney Winter Gear List:
- Light winter conditions:
- Crampons or microspikes (determine which traction device will be best by researching the trail conditions)
- Ice axe
- Helmet
- Intense winter conditions:
- Snowshoes or skis
- Avalanche beacon
- Snow shovel
Important Things to Know + Safety Tips for Hiking Mt Whitney in a Day
1. Check Weather Forecast and Be Prepared for Changing Conditions
Even if the forecast looks promising, be ready for unpredictable alpine weather on Mt Whitney.
Conditions at the summit can change rapidly, and at the very least, expect it to be significantly colder and windier than at lower elevations.
🧤 Pro Tip: Layering is key! Lightweight down jacket, windbreaker or rain jacket, long pants, gloves, and warm beanie are usually sufficient for summer.
In the summer, sudden thunderstorms can develop in the afternoon, often bringing lightning.
If the weather forecast at Mt Whitney’s summit turns bad before you begin your hike, it’s best to play it safe and postpone your hike.
If it turns bad while hiking, turn around quickly and seek shelter.
To minimize the chance of encountering storms, most hikers start in the early morning hours, with 1 AM to 3 AM being popular departure times from Whitney Portal.
This allows you to reach the summit and descend before noon.
As you ascend, always keep an eye on the sky.
If dark clouds start building, that’s a red flag! 🚩
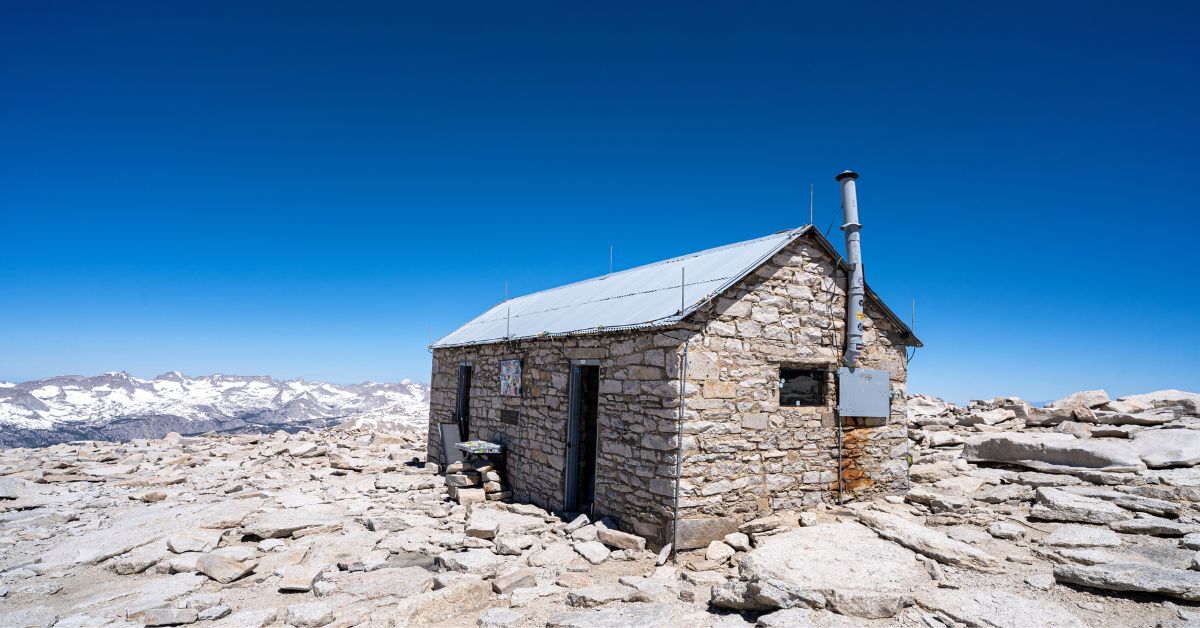
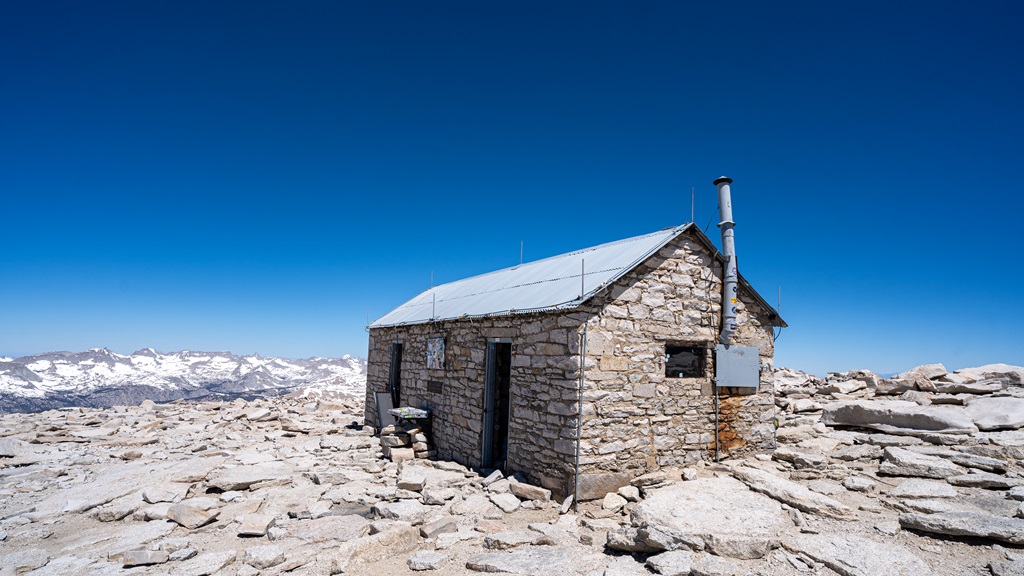
If you get caught in a lightning storm at the summit, the stone hut may offer some protection, but it’s not entirely risk-free.
Lightning can still strike you while in the hut, so it should only be used as a last resort when descending is too dangerous.
✅ Key Takeaways:
- Pack extra layers as the weather on Mt Whitney will be colder and windier than at lower elevations.
- Start your hike around 1 AM or 3 AM to avoid afternoon thunderstorms.
- Keep an eye out for any dark clouds and if the weather looks questionable, be ready to descend quickly.
2. Check Trail Conditions and Pack Proper Gear Depending on Conditions
Check with a ranger for the latest trail conditions or call the Eastern Sierra Visitor Center at (760) 876-6200.
You can also read the most recent reviews on AllTrails or find recent videos on YouTube – this is what my husband and I did to prepare for our hike in 2023.
If there’s any snow on the route, be sure to bring the appropriate gear.
Snow and ice can increase the risk of avalanches and rockfall, and as the snow melts it can create slippery and hazardous conditions, so proceed with caution.
If the 99 switchbacks are entirely buried in snow, forcing you to navigate a steep snow chute, this route should only be attempted by those with mountaineering experience and the proper equipment.
✅ Key Takeaways:
- Check for current trail conditions – contact a ranger, check AllTrails, and watch recent videos.
- Bring proper gear for moderate snowy conditions – microspikes/crampons, ice axe, and helmet.
- Only attempt this hike in moderate to heavy snowy conditions if you have mountaineering experience and proper gear.
3. Pack Emergency Gear and Supplies
I’ve already put together a list of essential emergency items (see above) you should carry on your one-day Mt Whitney hike.
High-altitude conditions are unpredictable and can change in an instant.
There have been reports of hikers getting stranded overnight at the summit or on Trail Crest – without the right gear, this can be life-threatening.
To stay safe, make sure you pack plenty of water and food, emergency shelter (bivvy, tent, and sleeping bag), navigation system, GPS satellite communicator, first aid kit, fire starter, rain gear, extra warm layers, and a multi-tool or knife.
Always be prepared for the unexpected!
✅ Key Takeaways:
- Pack emergency gear and supplies so you’re better prepared for any unexpected situation.
4. Pack a Water Filtration and Treatment System (plenty of water sources along the trail)
During our Mt Whitney day hike in 2023, my husband and I carried four full bottles of water and brought water filters to ensure we had safe drinking water at all times.
Looking back, we probably could have managed with two full 32-ounce water bottles each and two extra empty bottles, refilling along the way using our water filters until we reached Trail Camp.
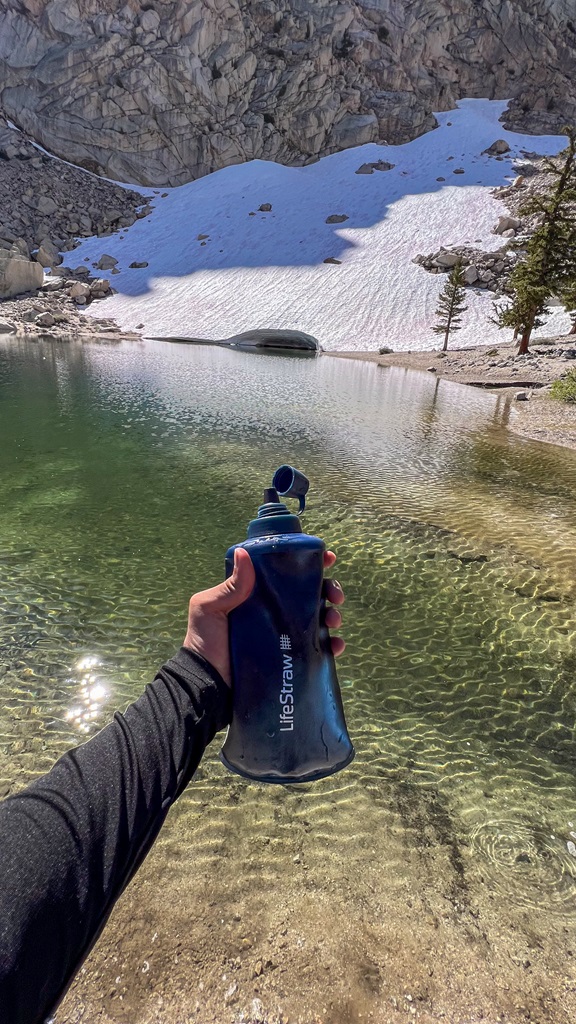
There are plenty of water sources along the Mt Whitney trail, including Lone Pine Creek, other creek crossings, and several lakes.
Hikers have several water treatment options, including filtration, purification, boiling, and chemical treatments.
We personally used the LifeStraw Peak Squeeze Water Filter System during our Mt Whitney adventure and loved it!
💧 Pro Tip: Bring a backup water filter or treatment option!
One mistake we made was not bringing a backup water treatment option.
If our filters were to malfunction, that would have been a bad situation.
Wherever you collect water, it’s essential to filter or treat it!
You never know what bacteria or viruses may be present (ick), so it’s always better to be safe than sorry.
The last reliable water source is at Trail Camp – 5 miles away from the summit.
💧 Pro Tip: From Trail Camp to Mt Whitney summit, it’s recommended to carry at least 3 liters of water per person.
✅ Key Takeaways:
- Always pack plenty of water, but don’t weigh yourself down if there are lots of water sources along the way that can be filtered/treated.
- Bring a backup filtration/treatment system in case your main method malfunctions.
- Always filter/treat natural water sources to avoid drinking nasty bacteria or viruses!
- Pack at least 3 liters of water per person for the final stretch from Trail Camp to the summit.
5. Have a Good Navigation System and Know How to Use It
Before hiking Mt Whitney, get a good paper map of the area and study it in the weeks leading up to your trip.
Knowing how to read a map and use a compass is a valuable skill that can come in handy in the backcountry.
If you’re not already familiar with topographic maps, take some time to practice reading one and using your navigation equipment.
Furthermore, having a reliable electronic GPS setup is a great idea for hiking in remote areas.
A combination of a handheld GPS device plus offline maps downloaded on your phone will give you peace of mind when out in the wilderness.
For our Mt Whitney hike in 2023, my husband and I used three different offline maps: AllTrails+, Google Maps, and onX Backcountry.
Technology can fail, so be sure to carry a paper map and compass and know how to use them!
✅ Key Takeaways:
- Pack a physical map and compass – know how to use them.
- Pack a topographic map and know how to read it.
- In addition, have a reliable electronic GPS setup, including a handheld GPS device and downloaded offline maps on your phone.
6. Understanding and Preventing Altitude Sickness on Mt Whitney
Hiking Mt Whitney in a day is a challenge not just because of the distance and elevation gain, but also because of the high altitude.
Altitude sickness is one of the most common reasons hikers fail to reach the summit.
The lack of oxygen at higher elevations makes it difficult for your body to function properly, and if you ascend too quickly without acclimating, you risk developing Acute Mountain Sickness (AMS – a form of altitude sickness).
If AMS worsens if can develop into life-threatening conditions known as high-altitude pulmonary edema (HAPE) and high-altitude cerebral edema (HACE).
Many hikers experience mild symptoms of AMS as they get closer to Mt Whitney’s summit, but it’s important to know when to turn around if symptoms worsen even the slightest bit.
Keep reading to learn how to prevent AMS, signs/symptoms to watch out for, and what to do if you experience altitude sickness.
How to Acclimate Properly
The key to avoiding AMS is proper acclimatization – the process of giving your body time to adjust to higher altitudes.
Ideally, backpacking the Mt Whitney Trail while gradually gaining elevation and sleeping at each new height is the best way to avoid AMS.
But let’s be real – that’s not why you’re reading this post.
You’re here because you want to summit Mt Whitney in just ONE day!
That makes acclimating a bit trickier, but definitely not impossible.
A good strategy is to spend as much time as possible at higher elevations before your hike to allow your body to adjust.
This can be done by hiking trails at 10,000+ feet and spending a few nights at high elevation beforehand.
Even with the training hikes, make sure you gradually work your way up to higher and higher elevations then return to lower elevations to rest.
Here’s a general acclimation plan if you’re staying in the Lone Pine area:
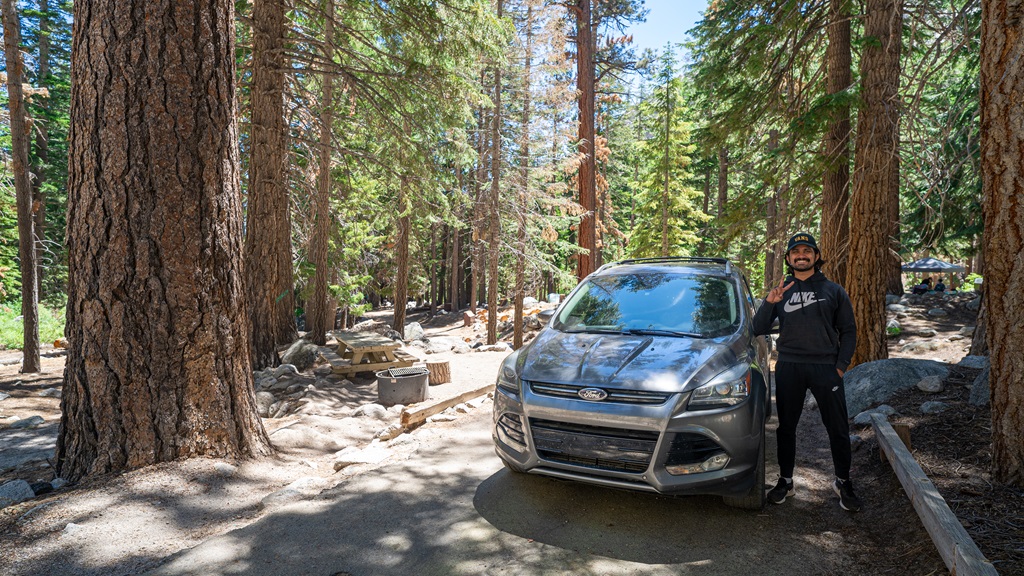
- Camp at Whitney Portal Campground (8,100 feet) for a few nights before your hike.
- Hike to Lone Pine Lake (10,000 feet), Horseshoe Meadows (10,000 feet) and/or Kearsarge Pass Trail at Onion Valley (9,100 to 11,700 feet).
- Once you start hiking the Mt Whitney Trail – pace yourself, take frequent breaks, and give your body time to adjust as you climb.
- Drink a lot of water and maintain a balanced intake of electrolytes (dehydration worsens altitude sickness).
Recognizing AMS Signs and Symptoms
AMS symptoms can be subtle at first but worsen as you ascend.
Pay attention to how you feel, and don’t ignore warning signs.
Mild to moderate AMS signs/symptoms:
- Headache
- Nausea / vomiting
- Dizziness / lightheadedness
- Loss of appetite
- Fatigue
- Difficulty sleeping
- Swelling of hands and feet
If AMS worsens (life-threatening):
- HACE (High-Altitude Cerebral Edema) – Disorientation, confusion, lack of coordination, trouble walking, extreme fatigue. This is caused by brain swelling and can be fatal.
- HAPE (High-Altitude Pulmonary Edema) – Persistent shortness of breath, coughing (often with pink, frothy sputum), chest tightness, and extreme fatigue. This is caused by fluid in the lungs and can be fatal.
What to Do if You Experience AMS
- If you start showing mild symptoms, stop climbing and rest to see if they improve.
- If symptoms persist or worsen, you must descend immediately – even if it means giving up your summit attempt.
- If you have access to supplemental oxygen, use it to help relieve symptoms.
- Some hikers take Diamox (Acetazolamide), a prescription medication that can aid acclimatization. Consult your doctor before your trip if you’re considering this option.
- Studies have also shown that Ibuprofen (600 mg) can help reduce AMS symptoms.
My Experience with AMS on Mt Whitney
Before our hike, my husband and I took steps to acclimate as much as time allowed by camping at the Whitney Portal Campground (8,100 feet) and hiking to Lone Pine Lake (10,000 feet).
We didn’t have enough time to properly acclimate, but we did what we could, and it actually helped more than I thought it would!
However, we still experienced mild AMS symptoms once we reached 13,700 feet at Trail Crest.
Both of us had mild headaches, and I felt slightly nauseous, but the symptoms remained manageable.
We paced ourselves, took a ton of breaks from the beginning of Trail Crest until the summit, and hydrated consistently.
While our symptoms didn’t worsen, we still felt horrible.
Due to this, we decided to spend a short time at the summit then quickly descend to lower elevation.
Once we were back at Trail Camp, our symptoms were so much better!
✅ Key Takeaways:
- Acclimate by staying at high elevation and doing training hikes at 10,000+ feet.
- Pace yourself and ascend slowly – don’t rush.
- Stay hydrated, eat well, and replenish electrolytes.
- Know the symptoms of AMS – if your condition worsens, descend immediately.
- Be prepared with emergency supplies, including a satellite communicator, if needed.
Reaching the summit isn’t worth risking your life.
If you experience AMS that continues to worsen, turn around immediately.
Mt Whitney isn’t going anywhere – you can always try again next time!
7. Know Your Limits
This is not a hike for beginners – far from it.
If you’re new to hiking, summiting Mt Whitney in a single day will take months of dedicated training and preparation.
But if you’re already an experienced hiker, accustomed to long, strenuous treks, you might only need a few weeks, if not just a few days, to prepare, mostly to acclimate to the altitude.
My husband and I felt confident tackling this hike as a last-minute decision because we had recently completed a tough 20-mile day in Yosemite.
Our biggest challenge wasn’t the distance or elevation gain but navigating the trail in snow, climbing the chute, and doing all this at high altitude.
We knew our limits and agreed to turn back if either of us felt too uncomfortable.
Surprisingly, we felt great hiking the Mt Whitney Trail in snowy conditions.
The altitude, though, was another story – it nearly forced us to turn around!
Bottom line: I’m all for pushing your limits, but only within reason.
Never attempt something you’re not physically or mentally prepared for.
And remember – reaching the summit is just the halfway point.
You still have 11 grueling miles back to the trailhead!
✅ Pro Tip: Get prepared, pack the proper gear, start early, pace yourself, stay fueled and hydrated, listen to your body, and remain within your limits.
8. Pack Out Your Waste (yes, I’m talking about poop)
All hikers must pack out their human waste to help preserve the beauty and integrity of Mt Whitney.
While it might not be the most glamorous part of the hike, it’s a crucial step in preserving this incredible wilderness.
The Mt Whitney Trail is mostly solid granite with minimal soil, and the cold, dry climate significantly slows down natural decomposition, therefore burying your poo just isn’t an option.
The only public toilets are at the trailhead, so do yourself a favor and try to go before you start your hike.
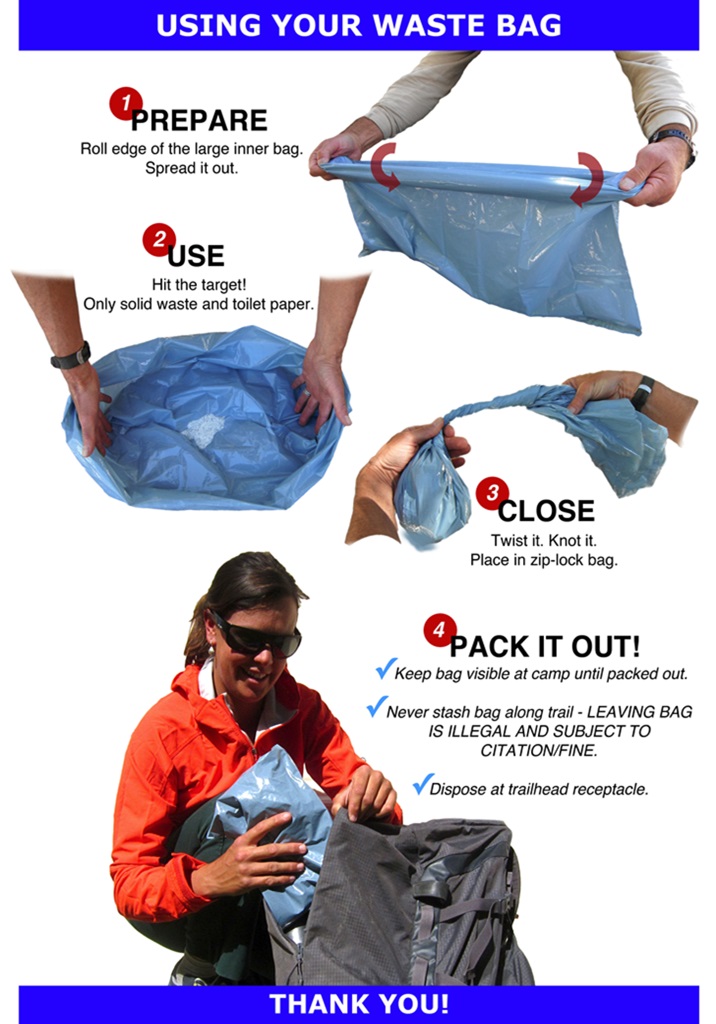
Waste kits, also known as WAG bags, are provided at the Eastern Sierra Visitor Center and may be found at the Mt Whitney Trailhead, and you can purchase them at outdoor stores, like REI.
Once used, pack them out and dispose of them in the designated trash bins at the trailhead.
💩 Pro Tip: To prevent a smelly backpack consider double bagging your waste kit or securing it to the outside of your pack.
It might feel weird at first, but it’s a small effort that makes a huge difference.
Let’s all do our part to keep Mt Whitney wild and beautiful for future generations!
9. Be Bear Aware and Store Food/Scented Items Properly
Whitney Portal and the surrounding Mt Whitney area are prime bear territory, and these bears are smart.
If you leave food or scented items in your car, bears will attempt to get inside where they will either destroy the outside of your vehicle or the inside if they get in.
To avoid returning to a trashed vehicle, store all food and scented items in the bear proof lockers located around Whitney Portal and near the Mt Whitney Trailhead.
If you’re backpacking, bear canisters are required on the Mt Whitney Trail, but since you will be hiking Mt Whitney in a day you won’t have to worry about this.
One more thing to note, bear spray is not recommended in the Mt Whitney area – black bears are typically easy to scare off.
✅ Key Takeaways:
- Store food and scented items in bear proof lockers at Whitney Portal or at your campsite.
- Dispose of trash properly in bins provided at the trailhead and parking area.
- Bear spray is not needed – learn black bear safety techniques.
10. Let Someone Know Your Plan
Before heading up to Mt Whitney, make sure someone at home knows your itinerary and expects a check-in from you that evening after your hike or at least early the next day.
Share the following details with a trusted friend or family member:
- Names of everyone in your group
- Your car’s make, model, and license plate number
- Permit reservation number
- Entry date, planned route, and expected exit date
Also, give them the number for the Inyo County Sheriff’s Office (760-878-0383) and instruct them to report you missing if you’re 24 hours overdue on your check-in.
You never know what could happen out there, so taking this simple step ensures someone is looking out for you!
11. Hike in a Group (and if you’re the group leader, be a good leader)
Solo hiking is totally doable, but having a buddy or group adds an extra layer of safety.
If something goes wrong, having others there to help can make all the difference.
✅ Pro Tip: If you start as a group, finish as a group – you’re a team, and sticking together is key.
If you are the leader of a group, take the time to assess risks, understand each person’s abilities, and make smart decisions for the whole group.
Set turnaround times in advance and have a plan in case someone gets injured, the group gets separated, or if everyone is not able to reach the summit.
A successful hike isn’t just about reaching the top but making sure everyone gets back safely!
12. Follow Leave No Trace Principles
Each year thousands and thousands of hikers take on the Mt Whitney Trail, making it one of the most popular hikes in the country!
This trail passes through a protected wilderness area, designated by Congress to remain as wild and untouched as possible.
That means it’s up to all of us to minimize our impact and keep this incredible alpine environment pristine for future generations.
🌲 By following the Leave No Trace principles, you can do your part to protect Mt Whitney:
- Plan Ahead and Prepare – Know the rules, check weather conditions, and pack appropriately.
- Travel and Camp on Durable Surfaces – Stick to designated trails and campsites to avoid damaging fragile vegetation.
- Dispose of Waste Properly – Pack out everything, including trash, leftover food, and human waste (use a WAG bag!).
- Leave What You Find – Preserve nature by not taking rocks, plants, or artifacts.
- Minimize Campfire Impact – Fires are not allowed on the Mt Whitney Trail. Use a camp stove for cooking.
- Respect Wildlife – Keep your distance, don’t feed animals, and store food properly to avoid negative bear encounters.
- Be Considerate of Other Visitors – Yield to uphill hikers, keep noise levels down, and respect the wilderness experience for everyone.
By committing to these principles, you help preserve Mt Whitney’s beauty and ensure future hikers can enjoy it just as you do. 💚
Day Hike Mt Whitney Logistics: Parking + Where to Stay
Mt Whitney Trailhead and Parking
The Mt Whitney Trailhead is the starting point for the iconic Mt Whitney Trail, which leads to the summit of Mt Whitney.
It’s easy to find, located about 13 miles from the town of Lone Pine, along Whitney Portal Road through the Alabama Hills.
As you drive into Whitney Portal, you’ll spot the trailhead on your right.
There’s plenty of parking available in the area but be sure to pay attention to the signs – some spots are designated for day-use parking, while others are for overnight campers.
If there are no spaces directly across from the trailhead, there’s additional parking in the lower lot.
The trailhead has restrooms, and if you need to refill your water, there’s a faucet nearby for last-minute fills.
🚽 Pro Tip: Empty your bladder and bowels at the trailhead restrooms as there are no toilets along the trail.
When parking, don’t forget to remove any food or scented items from your vehicle.
Use the bear proof lockers provided at the trailhead to safely store these items, as the area is known for bear activity. 🐻
Where to Stay Near Mt Whitney
Campgrounds
1. Lone Pine Campground is located about 7 miles from the Whitney Portal Area.
This campground has 42 single campsites, 1 double site, and 1 walk-in group site.
Some sites may be available at a first come, first serve basis.
Standard sites are $37 per night and the group site is $80 per night.
Reserve your campsite at Recreation.gov!
2. Mt Whitney Trailhead Campground is located in the “ravine” on the east side of the overflow parking lot at Whitney Portal.
These campsites are walk-in only, and there is a one-night stay limit!
The campsites are $22 per night.
Instructions on how to pay can be found on the bulletin board at the campground entrance or see the camp host.
3. Whitney Portal Campground is located within the Whitney Portal Area.
This campground has 43 single campsites.
Some sites may be reserved in advance, while others are available on a first-come, first-serve basis.
The sites are $32 per night.
Reserve your campsite at Recreation.gov!
4. Tuttle Creek Campground is located about 11 miles from the Whitney Portal Area.
This campground has 83 RV (no hook-ups) and tent sites, and it’s open all year-round.
Standard campsites are $10 per night and require no reservation.
Group sites are $20 per night, and you can call for group reservations at (760) 872-5000.
There is a dump station ($10 fee) and potable water seasonally – closed in winter.
5. Designated dispersed campsites can be found in the Alabama Hills – refer to this map for specific locations.
⚠️ Be cautious about camping in the Alabama Hills during the summer – temperatures can reach above 100°F!
6. Lone Pine is the closest town to Whitney Portal and offer a few campground options, including Diaz Lake Campground, Portuguese Joe Campground, Boulder Creek Mobile Home & RV, Sierra View RV Park, and Lone Pine Mobile Oasis.
Lodging
1. Dow Villa Motel – A popular choice in Lone Pine with comfortable rooms and a pool. Located in the heart of town, it’s convenient for those hiking Mt Whitney.
2. The Whitney Portal Hostel & Hotel – Located near the Whitney Portal Road, this hostel and hotel offers group bunk bedrooms and brand-new hotel rooms.
3. Lone Pine Budget Inn – A budget-friendly option with basic amenities and close proximity to the Mt Whitney Trailhead.
4. Portal Motel – Another budget-friendly option with basic amenities and only 12 miles from Whitney Portal.
Visit this website for more lodging options in and around Lone Pine.
Mt Whitney Summit via Mt Whitney Trail: Step-by-Step Directions
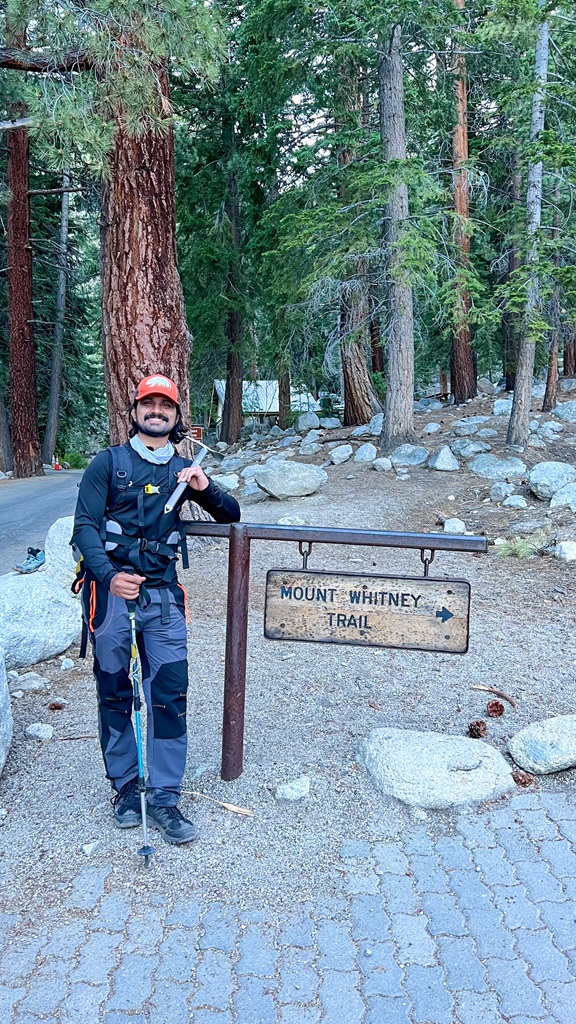
Mt Whitney Trailhead
Mt Whitney Trailhead to Lone Pine Lake: 0.0 to 2.9 miles | 1,640 feet of elevation gain
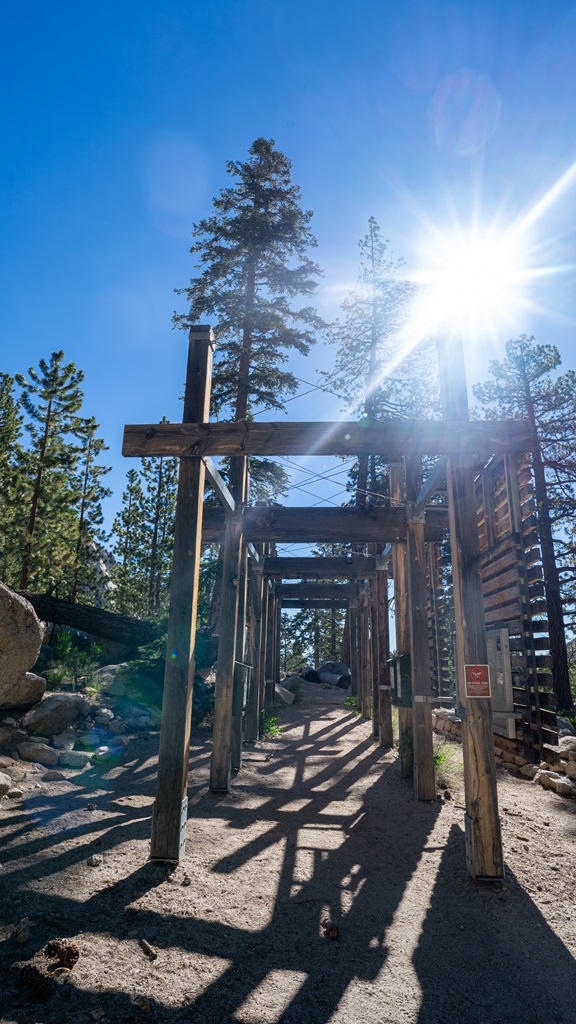
The adventure starts at Whitney Portal, where you’ll find the Mt Whitney Trailhead right across from the first set of restrooms.
Pass through the framed entryway with essential trail info and safety warnings, then get ready for a steady climb!
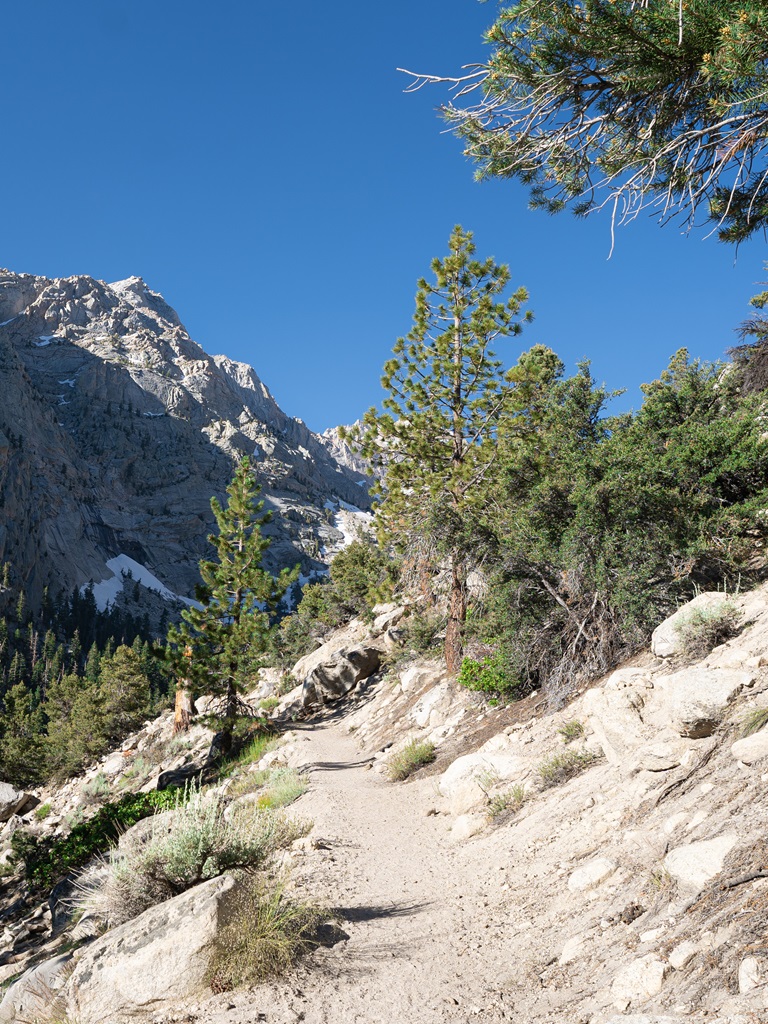
For the first 3 miles, the trail gradually ascends with a few level sections to catch your breath.
You’ll encounter a couple of creek crossings – two near the start and another via a log bridge – plus a handful of switchbacks.
The creek crossings are usually easy to navigate by rock hopping.
If there was a heavy winter, the creeks might be flowing pretty hard in the spring and summer – expect to get your feet wet!
🧦 Pro Tip: Pack extra socks to keep your feet dry and avoid blisters.
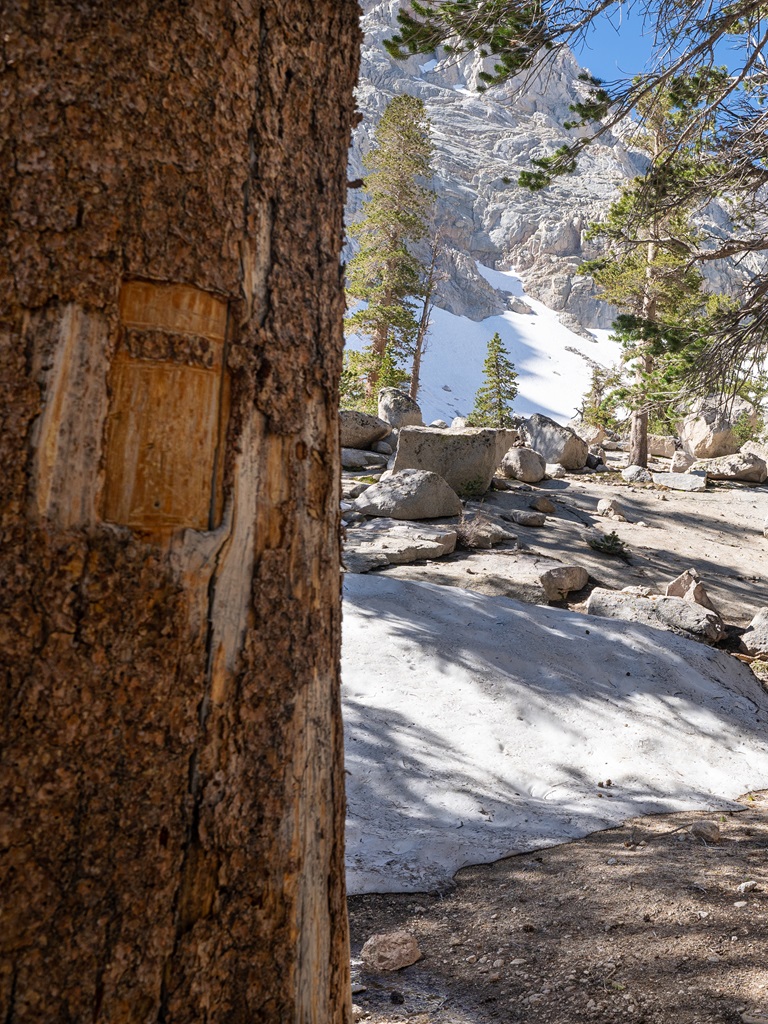
Stay on the Mt Whitney Trail and avoid the North Fork Lone Pine Creek Trail, which leads to the more technical Mountaineers Route.
The main trail is well-marked, with notches cut into trees to help guide your way.
Lone Pine Lake
Lone Pine Lake to Outpost Camp: 2.9 to 3.8 miles | 380 feet of elevation gain
As you approach Lone Pine Lake, the trail levels out.
If you want to reach the lake, you will have to take a side trail for 0.1 miles – but more than likely, you will be hiking in the dark, so it might be best to see the lake on your back down the mountain.
As you continue along the Mt Whitney Trail past Lone Pine Lake, you will enter the Whitney Zone where a permit is required beyond this point.
The landscape becomes rockier and more barren, but you will pass a beautiful meadow.
In about a mile from Lone Pine Lake you will reach Outpost Camp sitting at 10,380 feet in elevation.
Outpost Camp and Mirror Lake
Outpost Camp to Consultation Lake: 3.8 to 5.8 miles | 1,300 feet of elevation gain
Outpost Camp is a flat, well-established site with plenty of tent spots and easy access to water.
The trail winds through the camp and continues on the other side, marked by a sign for the Mt Whitney Trail.
There are a few side trails that lead to other campsites, so make sure you are on the main trail.
About 0.5 miles past Outpost Camp, you’ll gain around 260 feet in elevation before reaching Mirror Lake on your right.
After Mirror Lake, the trail gets noticeably steeper.
You’ll follow Lone Pine Creek for much of this climb, crossing it at a few points along the way.
You’ll eventually pass the tree line, leaving the last of the tall pines behind.
In some areas, the correct path may not be obvious – take a second to look around to make sure you are on the right path and check your offline maps.
After climbing 0.9 miles beyond Mirror Lake and gaining 720 feet in elevation, you’ll arrive at Trailside Meadow.
From Trailside Meadow, it’s another 0.6 miles and a 320-foot climb to reach Consultation Lake.
Trailside Meadow and Consultation Lake
Consultation Lake to Trail Camp: 5.8 to 6.0 miles | 320 feet of elevation gain
At the 5.2-mile mark and 11,360 feet in elevation, Trailside Meadow provides the last patch of lush greenery before the high-altitude alpine terrain takes over.
This is a great spot to refill your water and rest, as you might start feeling the high altitude here.
From here, the rocky trail climbs toward Consultation Lake – another great spot to rest and refill your water bottle.
You will have to navigate off trail to reach this alpine lake.
Camping is allowed at Consultation Lake, so be respectful if people are camping here.
Continue along the Mt Whitney Trail for a short distance past the lake until you reach Trail Camp.
Trail Camp and 99 Switchbacks
Trail Camp to Trail Crest via 99 Switchbacks: 6.0 to 8.2 miles | 1,700 feet of elevation gain
Tramp Camp sits at 12,000 feet in elevation.
This is the perfect spot to rest for a while to help your body acclimate.
Make sure you hydrate and fuel your body!
The real challenge is about to begin. 🥲
If the trail is mostly clear of snow, you’ll take on the infamous “99 switchbacks”.
Are there exactly 99 switchbacks??
If you want to take one for the team and count them, let me know the answer!
This section of the hike is steep and exposed, gaining 1,700 feet in 2.2 miles.
Take your time, pace yourself, and rest frequently.
⚠️ If deep snow covers the 99 switchbacks, you’ll need to take the steep, snow chute. This alternate route climbs 1,600 feet in just a mile and requires mountaineering skills and proper gear – attempt only if fully prepared!
Even if the 99 switchbacks are mostly clear, I recommend bringing microspikes just in case some sections are snowy/icy.
Eventually, the trail will level out as you get closer to the top of Trail Crest.
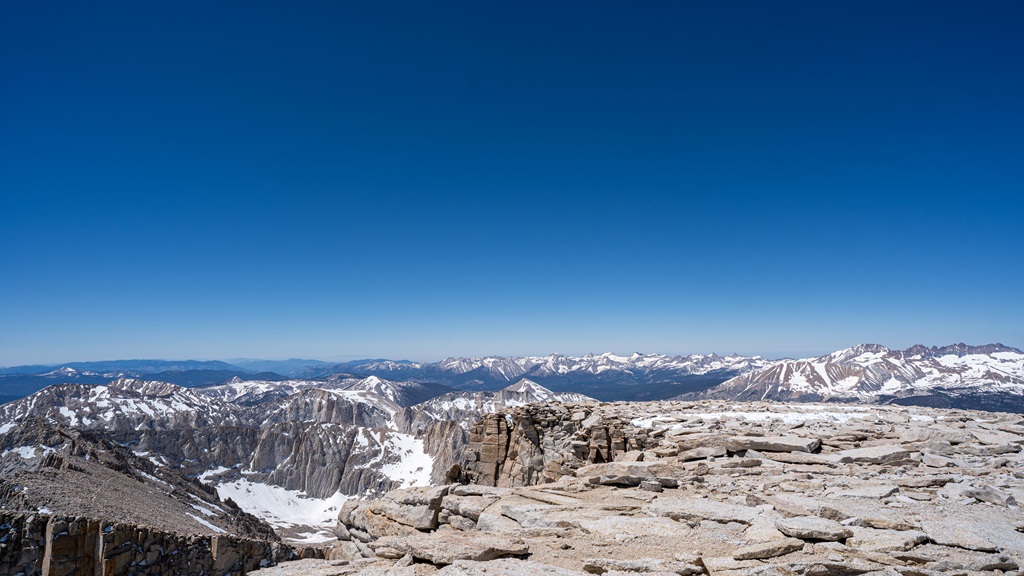
Once you reach the ridge, the views will leave you breathless!
Or is that just the lack of oxygen? 🤪
Seriously though, you are now at 13,700 feet.
This is exactly where I started feeling the effects of high altitude – AMS was sneaking up on me.
Rest, hydrate, and fuel up.
Also, check in with yourself to see how you are feeling.
If you are starting to get symptoms of mild altitude sickness, take it slow, rest often, and stay hydrated.
If the symptoms worsen, descend immediately – do not push on!
Trail Crest
Trail Crest to Mt Whitney Summit: 8.2 to 11 miles | 805 feet of elevation gain
From the top of Trail Crest, you have about 2.8 more miles to go – this is the home stretch.
This section is once again rocky and exposed.
My husband and I had to tackle the steep, snow chute when we went in 2023.
Initially, I thought that would be the hardest part, but I was humbly mistaken.
Trail Crest nearly broke us. 🥴
The altitude hit hard, forcing us to stop every few minutes to catch our breath.
Thankfully, our symptoms stayed mild, and taking it slow likely helped prevent them from worsening
Even though this section is very difficult if you are not acclimated to the elevation, the views are so stunning!
Along the way, you’ll pass “the windows” – narrow gaps between jagged peaks with steep drop-offs on either side.
If you’re afraid of heights, this section might be intimidating, but I found it manageable despite my slight fear.
As you near the summit, the iconic stone hut comes into view in the distance – almost there!
The final push includes a few short but steep switchbacks, leading you to the top, where the stone hut and an unforgettable sense of accomplishment await.
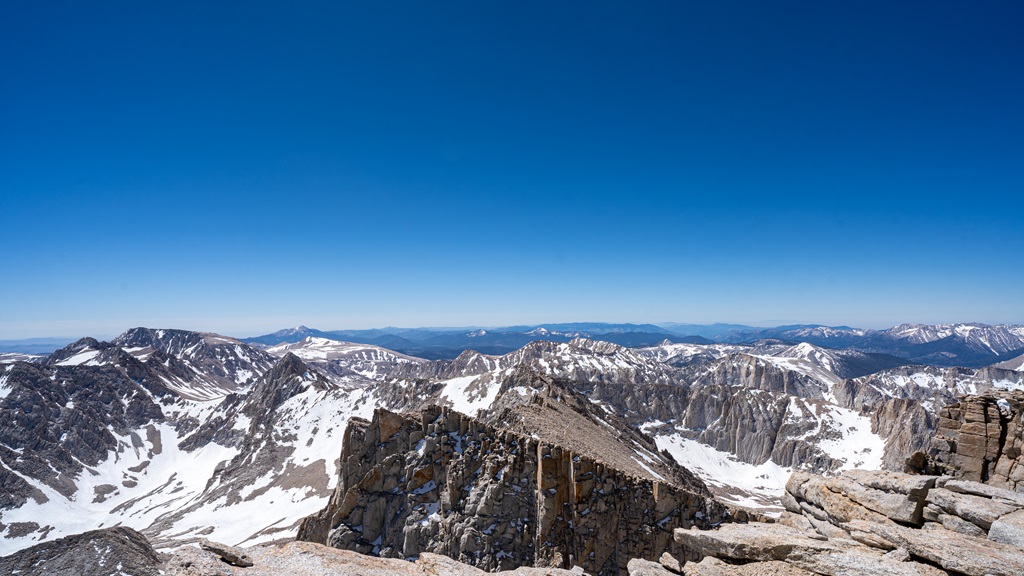
Mt Whitney Summit
Mt Whitney Summit: 14,505 feet above sea level
If you made it to the summit, give yourself a hug!!
For real, this is a huge accomplishment! 🎉
If you’re able, spend time at the summit and enjoy the views.
Take a picture with one of the summit signs lying around at the top.
And don’t forget to sign the summit register – we forgot to do this, oops.
If you were not able to summit due to whatever reason (unsafe conditions, AMS, bad weather, etc.), that’s ok!
The mountain is not going anywhere – you can always try again later.
Your safety comes first. Be happy you made it as far as you did! 🥳
Return to Mt Whitney Trailhead
Mt Whitney Summit to Mt Whitney Trailhead: 11 more miles to go
Don’t forget you have to hike ALL the way back down to the trailhead for another 11 miles.
The summit is only the halfway point!
If you have hiking poles, they will come in handy on the descent.
Your ankle, knee, and hip joints will thank you. 🙏
Hiking Mt Whitney is no small feat, and whether you reach the summit or not, just attempting this trail is an achievement.
Respect the mountain, listen to your body, and most importantly – enjoy the journey!
FAQs: Hiking Mt Whitney in a Day
-
Can I hike Mount Whitney in one day?
Yes, you can hike Mount Whitney in one day. Make sure you are fully prepared to hike 22 miles with 6,600 feet of elevation gain!
-
How long does it take to hike up Mount Whitney?
The time to hike Mount Whitney in one day varies between 12 to 20 hours.
-
Do you need a permit to hike Mt Whitney in a day?
Yes, you need a day use permit to hike Mt Whitney in a day.
-
What is the success rate of the Mount Whitney day hike?
While there aren’t official statistics, a common estimate for the success rate of a Mount Whitney day hike is around one-third or 33%.
-
How do I train for Mt Whitney day hike?
In general, a good training program for hiking Mt Whitney in a day should include strength training focusing on compound lifts and single leg exercises, endurance training focusing on long, strenuous hikes, and high-altitude conditioning.
-
What size pack for Mt Whitney day hike?
A 22- to 35-liter backpack should suffice for Mt Whitney day hike.
-
Can beginners climb Mount Whitney?
Yes, if you train and prepare many months in advance; however, a beginner should not attempt Mount Whitney without adequate preparation.
-
Is hiking Mt Whitney worth it?
Yes, hiking Mt Whitney is absolutely worth it to stand on top of the tallest peak in the lower 48 states!
-
How hard is Mt Whitney day hike?
Hiking Mt Whitney in a day is extremely challenging due to the distance, elevation gain, and high altitude.
-
Are there bears at Mt Whitney?
Yes, bears are quite active around the Mt Whitney area.
-
Where to stay when hiking Mount Whitney?
The most ideal place to stay when hiking Mount Whitney is at the Whitney Portal Campground.
-
How many people hike Mt Whitney per day?
During the quota season, only 100 hikers and 60 backpackers are allowed to hike/climb Mt Whitney in a day from Whitney Portal. You may encounter other hikers or backpackers coming from a different route.
Hiking Mt Whitney in One Day Trip Report
Date: July 12, 2023
Conditions: Lots of leftover snow on the trail from the previous winter
Verdict: Most insane adventure ever – summited our first 14er!
🎦 We vlogged our entire experience – watch it HERE.
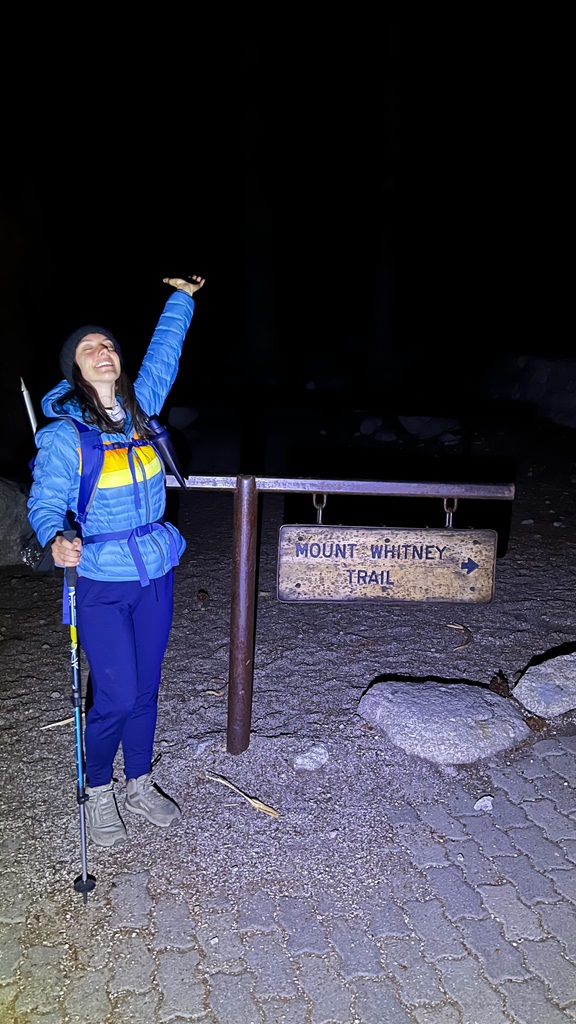
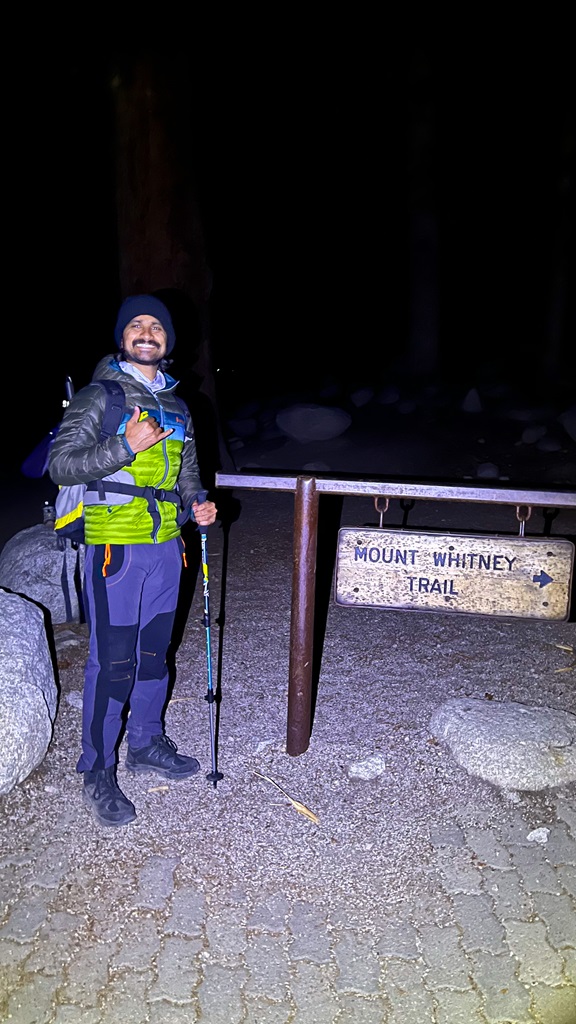
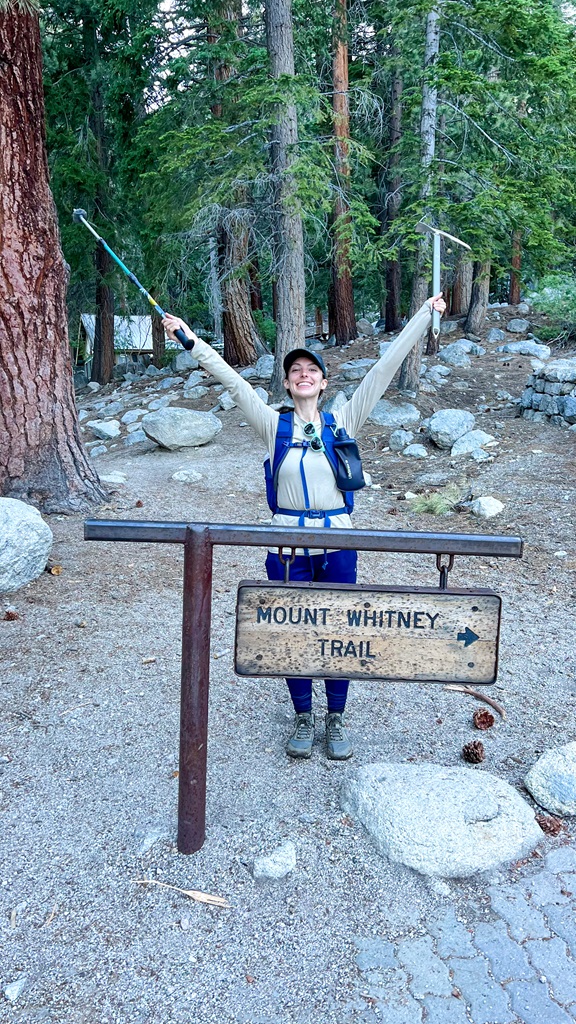
Mt Whitney Trailhead – The Beginning (11:05 PM)
The greatest adventure of our lives began at the Mt Whitney Trailhead at 11:05 PM on July 11th, 2023.
Starting a hike at that time felt so strange.
We’ve never hiked through the night like that before.
We’ve done plenty of sunrise hikes, but we usually start hiking around 4 or 5 AM.
Trying to sleep during the day was impossible – we maybe got an hour of solid sleep.
Attempting this strenuous hike without any sleep would add to the challenge.
I think the adrenaline of hiking at night and trying to bag our first 14er helped us stay awake and alert!
Also, I would like to point out that I’m afraid of the dark.
But hiking with my husband definitely helped calm my nerves.
We knew this portion of the trail since we had already hiked it to Lone Pine Lake a few days prior.
It consisted of quite a few switchbacks with a decent bit of elevation gain, but nothing too tough.
I think the scariest part about this whole hike was the second creek crossing!
Due to a lot of snow melt, the creek was flowing heavily and the rocks that provided an easy way to cross were nearly submerged.
My husband nearly got swept away but thankfully he regained his balance.
We safely made it across with wet boots, wet socks, and cold feet.
Thankfully, we packed an extra pair of socks but *spoiler* they also got wet later on.
Lone Pine Lake (12:55 AM)
Once we reached Lone Pine Lake, we took our first rest break.
All we ate were GU energy gels as we weren’t really hungry yet.
We used our water filters to get water from the second creek crossing – it was so cold and so good!
After hydrating and replenishing electrolytes, we continued on our way.
There was hardly any snow from the Mt Whitney Trailhead to Lone Pine Lake, but after the lake, we quickly reached more snow.
It wasn’t too bad and easily navigable.
We pressed on toward Outpost Camp.
Outpost Camp (1:35 AM)
We reached Outpost Camp and saw a few tents.
We stayed quiet as not to disturb the campers.
As we passed the tents, we reached more snow.
The trail was becoming harder to find so we had to whip out the offline maps on our phones to help.
We basically relied on our offline maps for most of this section until Trail Camp.
I remember there being more creek crossings, but they were a lot easier to cross as compared to the one at the beginning.
I changed into a new pair of socks at some point between Outpost Camp and Trail Camp, but they too got wet.
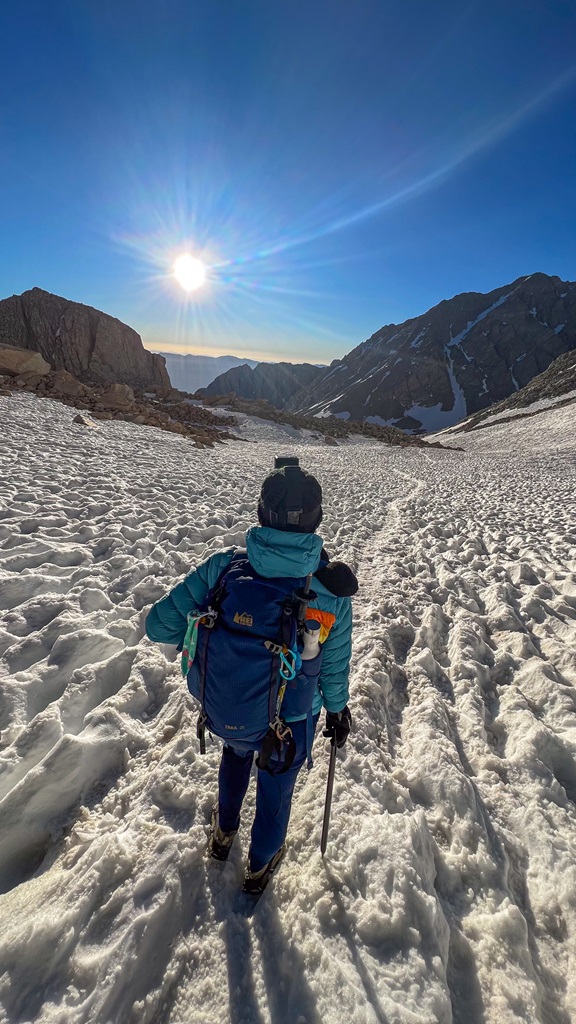
Before reaching Trail Camp, we had to strap on our microspikes as we started going up a snowy mountain side.
The trail was completely covered and not visible anymore.
At this point we were just following other peoples’ footprints to guide us.
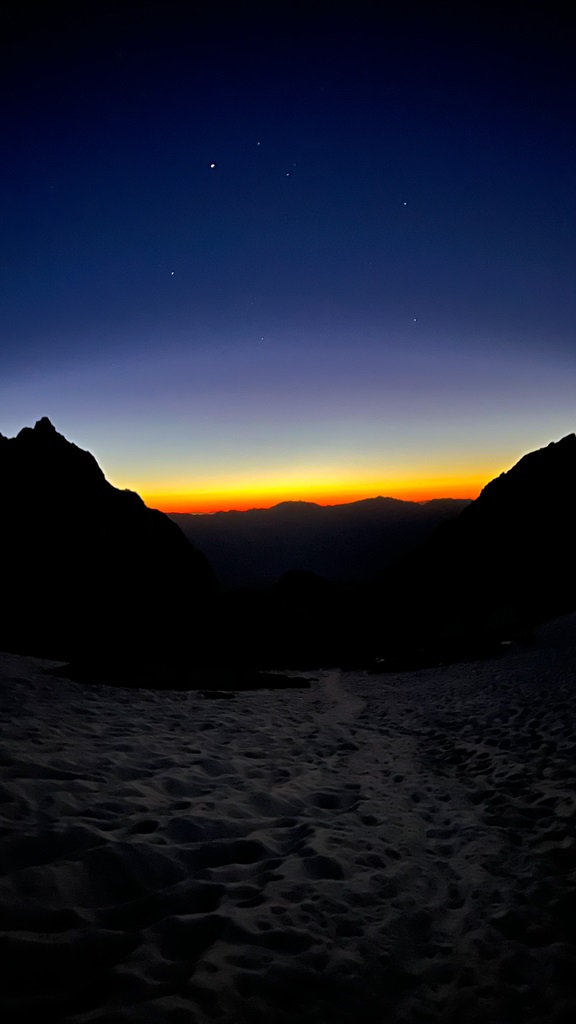
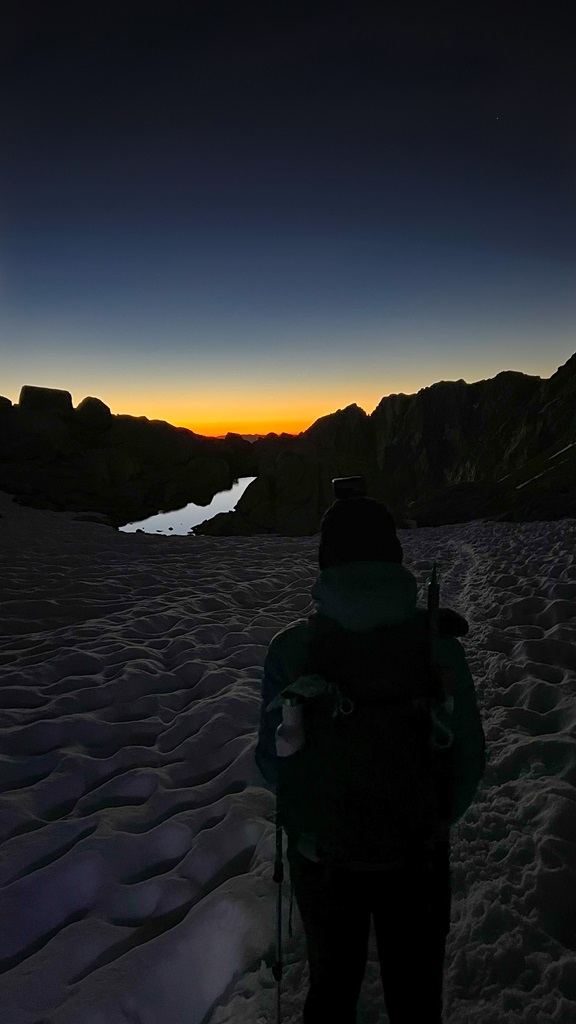
This section was fairly steep, but nothing compared to what we will be climbing up soon.
As we neared to the top, we looked behind us and saw the sun rising over the mountains – it was a beautiful sight!
Trail Camp (5:15 AM)
We finally reached Trail Camp!
After hiking for about 6 hours, we decided to take a long, well-deserved break to refuel and hydrate.
Also, we were at 12,000 feet in elevation and our bodies were not acclimated to this altitude yet.
So far, we felt good – no altitude sickness symptoms!
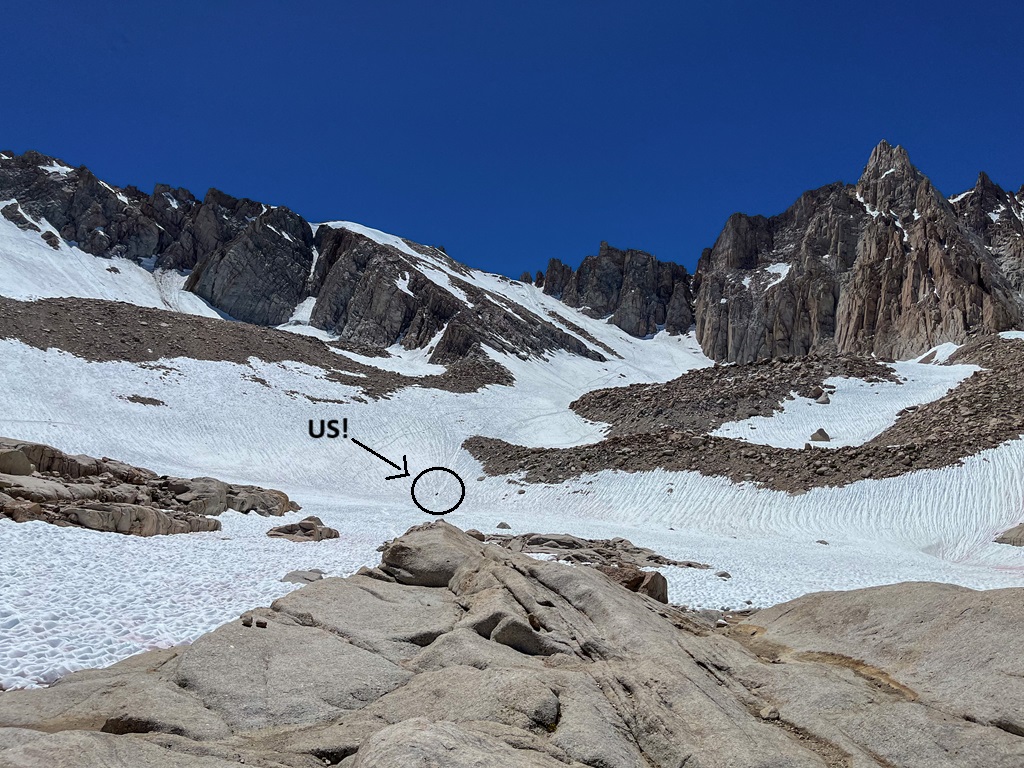
We knew the 99 switchbacks were completely covered in snow and that we would have to navigate a steep, snow chute.
We looked up at the chute and noticed a few headlamps in the distance – people were making their way up towards the summit.
We analyzed the chute for a bit, mentally preparing ourselves for the challenge.
Physically, we were ready to go!
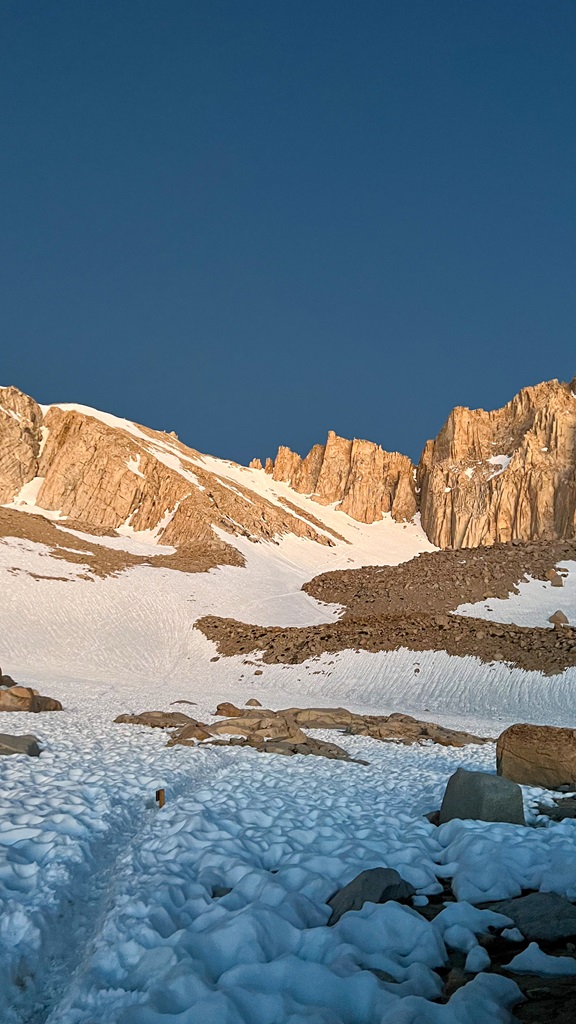
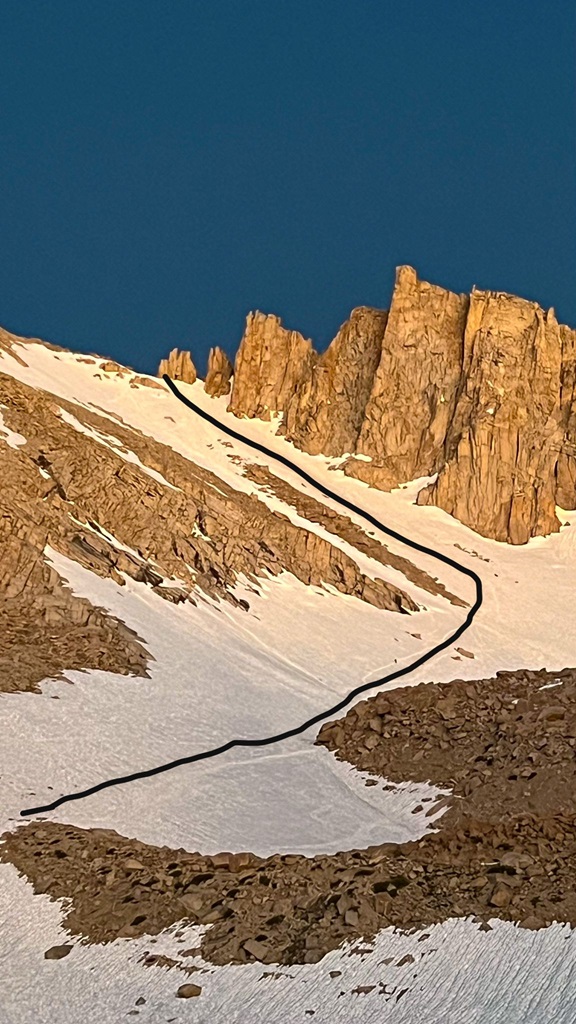
Tackling the Chute (5:45 AM)
Here we go – the second most challenging part of this hike.
This was our first time climbing up a snowy mountain of this size.
Also, our first time using ice axes.
We looked up videos of how to perform a self-arrest, but we have never actually practiced – I know, that’s not smart!!
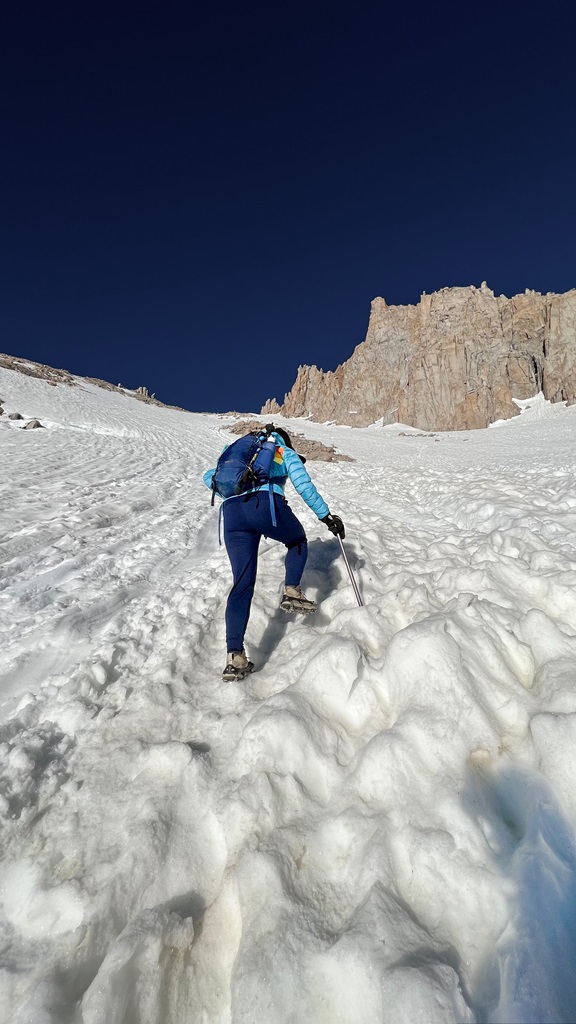
We wore our microspikes and had no issues.
Some people recommended crampons over microspikes when going up the chute, but we also read quite a few reviews from AllTrails where people made it up with microspikes.
As we got closer to the top of the chute, the snow started to get slushy.
This made it harder to find a grip as the snow would give away.
Thankfully we were already close to the top, so we were able to pick up the pace and push through the last little bit to reach the top safely.
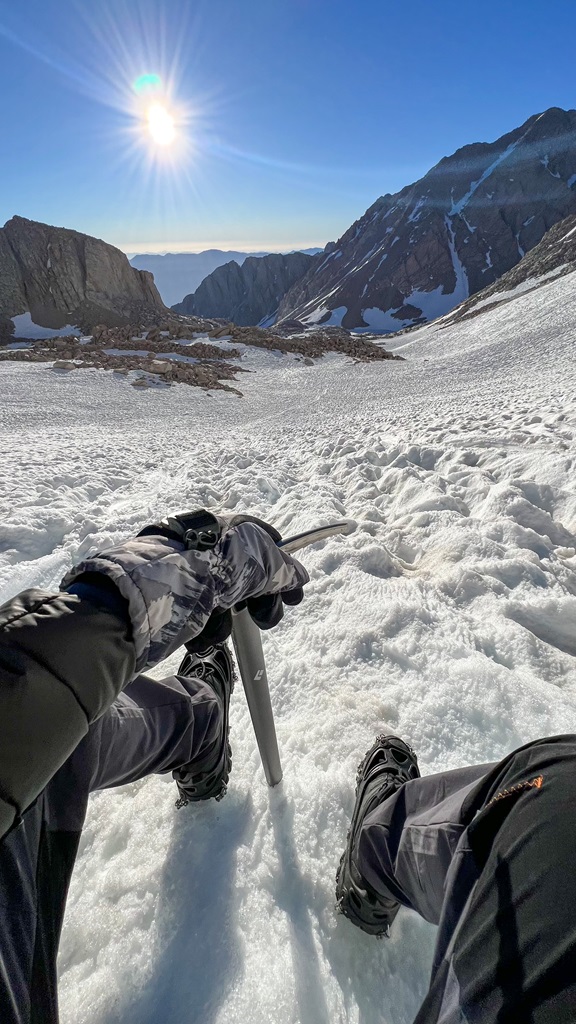
Trail Crest (7:45 AM)
Reaching the top of the chute felt like we had reached the summit of Mt Whitney.
It took us about 2 hours to climb from Trail Camp to Trail Crest.
We were very proud of our time!
We didn’t want to rush any part of this hike, but we knew the sun would melt the snow making it harder to climb up the chute.
We took frequent short breaks but pushed through at a decently fast pace.
Once at the top of Trail Crest, we decided to take about a 15- to 20-minute break before continuing on towards the summit.
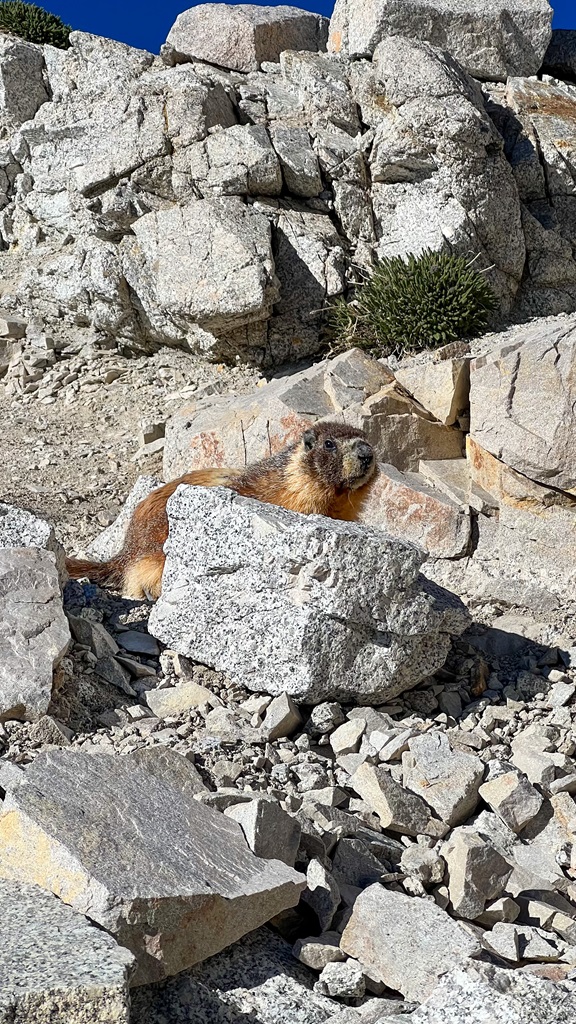
We were snacking and hydrating, talking to other people at the top, and shooing away a sneaky marmot.
Then all of a sudden, it hit me.
I felt the effects of being at 13,700 feet.
The first symptom was nausea which made me stop eating.
I sat there for a moment to make sure it didn’t get worse (if I had vomited, I would have turned around).
I didn’t feel any other symptoms, so we decided to make our way towards the summit of Mt Whitney.
I could feel how thin the air was – I was taking deep, slow breaths and stopping to rest every 5 minutes.
We agreed to ascend along this section very slowly.
We had made good time and were able to take as much time as we needed.
The skies were clear, and the conditions were good so far.
We had plenty of water with us, so we hydrated quite often by taking little sips.
I also ate a few ginger candies which were supposed to help reduce the nauseous feeling according to some other AllTrails reviews I had read.
It actually seemed to help!
We were moving so slowly that I believe our bodies were able to acclimate a little bit without symptoms becoming worse.
My husband started to feel mild AMS symptoms about halfway along Trail Crest.
We both felt slightly nauseous and fatigued with a small headache.
We kept motivating each other along the way as we were getting closer and closer to the summit.
I kept checking in on how Vikas was feeling just to make sure his symptoms were not getting worse.
My symptoms remained mild and actually slightly improved.
However, we both still felt crappy and exhausted.
Remember how I said climbing up the chute was the second most challenging part of the hike?
Well, hiking along Trail Crest to the summit was by far the hardest part of this hike in our personal opinions.
Not only are you exhausted from hiking uphill all night and morning, but the altitude is what takes it out of you.
I’m sure if you are properly acclimated to the altitude then this part would not be so bad.
We pushed through, one step at a time.
Listening to our bodies and staying in-check with our AMS symptoms.
We finally got to the last little bit before reaching the summit.
The last portion of the trail was covered in snow and not safe to attempt as you would have to transverse across a steep snowy mountain side with jagged rocks at the bottom.
No thank you, I’ll pass.
Instead, we rock scrambled up a different route towards the summit.
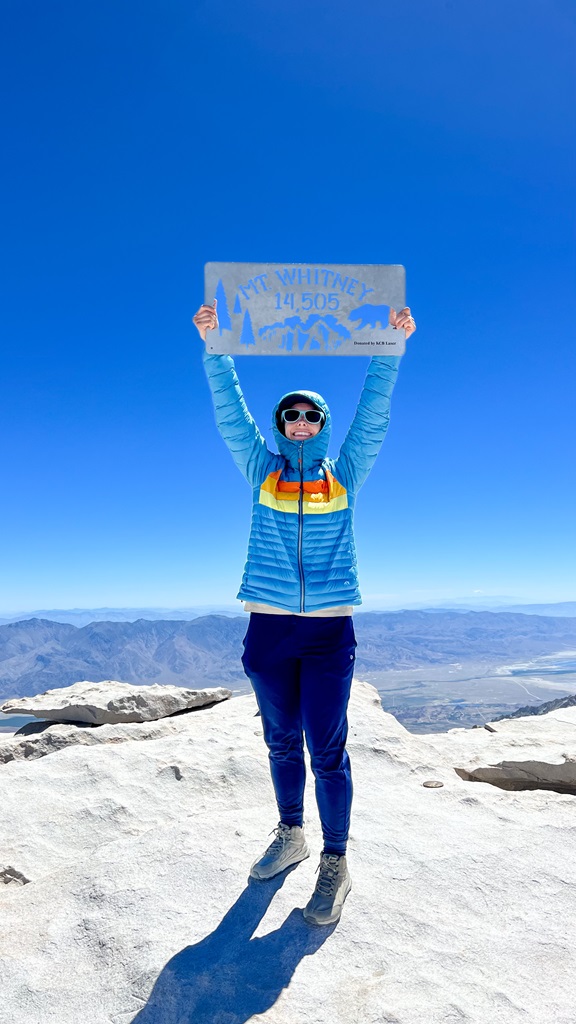
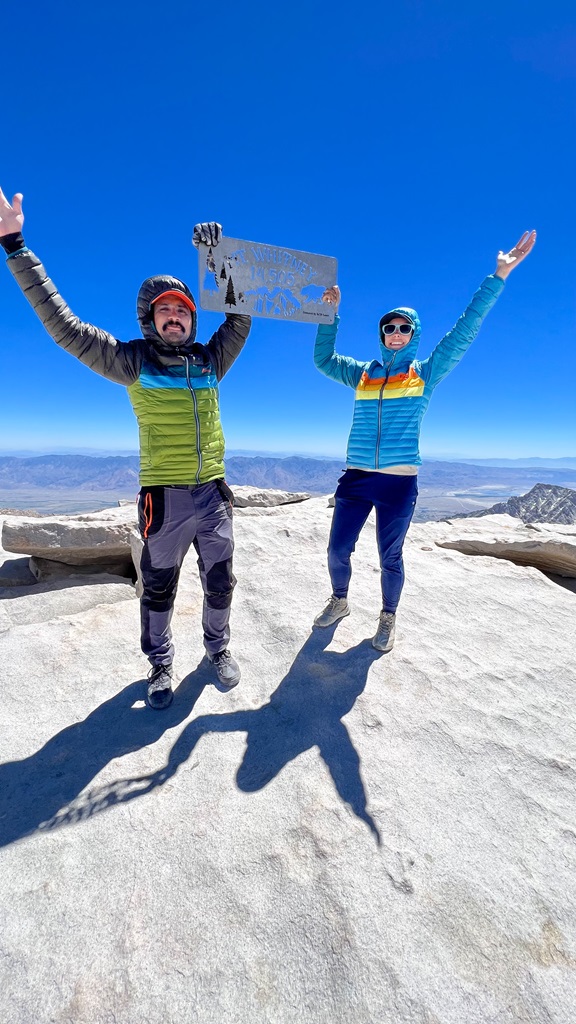
Mt Whitney Summit (11:10 AM)
I can’t even describe the feeling I had once we had made it to the top.
I wish I could say I was jumping up and down with joy, but it was hard enough to just hold up the dang summit sign to take a picture!
But we still were ecstatic about being on top of the tallest peak in the lower 48 states!
Such an insane experience.
Only took us 3 hours from the start of Trail Crest to reach the summit of Mt Whitney, but we freaking did it! 🫠
The views from the top were unreal.
If I wasn’t feeling so crappy from the altitude, I probably would’ve cried tears of joy.
This was by far our greatest accomplishment of our lives.
My husband and I completed our first 14er together which happened to be Mt Whitney, sitting at 14,505 feet.
And we completed this hike in ONE day.
Wow, what a journey – but it’s not over yet.
We rested at the top for about 15 to 20 minutes then quickly made our way back down to lower elevation.
Although our AMS symptoms remained mild and did not worsen, they were still there.
Going back down Trail Crest went by a lot quicker than going up.
We reached the top of the chute in no time!
Glissading Down the Chute
⚠️ According to the fs.usda.gov, “Sliding down the snow on your bottom (glissading) from Trail Crest is not a safe option. The slope angle and underlying ice will likely cause you to slam into rocks at high speed. There have been injuries and fatalities here due to glissading.”
I could be wrong, but when the switchbacks to Trail Crest are covered in snow, I’m pretty sure most people choose the option to glissade down to Trail Camp rather than attempt to walk back down.
I am not saying glissading down is safer than walking down but we felt more comfortable glissading.
However, we were initially terrified due to it being so steep at first.
There were already a few glissading paths created from previous people.
We chose the biggest and deepest path which seemed to have been used the most.
The snow was still pretty thick, and we didn’t notice any exposed rocks while hiking up.
After scanning what we could see, it seemed fairly safe.
So, we just went for it – full send!
Vikas went first (my hero) and then it was my turn.
I waited a few minutes just to make sure I wouldn’t run into Vik on the way down.
I could not see or hear him.
I was hoping he was okay and made it down safely.
Again, I looked up videos on how to properly glissade – this doesn’t replace actually practicing.
We did do a little bit of glissading when coming down from the summit, so that was our very brief practice session.
I cannot believe I was about to slide down the side of a huge mountain on my butt!!
It was initially terrifying but also exhilarating at the same time.
I took my position – sitting on my butt, knees slightly bent, and a death grip on my ice axe which was dug strongly into the snow.
And down I went.
I was able to control my speed and come to a stop several times.
I could see Vikas who was WAY below me down the mountain.
He gave me a thumbs up meaning he was okay.
After the steepest part was over, I felt more comfortable going a bit faster and could actually enjoy the ride.
Besides scrapping my elbows and butt on a few rocks, it was so much fun!
I wish we could’ve glissaded all the way back to the trailhead.
My legs were very thankful for the break, and we saved a lot of time glissading rather than walking back down the chute.
I honestly would love to relive that part again.
I hear the adrenaline rush can be addictive. 😁
Mt Whitney Trailhead – The End (7:30 PM)
I can’t believe it’s over.
I’m so happy it’s over!
But also, sad that it’s over.
It was such a beautiful journey that challenged us physically, mentally, and emotionally.
We have never been more challenged than hiking up to Mt Whitney in one day in the snow!
I’m honestly so lucky to say we made it to the summit.
If our AMS symptoms would have worsened even the slightest bit, we would’ve definitely turned around.
There were times on Trail Crest where I was questioning whether or not we would make it.
We were moving like snails.
But I’m glad we had the time to move slowly.
I think we agreed on a turnaround time at 1 PM.
Thankfully, we made it well before that!
Words cannot describe the feeling of being on top of Mt Whitney – it was a once in a lifetime experience.
We were so exhausted when we got back to our car.
We booked two nights at the Whitney Portal Campground, but unfortunately those two nights were not at the same campsite.
We moved from one campsite the day before then had to move into a new campsite once we got back from Mt Whitney.
Let’s just say, we were not looking forward to setting everything back up again!
But since we were car camping it didn’t take too long.
Once the car was set up for sleeping, we made a quick dinner.
We mixed together beans and rice in a bag and attempted to eat but we could not.
Our bodies just needed to rest.
We jumped in the car and immediately fell asleep.
It was one of the best sleeps of my life! 😌
Conclusion
Hiking Mt Whitney in a day is an exhilarating challenge – but it demands careful preparation and training.
To ensure a safe and successful summit, you’ll need to plan ahead, have the right gear, and know your limits.
In summary, here’s how to get ready for this epic adventure:
- Train for the challenge – Build endurance, strength, and stamina for the demanding ascent.
- Acclimate to high altitude – Spend time at elevation beforehand and recognize the symptoms of altitude sickness.
- Pack smart – Bring essential gear, safety items, plenty of snacks, and enough water.
- Check conditions – Monitor the weather and trail reports before heading out.
- Secure a permit – Obtain the required permit and share your itinerary with someone you trust.
- Respect the wilderness – Follow Leave No Trace principles to help protect this stunning area.
- Be prepared for emergencies – Know how to handle unexpected situations.
- Listen to your body – If conditions become unsafe or you’re feeling unwell, don’t hesitate to turn back.
If this guide inspires you to summit Mt Whitney, I’d love to hear about your adventure.
Leave a comment and share your experience!
🏔️ Explore more of the Sierra Nevada Mountains:
Enjoyed this post? Pin for later!